Table of Contents
Advertisement
Quick Links
Grip Factory Munich
YOUR INNOVATIVE PARTNER FOR CAMERA SUPPORT
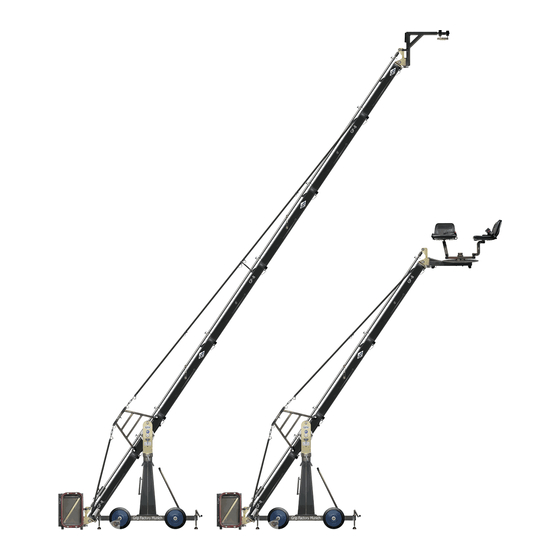
GF-8
Crane System
Instruction Manual
Standard-Versions 1-18
Xten-Versions 1-8
Valid: Sep. 2007
Grip Factory Munich GmbH
Tel.: +49 (0) 89 319 0 129-0
Fürholzener Straße 1
Fax: +49 (0) 89 319 0 129-9
85386 Eching bei München
e-Mail: info@g-f-m.net
Germany
http://www.g-f-m.net
Advertisement
Table of Contents

Related Manuals for gfm GF-8

Summary of Contents for gfm GF-8
- Page 1 Grip Factory Munich YOUR INNOVATIVE PARTNER FOR CAMERA SUPPORT GF-8 Crane System Instruction Manual Standard-Versions 1-18 Xten-Versions 1-8 Valid: Sep. 2007 Grip Factory Munich GmbH Tel.: +49 (0) 89 319 0 129-0 Fürholzener Straße 1 Fax: +49 (0) 89 319 0 129-9 85386 Eching bei München...
-
Page 2: Table Of Contents
Accessories for GF- 8 crane..................40 Mounting the accessories ................... 40 Use with GFM Track (GF-Track) ................41 Transport trolley for the GF-8 Crane ................. 42 GF-8 Crane Dollies ....................43 The GF-8 Double Ended Connected Steering Base............ 44 Page: 1... -
Page 3: Safety Guidelines
The GF-8 Crane may only be set-up or operated by trained and experienced personnel. To avoid misuse by untrained personnel, the crane should be dismantled when not in use or under supervision. -
Page 4: General Assembly Procedure - Gf-8
The 30cm / 1ft column extension is used in versions 9 to 18 to increase the pivot height from 154cm to 184cm. It is connected to the standard GF-8 column with 4 locking nuts and bolts. Make sure that the 4 locking bolts are locked securely. - Page 5 GF-8 Xten Crane System Instruction Manual For Standard Versions 9 to 18 we recommend using the 4 telescopic column supports. In smaller versions they are not required but using them does increase the columns stability. To mount the supports connect the grooved end to the connection on the column, securing with the locking pin.
- Page 6 GF-8 Xten Crane System Instruction Manual Connect the 2 sections of the rigging harness to the middle section of the GF-8. Ensure that the 4 locking bolts are fastened tightly. Connect the cross bar to stabilize the rigging harness. Ensure that the 2 locking pins are inserted fully For Standard Versions 1 to 16 connect the 127cm / 4ft section to the middle section.
-
Page 7: For All Gf-8 Xten-Versions
GF-8 Xten Crane System Instruction Manual Depending on the version being assembled connect 2 of the respective rigging rods to the turnbuckles on the rigging harness and in turn to the 2 connections on the arm section leading to the weight bucket. -
Page 8: Assembly & Technical Specification Version 1 To 16
GF-8 Xten Crane System Instruction Manual Assembly & Technical Specification Version 1 to 16 Version 1 Front extension arms required 1 x 150 cm / 5’ Rear extension arm required 1 x 127 cm / 4’ 2” Lift range 319 cm / 10’ 5”... -
Page 9: Version 10
GF-8 Xten Crane System Instruction Manual Version 2 Front extension arms required 1 x 150 cm / 5’ + 100 cm / 3’ 3” Rear extension arm required 1 x 127 cm / 4’ 2” Lift range 481 cm / 15’ 9”... -
Page 10: Version 11
GF-8 Xten Crane System Instruction Manual Version 3 Front extension arms required 2 x 150 cm / 5’ Rear extension arm required 1 x 127 cm / 4’ 2” Lift range 564 cm / 18’ 6” Maximum Euro-adapter height 453 cm / 14’ 10“... -
Page 11: Version 12
GF-8 Xten Crane System Instruction Manual Version 4 Front extension arms required 2 x 150 cm / 5’ + 100 cm / 3’ 3” Rear extension arm required 1 x 127 cm / 4’ 2” Lift range 727 cm / 23’ 9”... -
Page 12: Version 13
GF-8 Xten Crane System Instruction Manual Version 5 Front extension arms required 3 x 150 cm / 5’ Rear extension arm required 1 x 127 cm / 4’ 2” Lift range 809 cm / 30’ 7” Maximum Euro-adapter height 576 cm / 18’ 10“... -
Page 13: Version 14
GF-8 Xten Crane System Instruction Manual Version 6 Front extension arms required 3 x 150 cm / 5’ + 100 cm / 3’ 3” Rear extension arm required 1 x 127 cm / 4’ 2” Lift range 891 cm / 31’ 10”... -
Page 14: Version 15
GF-8 Xten Crane System Instruction Manual Version 7 Front extension arms required 4 x 150 cm / 5’ Rear extension arm required 1 x 127 cm / 4’ 2” Lift range 1054 cm / 34’ 6” Maximum Euro-adapter height 716 cm / 23’ 5“... -
Page 15: Version 16
GF-8 Xten Crane System Instruction Manual Version 8 Front extension arms required 4 x 150 cm / 5’ + 100 cm / 3’ 3” Rear extension arm required 1 x 127 cm / 4’ 2” Lift range 1216 cm / 39’ 10”... -
Page 16: Version 17
Length of rear end (pivot to outside of bucket) 220 cm / 7’ 2“ Assemble the GF-8 Column Extension as per the instructions on page 3 The GF-8 version 9 is assembled in the same manner as version 1. Version 10 Front extension arms required 1 x 150 cm / 5’... - Page 17 Length of rear end (pivot to outside of bucket) 220 cm / 7’ 2“ Assemble the GF-8 Column Extension as per the instructions on page 3 The GF-8 version 11 is assembled in the same manner as version 3. Version 12 Front extension arms required 2 x 150 cm / 5’...
- Page 18 Length of rear end (pivot to outside of bucket) 220 cm / 7’ 2“ Assemble the GF-8 Column Extension as per the instructions on page 3 The GF-8 version 13 is assembled in the same manner as version 5. Version 14 Front extension arms required 3 x 150 cm / 5’...
- Page 19 Length of rear end (pivot to outside of bucket) 220 cm / 7’ 2“ Assemble the GF-8 Column Extension as per the instructions on page 3 The GF-8 version 15 is assembled in the same manner as version 7. Version 16 Front extension arms required 4 x 150 cm / 5’...
- Page 20 GF-8 Xten Crane System Instruction Manual The following versions 17 and 18 require a 150cm / 5ft. section to the rear i.e. Counterweight Bucket End. The 30cm / 1ft Column Extension is also required to achieve a pivot height to 184cm / 6ft.
- Page 21 GF-8 Xten Crane System Instruction Manual Tip: The angle adjuster has an integrated leveller. By turning it, the vertical plate on the angle adjuster can be set to a perfect right angle. Correct setting of the angle adjuster enhances the crane’s balance. Level the weight bucket before loading any...
- Page 22 GF-8 Xten Crane System Instruction Manual 18. Connect the remote bracket to the angle adjuster by inserting the male flange into the female flange on the angle adjuster. Secure it with the safety pin. 19. Attach the weight bucket to the short end of the crane by inserting the male weight bucket flange into the female flange on the angle adjuster.
-
Page 23: Assembly & Technical Specifications For The Xten Versions
GF-8 Xten Crane System Instruction Manual Assembly & Technical Specifications for the Xten Versions The following Xten Versions, 1 to 8 require a 160cm / 5ft 3 inch section to the rear i.e. Counterweight Bucket End. In addition to the standard mounting column, the 30cm / 1ft Column Extension is... -
Page 24: Xten Version 2
GF-8 Xten Crane System Instruction Manual 17. Connect the remaining angle adjuster to the end of the second 150cm section and secure it with the provided safety pin. 18. Connect one of the 150cm / 5’ parallelogram rods to the middle section and then connect the second 150cm parallelogram rod to the first 150cm rod. -
Page 25: Xten Version 3
GF-8 Xten Crane System Instruction Manual 13. Connect the 2 x 150cm / 5’ rigging rods in turn to the connectors on the first extension. Ensure that the locking pins are inserted fully. 14. Hand tighten the rods by turning the turnbuckles until the rods are taut. - Page 26 GF-8 Xten Crane System Instruction Manual Double rigging is required! Observe guidelines on pages 36 and additionally ensure that the Large Rigging Harness is used with double rigging to the rear and front. Continue from § 9, page 6 10. Connect one of the 150cm / 5’ sections to the middle section. Slip the con-nection flanges into each other and secure them with the provided safety pin.
-
Page 27: Xten Version 4
GF-8 Xten Crane System Instruction Manual Xten Version 4 (Pivot height 184cm / 6ft, Large Rigging Harness, Rear Extension 160cm / 5’ 3") Front extension arms required 4 x 150 cm / 5’ Rear extension arm required 1 x 160 cm / 5’ 3”... -
Page 28: Xten Version 5
GF-8 Xten Crane System Instruction Manual adjuster and secure it with a safety pins at each end. Tip: The angle adjuster has an integrated leveller. By turning it, the vertical plate on the angle adjuster can be set to a perfect right angle. - Page 29 GF-8 Xten Crane System Instruction Manual 14. Connect another 2 x 150cm / 5’ rigging rods to the first 2 rigging rods. Ensure that the locking pins are inserted fully. 15. Connect the 2 x 150cm / 5’ rigging rods in turn to the connectors on the first extension.
-
Page 30: Xten Version 6
GF-8 Xten Crane System Instruction Manual Xten Version 6 (Pivot height 184cm / 6ft, Large Rigging Harness, Rear Extension 160cm / 5’ 3") Front extension arms required 5 x 150 cm / 5’ + 100 cm / 3’ 3” Rear extension arm required 1 x 160 cm / 5’... -
Page 31: Xten Version 7
GF-8 Xten Crane System Instruction Manual connect the second 150cm parallelogram rod to the first 150cm rod. In turn, connect the third 150cm parallelogram rod to the second 150cm rod. In turn, connect the fourth 150cm parallelogram rod to the third 150cm rod. In turn, connect the fifth 150cm parallelogram rod to the fourth 150cm rod. - Page 32 GF-8 Xten Crane System Instruction Manual 11. Connect another 150cm / 5’ section to the first 150cm / 5’ section. Slip the connection flanges into each other and secure them with the provided safety pin. Note: Support the second section by placing it on a support stand or rostrum 12.
-
Page 33: Xten Version 8
GF-8 Xten Crane System Instruction Manual Xten Version 8 (Pivot height 184cm / 6ft, Large Rigging Harness, Rear Extension 160cm / 5’ 3") Front extension arms required 5 x 150 cm / 5’ + 127 cm / 4’ 2” + 100 cm / 3’ 3”... - Page 34 GF-8 Xten Crane System Instruction Manual 22. Connect the remaining angle adjuster to the end of the last section and secure it with the provided safety pin. 23. Connect one of the 150cm / 5’ parallelogram rods to the middle section and then connect the second 150cm / 5’...
-
Page 35: Parallelogram Rod Support
GF-8 Xten Crane System Instruction Manual Parallelogram Rod Support The Parallelogram Rod Supports are required from Version 3 onwards. Assembly is as follows: The support consists of 3 parts: 2 vertical side supports and a horizontal top cradle. Connect a side support to the top cradle by screwing the parts together. Bolt the vertical part to the crane arm extension by turning the knurled knob. -
Page 36: Rigging System
GF-8 Xten Crane System Instruction Manual Rigging system The rigging system must be mounted as of Standard Versions 2 onwards i.e. versions with more than 1 x 150cm section to the front. For each extension section there is a matching pair of rigging rods. -
Page 37: Double Rigging System
The Double Rigging System and Large Rigging Harness must be mounted for all GF-8 Xten Versions. For each extension section there is a matching pair of rigging rods. The rods for the 150cm sections are all identical. In principle, mounting the rigging requires... - Page 38 GF-8 Xten Crane System Instruction Manual Connect 2 x 142cm / 4’ 7” rigging rods to the Rigging Rod Connectors and in turn connect another 2 x 142cm / 4’ 7” rigging rods to the 4th Rigging Rods. Ensure that the locking pins are inserted fully.
-
Page 39: Mounting The Extra, Mini Counterweight Bucket For Xten Versions
The working payload capacities may not be exceeded. An itemized weight list for GFM accessories may be found below. Place the correct amount of counterweight in the weight bucket to balance the load. -
Page 40: General Safety
GF-8 Xten Crane System Instruction Manual Working load capacity = Camera operator / operators + accessories Attention: we recommend that the camera and remote head are additionally secured to the remote head mount with a safety cord. Place the required amount of counterweights in the weight bucket so that the crane arm becomes balanced and remains in the horizontal position. -
Page 41: Accessories For Gf- 8 Crane
GF-8 Xten Crane System Instruction Manual Accessories for GF- 8 crane Levelling leg Monitor carrier Push bar Track wheel with brake Mounting the accessories Levelling Legs: Crank the spindle up to give enough clearance to connect the levelling arm to the dovetail connection on the base dolly. -
Page 42: Use With Gfm Track (Gf-Track)
Note: ensure that the track wheels are parallel to the track. · The assembled and balanced crane can be rolled onto the track by using the GFM Starter Ramp. To do so remove the levelling legs and ensure that the track wheels are aligned with the track. -
Page 43: Transport Trolley For The Gf-8 Crane
GF-8 Xten Crane System Instruction Manual Transport trolley for the GF-8 Crane The above photos show the practical transport solution for the GF-8 Crane System. The GFM trolley fits the complete system with dolly and column as an extra unit. -
Page 44: Gf-8 Crane Dollies
Levelling legs are also available. For use with Standard GF-8 versions. GF-8 Base as Track or Western Dolly The crane platform may be mounted on the base dolly to provide a track or western dolly style function. -
Page 45: The Gf-8 Double Ended Connected Steering Base
GF-8 Xten Crane System Instruction Manual The GF-8 Double Ended Connected Steering Base Offers all the features of the standard base but with GFM’s connected steering system. The 3 steering functions are controlled from the rear of the dolly by simply flicking a lever. - Page 46 GF-8 Xten Crane System Instruction Manual Steering mode 1: 2 wheel front steering – rear wheels fixed Front wheel steering Switch lever (here in the downward position) Steering mode 2: 4 wheel steering – all 4 wheels can be turned together giving a “roundy round“...
Need help?
Do you have a question about the GF-8 and is the answer not in the manual?
Questions and answers