Table of Contents
Advertisement
Advertisement
Table of Contents

Related Manuals for Inateck VD1001


Summary of Contents for Inateck VD1001
- Page 1 Inateck Instruction manual Video Capture Card VD1001...
-
Page 2: Table Of Contents
Contents Product introduction ......................3 2. Product Features ........................ 3 3. Connection ........................... 3 4. Product specifications: ....................4 5. Package Contents ......................5 6. Capture Video on Windows System - Using OBS Studio Software ....5 6.1 Capture Video with OBS Studio ................5 6.2 How to Livestream Video with OBS Studio on Windows ......10 7. -
Page 3: Product Introduction
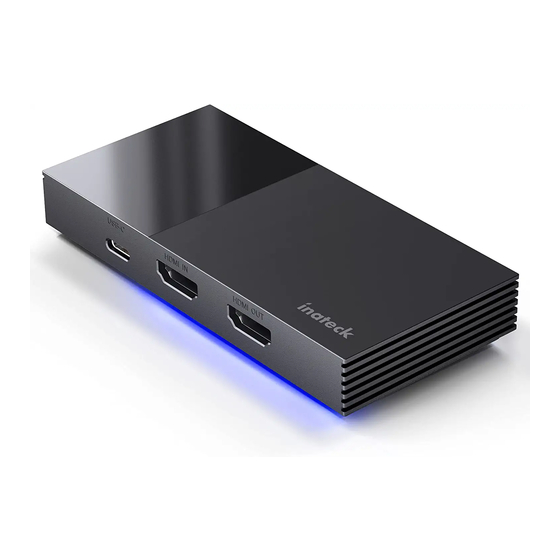
1. Product introduction VD1001 video capture card is a portable sound and video capture tool. The card receives audio and video signals from laptop, desktop computer, or gaming consoles, via the HDMI input port. Connect a computer to the USB-C output port, you can livestream video. You can meanwhile connect a display to the HDMI output port. -
Page 4: Product Specifications
5. Download a video capture tool and begin capturing video. 4. Product specifications: Product name Inateck VD1001 Material Weight 109g Dimensions... -
Page 5: Package Contents
US standard are supported, Mic input supported) LED Indicator Blue (Flashes under working status) 5. Package Contents Inateck VD1001 Video Capture Card x1 USB 3.0 Data Cable x1 HDMI Cable x1 Instruction Manual x1 6. Capture Video on Windows System - Using OBS Studio Software 6.1 Capture Video with OBS Studio... - Page 6 2. Click the "+" label at the bottom left of the frame, and select "Video Capture Device" 3. Once "Video Capture Device" is selected, a separate frame will show. 4. Click OK and another frame will appear, which shows the individual characteristics of the Video Capture Card.
- Page 7 Note: ① Input format on USB 3.0 and USB 2.0 based systems will respectively be YUY2 and MJPEG. YUY2 is the best format for the clearest image, and proper data transfer rate (only available with USB 3.0). ② Color Space can be set to "Auto" or adjusted based on the connected source system.
- Page 8 Once these settings are correctly set, click "OK". (The Device should read as "HDMI Capture"). Now, connect the intended source device (Xbox One, PS4, Nintendo Switch) via the HDMI input on the capture card. You should now see an image inside of OBS Studio.
- Page 9 sound settings (The interface is taken from Windows 10, which can be slightly different from other operating systems.) Note: If you want to receive or capture sounds with the AUX 3.5 port on the card, please connect a pair of headphones with microphone via the headphone port. You may also connect a microphone device to the microphone port on the video capture card if there’s no microphone on your headphone.
-
Page 10: How To Livestream Video With Obs Studio On Windows
Reserve the default properties inside the setting frame. Click “Start Recording” to start sound capture after you’ve configured the device by steps above. 6.2 How to Livestream Video with OBS Studio on Windows Follow the steps below after you’ve completed the configurations in step 6.1. 1. - Page 11 2. Click “Stream”, and you’ll find livestreaming platforms, servers, encryption keys as well as other options. 3. Fill in the server website, encryption key and other information according to platform policy (for detailed information, please refer to the relevant livestreaming platform statement.) After that, click “Apply”...
-
Page 12: Capture Video On Mac Os - Using Obs Studio Software
4. Next, return to the main interface and click “Start Streaming” and you can livestream videos captured from your devices in a moment. If the connection fails, please check if the server site, encryption key and other information you’ve offered to the correspondent livestreaming platform are correct. - Page 13 2. Inside the "Add Source" menu, select "Video Capture Device" 3. Inside the "Create New Device" menu, select "Create New", and rename the device to your desired name. Make sure the "Make source Available" box is checked, and then click "OK"...
- Page 14 MJPEG. YUY2 is the best format for the clearest image, and proper data transfer rate (only available with USB 3.0). ② Color Space can be set to "Auto"or adjusted based on the connected source system. 6. Once these settings are correctly set, click"OK". (The Device should be read as "HDMI Capture").
- Page 15 the bottom left, and select "Audio Input Capture" If you want to receive and capture sounds with the AUX 3.5 port on the video capture card, please connect a pair of headphones with microphone to the headphone port on the video capture card.
-
Page 16: How To Livestream Videos With Obs Studio On Mac Os
9. Once the new source has been added, the "properties" menu will appear. Select "HDMI Capture" in the drop-down menu next to the Device label. 10. After the above configurations, click “Start Recording” to begin capturing videos from your devices. 7.2 How to Livestream Videos with OBS studio on Mac OS Follow the steps below after you finish the operations stated in point 7.1. - Page 17 1. Click “Settings” 2. Click “Stream”, and you’ll find options such as livestreaming platforms, servers, and encryption keys 3. Fill in the server website, encryption key and other information according to the platform policy (For detailed information, please refer to the relevant platform statement). After you complete the information, click “OK”.
-
Page 18: Faq
Next, return to the main interface and click “Start Streaming” and you can livestream videos captured from your devices in a moment. If the connection fails, please check if the server site, encryption key and other information you’ve offered to the correspondent livestreaming platform are correct. - Page 19 are connected to the video capture card simultaneously? A: The card will record and capture the sound via the microphone port. The microphone function of the headphone will be disabled. Q: Why cannot I capture sound, nor hear voice via the headphone connected to the video capture card? A: First make sure that you’ve properly configured your device.
-
Page 20: Support
The video capture card will only output 60Hz though your display may support higher refresh rates (above 60Hz). 9. Support For any inquiries or comments concerning our products, please send an email to support@inateck.com. We will respond to you as soon as possible.
Need help?
Do you have a question about the VD1001 and is the answer not in the manual?
Questions and answers