Hitachi RAR-6N1 Manual
Hide thumbs
Also See for RAR-6N1:
- Service manual (86 pages) ,
- Service manual (93 pages) ,
- Manual (279 pages)
Advertisement
Table of Contents
- 1 Preparation before Operation
- 2 Names and Functions of Remote Controller
- 3 Various Functions
- 4 Automatic Operation
- 5 Heating Operation
- 6 Dehumidifying Operation
- 7 Fan Operation
- 8 Auto Swing Operation
- 9 Powerful Operation
- 10 Silent Operation
- 11 Eco Operation
- 12 Weekly Timer Operation
- 13 Info Function
- Download this manual
Advertisement
Table of Contents

Related Manuals for Hitachi RAR-6N1


Summary of Contents for Hitachi RAR-6N1
- Page 1 Remote Controller Manual MODEL RAR-6N1 Remote Controller manual Page 1~28 To obtain the best performance and ensure years of trouble free use, please read this instruction manual completely. – 1 –...
- Page 2 Remote Controller Manual MODEL RAR-6N1 Remote Controller manual Page 1~28 To obtain the best performance and ensure years of trouble free use, please read this instruction manual completely. <0016692L> – 1 –...
-
Page 3: Preparation Before Operation
PREPARATION BEFORE OPERATION To install the batteries 1. Slide the cover to take it off. 2. Install two dry batteries AAA.LR03 (alkaline). The direction of the batteries should match the marks in the case. 3. Replace the cover at its original position. To x the remote controller holder to the wall 1. - Page 4 PREPARATION BEFORE OPERATION To set calendar and clock 1. Press (RESET) button when fi rst time setting. "Year" blinks. 2. Press (TIME) button to set the current year. 3. Press (CLOCK) button. "Day" and "Month" blink. 4. Press (TIME) button to set the current day and month.
-
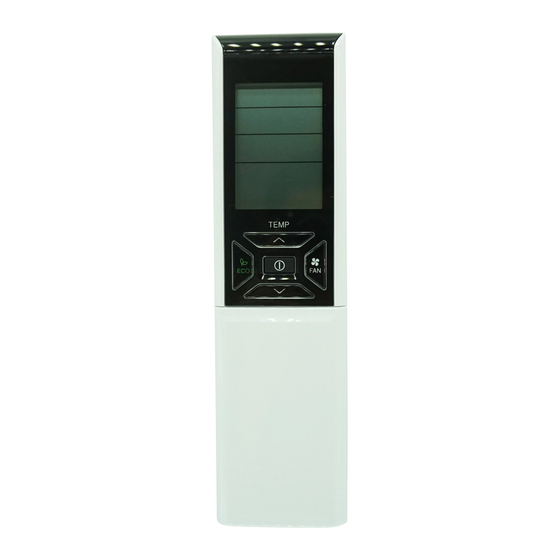
Page 5: Names And Functions Of Remote Controller
NAMES AND FUNCTIONS OF REMOTE CONTROLLER REMOTE CONTROLLER This controls the operation of the indoor unit. The range of control is about 7 meters. If indoor lighting is controlled electronically, the range of control may be shorter. This unit can be fi xed on a wall using the fi xture provided. Before fi xing it, make sure the indoor unit can be controlled from the remote controller. - Page 6 NAMES AND FUNCTIONS OF REMOTE CONTROLLER MODE selector Button POWERFUL Button Use this button to select the Use this button to set the operating mode. Every time you POWERFUL mode. ( p. 11) press this button, the mode will change from (AUTO) (HEAT) (DEHUMIDIFY)
-
Page 7: Various Functions
VARIOUS FUNCTIONS Auto Restart Control If there is a power failure, operation will be automatically restarted when the power is resumed with previous operation mode and airfl ow direction. (As the operation is not stopped by remote controller.) If you intend not to continue the operation when the power is resumed, switch off the power supply. When you switch on the circuit breaker, the operation will be automatically restarted with previous operation mode and airfl... -
Page 8: Heating Operation
HEATING OPERATION Use the device for heating when the outdoor temperature is under 21°C. When it is too warm (over 21°C), the heating function may not work in order to protect the device. In order to maintain reliability of the device, please use this device when outdoor temperature is above –15°C. -
Page 9: Dehumidifying Operation
DEHUMIDIFYING OPERATION Use the device for dehumidifying when the room temperature is over 16°C. When it is under 15°C, the dehumidifying function will not work. Press the MODE selector button so that the display indicates (DEHUMIDIFY). The fan speed is set at LOW. Press (FAN SPEED) button to select SILENT or LOW fan speed. - Page 10 COOLING OPERATION Use the device for cooling when the outdoor temperature is -10~ 43°C. If indoors humidity is very high (80%), some dew may form on the air outlet grille of the indoor unit. Press the MODE selector button so that the display indicates (COOL).
-
Page 11: Fan Operation
FAN OPERATION User can use the device simply as an air circulator. Press the MODE selector so that the display indicates (FAN). Set the desired FAN SPEED with the (FAN SPEED) button (the display indicates the setting). (HIGH) (MED) (LOW) (SILENT) START Press the... -
Page 12: Powerful Operation
POWERFUL OPERATION By pressing (POWERFUL) button during AUTO, HEATING, DEHUMIDIFYING, COOLING or FAN operation, the air conditioner performs at the maximum power. During POWERFUL operation, cooler or warmer air will be blown out from indoor unit for COOLING or HEATING operation respectively. To start POWERFUL operation Press (POWERFUL) button during operation. -
Page 13: Silent Operation
SILENT OPERATION By pressing (SILENT) button during AUTO, HEATING, DEHUMIDIFYING, COOLING or FAN operation, the fan speed will change to ultra slow. To start SILENT operation Press (SILENT) button during operation. “ ” is displayed on the LCD. Fan speed will be ultra slow. To cancel SILENT operation Press (START/STOP) button. - Page 14 ECO OPERATION There are two kinds of ECO OPERATION with sensor or without sensor, depending on models. Please refer to [Names and Functions of each part] in the unit instruction manual to verify if your unit is equipped with a sensor and read the following instruction on ECO Operation accordingly. ECO OPERATION ECO operation is an energy saving function by changing set temperature automatically and by limiting the maximum power consumption value.
-
Page 15: Eco Operation
ECO OPERATION ECO OPERATION with sensor The sensor detects the presence of people in the room. When nobody is detected, the unit automatically starts enegy saving operation by shifting the set temperature in two steps. By pressing the (ECO) button during AUTO, HEATING, DEHUMIDIFYING or COOLING operation, the air conditioner performs the "ECO"... - Page 16 LEAVE HOME (LH) OPERATION Prevent the room temperature from falling too much when no one is at home. The initial setting temperature is 10°C and the temperature range can be set between 10°C and 16°C. This operation is able to operate by "Continuous operation" or "Day timer operation". Please use "Day timer operation" to set the number of days up to 99 days.
- Page 17 CLEAN (ONE TOUCH CLEAN) OPERATION Drying indoor heat exchanger after cooling operation to prevent mildew. To start CLEAN operation Press (CLEAN) button when unit is OFF. Total time taken for One Touch Clean operation is 60 minutes. During this operation, HEATING or FAN operation shall operate.
- Page 18 ONCE TIMER (ON/OFF TIMER) OPERATION OFF TIMER The device can be set to turn off at a preset time. 1. Press (OFF-TIMER) button. blink on the display. 2. Set the "turn-off time" with (TIME) button. 3. After setting, direct the remote controller towards the indoor and press (SEND) button.
- Page 19 ECO SLEEP TIMER OPERATION The timer can be set up to a duration of 7 hours. By pressing (SLEEP) button during AUTO, HEATING, DEHUMIDIFYING, COOLING or FAN operation, the unit shifts the room temperature and reduces the fan speed. It results in energy saving. Set the current time fi...
- Page 20 ECO SLEEP TIMER OPERATION To set ECO SLEEP TIMER and ON TIMER The air conditioner will be turned off by ECO SLEEP TIMER and turned on by ON TIMER. 1. Set the ON TIMER. 2. Press (SLEEP) button and set ECO SLEEP TIMER. Example: In this case, air conditioner will turn off in 2 hours (at 1:38) and it will be turned on at 6:00 the next morning.
-
Page 21: Weekly Timer Operation
WEEKLY TIMER OPERATION It is possible to select Mode A or Mode B. For each mode, up to 6 programs can be set per day. In total, a maximum of 42 programs can be set for a week for each mode. If calendar and clock are not set, the reservation setting for WEEKLY TIMER cannot be set. - Page 22 WEEKLY TIMER OPERATION 5. Press (ON-OFF TIMER) button to select ON TIMER or OFF TIMER reservation. 6. Press (TIME) button to set time reservation. 7. Press (TEMP ) button to set temperature reservation. 8. Press (OK) button. The reservations are set. Day, program number, ON reservation, setting temperature will light up.
- Page 23 WEEKLY TIMER OPERATION Step 2: Select Mode A or Mode B and activate or deactivate WEEKLY TIMER. How to select Mode A or Mode B of WEEKLY TIMER setting. 1. Press (WEEKLY) button. blink on the display. (Normally Mode A will blink fi rst). 2.
- Page 24 WEEKLY TIMER OPERATION Step 3: Copy and cancel the reservation schedule. How to copy and paste. Editing the reservation schedule is easy by copying data from one day to another day. 1. Press (WEEKLY) button to select Mode A or Mode B. 2.
- Page 25 WEEKLY TIMER OPERATION Step 3: Copy and cancel the reservation schedule. How to delete WEEKLY TIMER data. [Delete one program number reservation] 1. Press (WEEKLY) button to select Mode A or Mode B. 2. Press (WEEKLY) button for 3 seconds to start editing the reserva- tion schedule.
- Page 26 WEEKLY TIMER OPERATION Step 3: Copy and cancel the reservation schedule. [Delete one day reservation] 1. Press (WEEKLY) button to select Mode A or Mode B. 2. Press (WEEKLY) button for 3 seconds to start editing the reservation schedule. 3. Press (DAY) button to select a day of the week to edit.
-
Page 27: Info Function
INFO FUNCTION By pressing (INFO) button, temperature around remote controller and monthly power consumption will be displayed on the remote controller. After changing the batteries, direct the remote controller towards the indoor unit and press (INFO) button. Current calendar and clock will be transmitted from indoor unit. In order to receive information from indoor unit, the distance between remote controller and receiver of indoor units is within 2 meters. - Page 28 OPERATION MODE LOCK The remote controller can be set to fi x the HEATING mode (including FAN), COOLING mode (including FAN) and DEHUMIDIFYING mode (including FAN) operations. Method to lock HEATING mode (including FAN) operation. Press (ECO) and (POWERFUL) buttons simultaneously for about 5 seconds when the remote controller is OFF.
- Page 29 – 28 –...
Need help?
Do you have a question about the RAR-6N1 and is the answer not in the manual?
Questions and answers