
Related Manuals for Toro GrandStand 78596


Summary of Contents for Toro GrandStand 78596
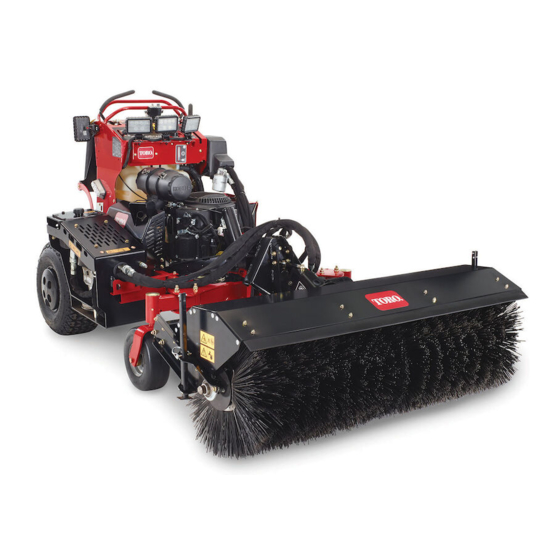
- Page 1 Form No. 3415-700 Rev B Broom GrandStand ® Multi Force Mower Model No. 78596—Serial No. 400000000 and Up *3415-700* Register at www.Toro.com. Original Instructions (EN)
-
Page 2: Table Of Contents
Whenever you need service, genuine Toro parts, or Safety ............... 3 additional information, contact an Authorized Service Training .............. 3 Dealer or Toro Customer Service and have the model Preparation............3 and serial numbers of your product ready. Figure 1 Operation............ -
Page 3: Safety
Operation Safety • Never allow children to operate the machine. Read and understand the contents of this manual • Do not put hands or feet near or under rotating before the engine is first started. parts. Keep clear of the discharge opening at all times. -
Page 4: Maintenance And Storage
• • If the machine should start to vibrate abnormally, Never store the machine with fuel in the fuel shut off the engine and check immediately for the tank inside a building where ignition sources are cause. Vibration is generally a warning of trouble. present, such as hot water and space heaters, clothing dryers, etc. -
Page 5: Setup
1. Nut and bolt 2. Middle position • Wheel Weight Kit (recommended) A Lift Cylinder Lock Kit (Toro part no. 137-4106) is available to secure the A-frame when you raise it for setup or maintenance; contact your Authorized Toro Dealer. -
Page 6: Installing The Broom To The Machine
Engage the quick pin on the machine quick-attach assembly (Figure Note: The pin will protrude from the quick-attach triangle. g210328 Figure 5 1. Carriage bolt (3/8 x 2-1/2 3. Broom lock bracket inches) 2. Nut g196445 Figure 7 Slowly move the machine up to the broom so that the quick-attach triangle of the machine Installing the Broom to the enters the broom quick-attach triangle and... - Page 7 Install the stop assembly (Figure Use the A-frame switch from the low flow kit to raise the quick-attach triangle until the pin snaps into place on the broom quick-attach triangle. Note: Ensure that the quick pin is fully seated; lower and raise the machine quick-attach triangle to assist the engagement.
-
Page 8: Operation
Operation Use the switches from the Low Flow Hydraulic kit to operate the broom (Figure 13). • Move the left switch up or down to raise or lower Operating the Broom the broom. • Move the right switch left or right to angle the DANGER broom. -
Page 9: Checking The Sweeping Path
g210832 Figure 15 1. Lower to normal operating 2. Float position position Checking the Sweeping g197271 Figure 16 Path 1. 51 to 102 mm (2 to 4 3. Swept area inches) maximum width Service Interval: Before each use or daily 2. -
Page 10: Using The Kickstands
Using the Kickstands Clearing a Clogged Broom Use the kickstands to raise the broom off the ground WARNING when you are not using the machine, performing maintenance, or storing the broom. This eliminates The rotating broom could cause serious unnecessary pressure on the bristles. injury. -
Page 11: Removing The Broom
Removing the Broom Operating Tips • Park the machine on a level surface, disengage If the ground speed is too fast, debris will pile up in the PTO, move the motion-control levers to the front of the broom, causing it to bulldoze instead of position, and engage the parking sweep. -
Page 12: Maintenance
Service Interval: Before each use or daily operation. Before storage Tensioning the Chain Use Toro Premium All Season Hydraulic Oil or SAE 20 oil. Service Interval: Every 40 hours Raise the broom all the way up using the hydraulic controls. -
Page 13: Replacing The Bristles
Replacing the Bristles Replace the bristles when they are worn to a 33 cm (13 inch) diameter from the original 51 cm (20 inch) diameter. Check the condition of the wear plate when you replace the bristles (see Figure 25); if the wear plate is worn through, replace it. - Page 14 If you are replacing the wear plate, remove the bolt and wear plate, and use the bolt to install the new wear plate (Figure 25). g210322 Figure 25 1. Wear plate 2. Bolt With the bristles curved toward the center of the broom, slide the new center brush onto the axle so that the prongs straddle 1 of the rods (Figure...
-
Page 15: Checking The Hydraulic Fluid Level
Storage Park the machine on a level surface, disengage the PTO, engage the parking brake, and move the motion-control levers outward to the position. EUTRAL Raise the A-frame and support it with a block or cylinder lock. Shut off the engine and remove the key. g214268 Figure 27 Lower the kickstands so that the bristles are... -
Page 16: Troubleshooting
Troubleshooting Problem Possible Cause Corrective Action The broom does not clean the surface. 1. The broom height is incorrect. 1. Adjust the broom height. 2. The tire pressure in the drive tires is 2. Adjust the tire pressure in the drive not correct. - Page 17 Notes:...
- Page 18 Notes:...
- Page 19 Notes:...
- Page 20 Customers who have purchased Toro products outside the United States or Canada should contact their Toro Distributor (Dealer) to obtain guarantee policies for your country, province, or state. If for any reason you are dissatisfied with your Distributor's service or have difficulty obtaining guarantee information, contact the Toro importer. If all other remedies fail, you may contact us at Toro Warranty Company.
Need help?
Do you have a question about the GrandStand 78596 and is the answer not in the manual?
Questions and answers