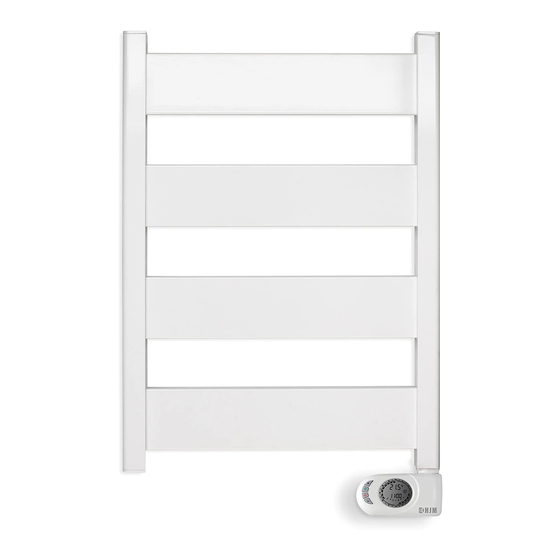
Summary of Contents for HJM NERIS500
- Page 1 INSTALLATION & OPERATING INSTRUCTIONS NERIS500 & NERIS750 1/19 EHC-NERIS_ENG-Rev.0-23-09-2021...
-
Page 2: Important Warnings
IMPORTANT WARNINGS Dear Customer: Thank you for purchasing our NERIS Towel Rail. As with all our products they are manufactured to the highest quality using the finest materials that gives us confidence that you will have many years of good use and comfort from your product. - Page 3 10. PRECAUTION: Some parts of this product can reach high temperatures and could cause burns. Pay special attention when children or vulnerable people are around to protect them from the heater. 11. Do not mount the heater directly under a power socket. 12.
-
Page 4: Installation
20. This device has been designed for domestic and light commercial use. This device has not been designed for industrial use. It must not be used Outdoors, in Greenhouses or in Animal or Agricultural environments. Keep the heater away from excessive heat, direct sunlight and in an environment that has a constant humidity. -
Page 5: Wall Mounting
• Allow for a minimum distance of 1m from the front of the unit to any obstacles that could hinder its operation. • Keep a minimum distance of 15 cm between the appliance and the side walls and any other obstacles (walls, for example) that may affect its function. - Page 6 2. Mark the position of the 4 holes on the wall. 3. Drill 4 holes suitable for 8 mm wall plugs. 4. Screw the larger diameter brackets onto the wall (∅ 26) as shown in Fig 2. Fix using the screws, washers and plugs provided as shown in Fig. 2. Fig.
- Page 7 Fig. 4 Fig. 5 7/19 EHC-NERIS_ENG-Rev.0-23-09-2021...
-
Page 8: Electric Supply Connection
ELECTRIC SUPPLY CONNECTION This appliance is equipped with a supply cable H05V2V2-F 2x1.0mm² that should be connected to a fused spur in accordance with BS7671. Requirements for Electrical Installations, Section 701. It is recommended that the cable ends are crimped before connecting the heater to the spur. - Page 9 PROGRAMMABLE DIGITAL THERMOSTAT Introduction There are 7 operational modes: Comfort, Night, Frost, Pilot Wire, Program, 2hr Boost, Stand-by. "Comfort" mode: The thermostat keeps the room temperature at the value set by the user. "Night" mode: The electronic control keeps the room temperature to a level below the configured “Comfort”...
-
Page 10: Power On / Stand-By
1. POWER ON / STAND-BY 1.POWER ON / STAND-BY Press the [On/Stand-by] key to turn on the device or to enter the "Stand-by" mode. When activated, the bottom part of the display shows the current time, while the configured operative mode and the temperature are shown in the upper part. -
Page 11: Operating The Device
2.“COMFORT” and “NIGHT” MODES Two different levels of temperature can be set: -"COMFORT" temperature: It is the temperature used for "Program Timer", "Pilot Wire" and "Comfort" modes. -"NIGHT" temperature: It is the temperature used for the "Night" and "Program Timer" modes. The desired temperature can be set pressing the [+] e [-] buttons. -
Page 12: Night Mode
NIGHT MODE The "Night" mode sets a value of temperature below the "Comfort" temperature value. It is suggested to set this operating mode during the night or when the room is not occupied for 2 or more hours. -Press the [Prog] button until the display shows the " Night" icon -Set the desired temperature through [+] and [-] buttons. - Page 13 PROGRAM TIMER MODE This operating mode allows the user to configure different temperature values for each hour of each day of the week. The “Comfort” / “Night” temperatures and the related time intervals can be thus programmed. -To activate this function, press the [PROG] button until the “Timer” icon is displayed.
- Page 14 - Press the [Prog] button to enter the editing mode - Now a time sequence can be defined for each day of the week. The procedure starts with day 1, and the desired sequence can be configured with the [+] and [-] buttons: For each hour of the day, it is then possible to assign either the “Comfort”...
-
Page 15: Thermal Safety
“Open Window Detection” function The “Open Window Detection” function enables detecting of an open window by sensing a sudden decrease of the temperature in the room. In such a case, the device deactivates the heating element for a maximum of 30 minutes or until an increase of the room temperature reveals that the window has been closed. - Page 16 Your radiator requires no regular maintenance, however, to ensure its good operation: Always disconnect the device from the mains before performing any cleaning or maintenance operation. Let it cool down before cleaning. Do not use detergent, solvent, abrasive products or any other chemical product to clean the radiator.
- Page 17 Polígono Industrial “Los Villares”. 37184 Villares de la Reina. Salamanca. España Tf.+34 923 222 277 +34 923 222 282. Fax +34 923 223 397 http://www.hjm.es Hereby declare, that the following equipment complies with all the essential requirements for health and safety of European Directives.
- Page 18 With adaptive start control. HERMANOS JULIÁN M., S.L. Oficina: Esposos Curie,44 / Fábrica: Gutenberg,91-93 Polígono Industrial “Los Villares”. 37184 Villares de la Reina. Salamanca. España Tf.+34 923 222 277 +34 923 222 282. Fax +34 923 223 397 http://www.hjm.es 18/19 EHC-NERIS_ENG-Rev.0-23-09-2021...
- Page 19 HERMANOS JULIAN M., S.L. Fábrica: Gutenberg,91-93 Polígono Industrial “Los Villares” ES-37184 Villares de la Reina . Salamanca . Spain +34 923 222 277 - +34 923 222 282 Fax: +34 923 223 397 Web: www.hjm.es ESB-37295664 19/19 EHC-NERIS_ENG-Rev.0-23-09-2021...


Need help?
Do you have a question about the NERIS500 and is the answer not in the manual?
Questions and answers