Table of Contents
Advertisement
Quick Links
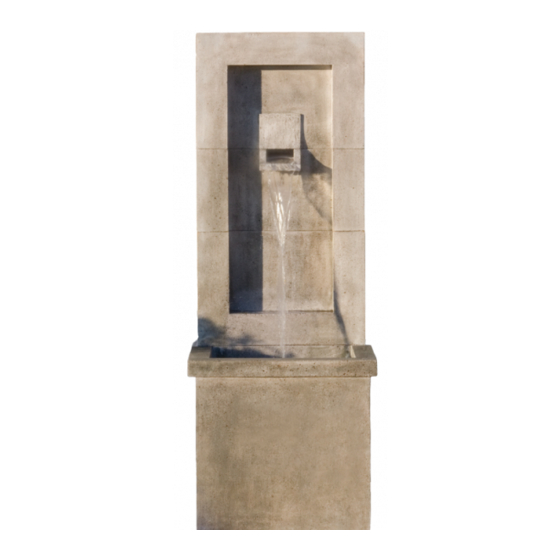
Fountain Components
Image
Item Description
Moderne
Fountain Top
Moderne
Fountain Basin
Moderne
Fountain Disc
for Basin
Moderne
Fountain Spiller
Stop
Fountain Information:
• Two people are recommended for the installation of this fountain!
• This fountain holds approximately 10 gallons of water.
• This fountain uses a large fountain cover: FTNCOV-LG
• Compatible with #10 Refill Device and LED kits
• A special stopper is required to use the refill kit for this fountain
Pump Information:
OEMPF525 - 525 GPH Pump (16 ft. cord length)
Tools Required:
Bubble Level
Screwdriver
Component
Quantity
Item #
FT-118A
1
FT-118B
1
FT-118D
1
FT-118E
1
FT-118 Moderne Fountain
Assembly Instructions
Pump Kit Parts List
Image
(use adapter indicated)
Approx. 12" length of 1/2" non-kink
Approx. 4" length of 5/8" i.d. clear
2.8 oz. tube of silicone
FT-118SPL Copper Spiller
Top
Side
Proudly
MADE IN USA
Component
PK500 Pump
LED Light
LED Cord
LED Transformer
#10 Stopper
black tubing
tubing
Hose Clamp
Quantity
1
1
1
1
1
1
1
1
1
1
rev 3/30/2020
Advertisement
Table of Contents

Related Manuals for Campania International FT-118 Moderne Fountain


Summary of Contents for Campania International FT-118 Moderne Fountain
- Page 1 FT-118 Moderne Fountain Assembly Instructions Fountain Information: • Two people are recommended for the installation of this fountain! • This fountain holds approximately 10 gallons of water. • This fountain uses a large fountain cover: FTNCOV-LG • Compatible with #10 Refill Device and LED kits •...
- Page 2 FT-118 Moderne Fountain Assembly Instructions Two people are recommended for the installation of this fountain! Fountain Set-Up: Assembly & Installation - A fountain can be difficult to install without knowing and understanding the steps involved. To ensure your fountain is installed properly, please read our instructions and tips before you begin.
- Page 3 FT-118 Moderne Fountain Assembly Instructions Step 9 - Use the silicone provided to install the copper spiller. (Image below) 9a - Be sure the spiller is clean and dry before installing Copper Spiller FT-118SPL Step 10 - Insert the spiller stop (FT-118E) into the slot behind the copper spiller.
- Page 4 Maintenance: Pump Care - The fountain relies heavily on the quality of the pump. A well-maintained pump can last several years. Step 1 - Fully submerge: Ensure the pump is fully submerged at all times to avoid damage. Step 2 - E nsure water level is sufficient: Check water levels regularly as water may evaporate over time, and periodically change water to avoid algae buildup.
Need help?
Do you have a question about the FT-118 Moderne Fountain and is the answer not in the manual?
Questions and answers