Advertisement
N HALF
INTRODUCTION
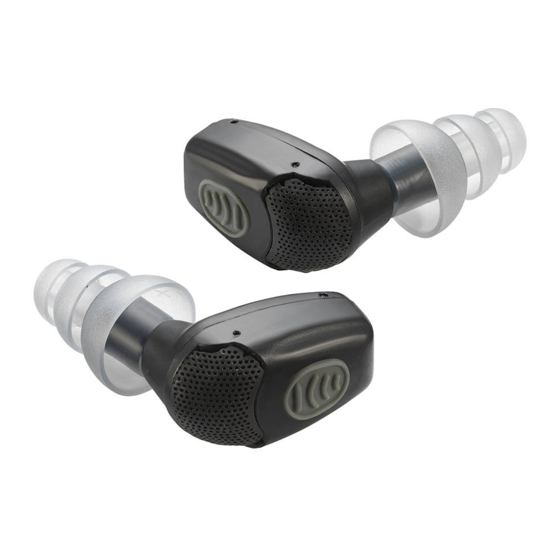
The NoizeBarrier
options; Single Ear Kit and optional ear plug, Enhanced Single Ear Comms
Kit with transducer, or Enhanced Dual Ear Comms Kit with transducer.
INSTALLATION
EARTIPS
All options come with eartips designed
specifically to work with OTTO's NoizeBarrier
Micro electronic earplugs. There are two stems
in the back of each eartip, a STRAIGHT stem,
and an ANGLED stem.
1 Install the eartip of the NoizeBarrier
inserting it into the STRAIGHT stem of the eartip.
2 a. In option A install the OTTO acoustic tube to the
ANGLED stem of the eartip. The tube should be
rotated until it points upward at a right angle from
the Micro body.
b. In option B-for wired kits, install the transducer
to the ANGLED stem of the eartip. The wire
should be rotated until it points upward at a
right angle from the Micro body and fits securely
around the outer ear.
3 When the Micro is inserted into the ear, the larger portion of the Micro
body should angle towards the rear of the cochlea, with the curved
windscreen facing forward to the user's face.
NoizeBarrier
Micro Comms Kit comes in three different Surveillance Kit
®
Micro Comms Kit
®
ANGLED
stem
®
STRAIGHT
stem
Micro by
®
Option 2a
Option 2b
Advertisement
Table of Contents

Related Manuals for Otto NoizeBarrier


Summary of Contents for Otto NoizeBarrier
- Page 1 ® inserting it into the STRAIGHT stem of the eartip. 2 a. In option A install the OTTO acoustic tube to the ANGLED stem of the eartip. The tube should be rotated until it points upward at a right angle from the Micro body.
- Page 2 QUICK REFERENCE FOLD IN SINGLE EAR KIT Please refer to the Eartip Installation section before beginning the next steps. 1 Adjust the acoustic tube so that it will rise vertically over the top of the ear, curve over, and direct back towards the nape of the neck. Install the acoustic tube into an earphone or surveillance kit as usual.
- Page 3 Micro. HEARING PROTECTION WARNING OTTO products are designed to produce a specific audio output level at maximum rated power. Modifying these devices in any way including adding or removing components or accessories may change the audio output of the device and could result in PERMANENT HEARING DAMAGE.
- Page 4 Designed, Manufactured and Engineered in the U.S.A. for More Than 50 Years ©2020 OTTO Engineering, Inc. All Rights Reserved This product can expose you to chemicals including lead, which is known to the State of California to cause cancer & other reproductive harm. For more information go to www.P65Warnings.ca.gov...
Need help?
Do you have a question about the NoizeBarrier and is the answer not in the manual?
Questions and answers