
Subscribe to Our Youtube Channel
Related Manuals for iRoom touchDock


Summary of Contents for iRoom touchDock
- Page 1 MANUAL intelligence. on. iRoom touchDock with device touchDock iRoom touchDock without device...
-
Page 3: Package Content
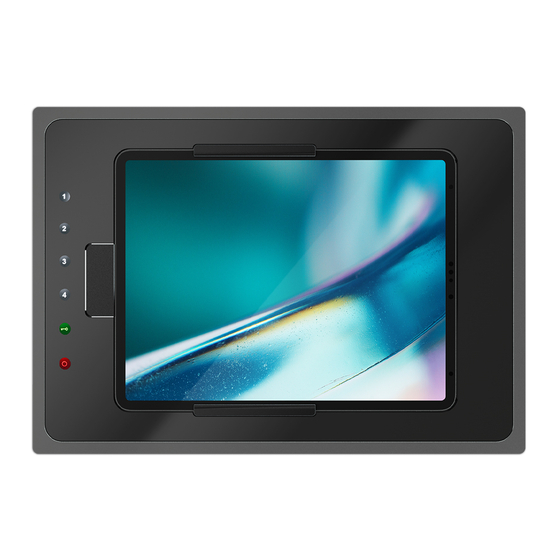
MANUAL for iRoom‘s touchDock Introduction Thank you for purchasing iRoom‘s touchDock (motorized in-wall docking station) with programmable Quick Keys. iRoom touchDock without device This MANUAL is designed to guide you through the hardware installation and initial software configuration. The warranty terms are also included in this MANUAL. -
Page 4: Installation
Aluminum Frame (attached to Back Box) The iRoom‘s touchDock may only be used with the included back box! Operating the device without the back box leads to a loss of warranty rights. Use for purposes not intended by the manufacturer will void warranty. -
Page 5: Installation Video
MANUAL for iRoom‘s touchDock Installation Video To have a better visual of the installation process watch the touchDock installation video in addition to studying this manual. Scan Me Click Me www.tinyurl.com/touchdock Page 5... - Page 6 See also cut-out If you use PoE+ to power dimensions on page 24. your touchDock you‘ll need to remove only the small knockout. If you use a regular power cable you‘ll need to remove both the large...
- Page 7 MANUAL for iRoom‘s touchDock 5. Place and fix the back box in 7. Fill the gap between the back the wall recess. Do not deform box and the recess in the wall the backbox. The back box with a plaster-based filler to...
- Page 8 If you use PoE+ to power safety strips that cover the your touchDock you‘ll need corner openings for the to remove only the small mounting clamps. knockout. If you use a regular power cable you‘ll need...
- Page 9 MANUAL for iRoom‘s touchDock 5. Insert the backbox with the 6. Feed the mounting clamps / attached aluminum frame into doglegs through the openings the recess. Do not deform the in the corners of the back back box. box and and use the included...
- Page 10 Power wires are only needed if you choose to power the unit through 110 - 240 V AC. iRoom touchDock 2020 Lineart iRoom touchDock with device Option I: Connecting 110-240VAC Option II: PoE+ Switch or Injector Connect the wires to the terminal according to color-code.
-
Page 11: Install The Docking Station
Install the Docking Station 1. Connect the keypad control Optional step for some cable that‘s attached to the touchDock models and iPad Aluminum frame to the upper models: 5-pin connector on the circuit Depending on the docking board of the docking station. - Page 12 5. Connect the other end of the power source to boot keypad control cable to the the docking station and connector on the magnetic proceed with setting up your glass frame. touchDock using the iOS App „iRoom‘s iDock“ Page 12...
- Page 13 2. Insert the iPad from the right side or from the top depending on whether the touchDock is installed horizontally or vertically and slide it into the guide rails. Push the iPad towards the charging connector until you hear a click noise.
- Page 14 intelligence. on. How to Insert or Change the Quick Key Icons 1. Remove the iPad from the 6. Choose the icons you wish docking station. to use from the included icon sheet. 2. Disconnect the docking station from power. Take off the magnetic glass frame carefully since it‘s connected to the keypad control cable.
- Page 15 MANUAL for iRoom‘s touchDock Prepare your iPad In order to charge your iPad with an iRoom docking station and to take advantage of iRoom‘s Smart Battery Management the USB Accessories option needs to be turned This option might be turned off by default depending on the iOS version of your iPad.
-
Page 16: Network Settings
App „iRoom‘s iDock“. iRoom‘s iDock iOS App • Find „iRoom‘s iDock“ App in the iOS App Store and install it on your iPad. • Dock the iPad into the Docking Station • Open the app and enter the default access code that shows on the login screen of the app. -
Page 17: General Settings
MANUAL for iRoom‘s touchDock General Settings LED Brightness Adjust the brightness of the Quick Keys backlight. Security Change the code to access the app. Touch Code Function Activate the antitheft protection of the iPad. Removal of the iPad can only be performed by entering the touch code. - Page 18 intelligence. on. General Settings Change Touch Code PIN If Touch Code Function is enabled you can change the default Touch Code PIN 1 2 3 4 to an individual 4 digit PIN to avoid unauthorized removal of the iPad. Unlock Time Defines the time the the unlock mechanism stays open (only iTop Tabletop and iTop OnWall models).
-
Page 19: Update Firmware
MANUAL for iRoom‘s touchDock Update Firmware Check if the docking station runs on the latest firmware and update new firmware. Page 19... - Page 20 Settings Audio Output via Jack If enabled the onboard 3.5 mm stereo jack can be used to stream music that is played on the iPad to a music system. Page 20...
-
Page 21: Motion Sensor Settings
MANUAL for iRoom‘s touchDock Motion Sensor Settings Detection Sensitivity Determines distance and accuracy of the proximity sensor. Sensitivity slider on the left is lowest sensitivity, maximum sensitivity is acchieved on the far right sight. Wave your hand in front of the quick keys to check the sensitivity on the graph below the slider. - Page 22 intelligence. on. Dock Commands Open the docking station to remove the iPad. Important Note: After setting up the docking station with the app, change the access code for the app to prevent unauthorized removal of the iPad through the app. Page 22...
-
Page 23: System Settings
MANUAL for iRoom‘s touchDock System Settings Load / Save / Send Settings You can save and load your settings or send them by email. Restore to Factory Settings This function requires the app‘s access code. Reboot iRoom‘s iDock Rebooting does not do the trick when disconnecting the keypad control cable from the glass frame. - Page 24 Specifications iRoom’s touchDock Type touchDock mini touchDock-iPad10 touchDock-USB-C-iPad11 touchDock-USB-C-iPad12.9 290 x 205 x 80mm 372 x 247 x 78mm 372 x 247 x 78mm 405 x 285 x 88mm Outside Dimensions (WxHxD) 11.4“ x 8.1“ x 3.2“ 14.6“ x 9.7“ x 3.1“...
-
Page 25: Electrical Safety Information
GmbH warrants that the product(s) furnished hereunder shall be free from defects in material and workmanship for a period of two (2) years from the date of purchase made by the original end-customer or for a period of 3 years from the date of shipment by iRoom GmbH under normal use and operation. -
Page 26: Warranty Conditions
Products being received at iRoom GmbH facility freight prepaid in accordance with the RMA process of iRoom GmbH. Products returned without an RMA number will not be processed and will be returned freight collect or subject to disposal. -
Page 27: Rohs/Weee Compliance Statement
WEEE Directive. Declaration of Conformity Hereby, iRoom GmbH, declares that this iRoom GmbH device, is in compliance with the essential requirements and other relevant provisions of Directive 2014/35/EU & 2014/30/EU. - Page 28 intelligence. on. Seite 28...
- Page 29 Einleitung iRoom touchDock without device Danke, dass Sie sich für unsere motorisierte Wandeinbau-Dockingstation touchDock mit programmierbaren Quick Keys entschieden haben. Dieses Benutzerhandbuch soll Sie bei der Hardware-Installation und der ersten Software-Konfiguration begleiten. Die Garantiebedingungen sind ebenfalls in diesem Benutzerhandbuch enthalten.
- Page 30 Installation Aluminum-Rahmen (auf der Unterputzdose Jede iRoom‘s touchDock darf nur in Verbindung mit der iRoom vormontiert) Unterputzdose verwendet werden. Der Betrieb des Gerätes ohne Unterputzdose führt zum Verlust der Garantie. Eine detaillierte Beschreibung finden Sie in der „Unterputzdose Installationshandbuch“.
- Page 31 ANLEITUNG für iRoom‘s touchDock Installationsvideo Sehen Sie sich das Installationsvideo an, um ergänzend zu dieser Anleitung zu sehen, wie die touchDock installiert wird. Scan Me Click Me www.tinyurl.com/touchdock Seite 31...
- Page 32 Unterputzdose. entsprechend der Wandaus- Falls Sie PoE+ verwenden, um schnittmaße vor. (siehe Seite die touchDock mit Strom zu versorgen muss nur der kleine Ausbruch entfernt werden. Bei einer Stromversorgung über 110-240V benötigen Sie den großen Ausbruch für das Stromkabel und den kleinen für das Netzwerkkabel.
- Page 33 ANLEITUNG für iRoom‘s touchDock 5. Platzieren und fixieren Sie 7. Putzen Sie die Unterputzdose die Unterputzdose in der mit dem montierten Putzdeckel Maueröffnung. Vermeiden sie mit einer gipshaltigen Spach- Verformung. Richten Sie die telmasse flächenbündig ein Unterputzdose an der rechten und achten Sie auf eine gerade Seite der Maueröffnung bei...
- Page 34 Durchführungen führung in der Unterputzdose. in die silbernen Sicherheits- Falls Sie PoE+ verwenden, um streifen der Unterputzdose, um die touchDock mit Strom zu später die Montageklammern versorgen muss nur der kleine zu montieren.. Ausbruch entfernt werden. Bei Stromversorgung über Entfernen Sie die Sicher- 240V Leitung, benötigen Sie...
- Page 35 ANLEITUNG für iRoom‘s touchDock 5. Setzen Sie die Unterputzdo- 6. Führen Sie die Montageklam- se mit dem vormontierten mern durch die unter Punkt 4 Aluminium-Rahmen in die geschnittenen Durchführun- Ausnehmung ein. Vermeiden gen und schrauben Sie diese Sie Verformung. mit den mitgelieferten M4x20 Schrauben und Unterlegschei- ben an der Unterputzdose fest.
- Page 36 Netzwerkkabel an einen PoE+ Netzwerkswitch oder Injector angeschlossen wird. iRoom touchDock 2020 Lineart iRoom touchDock with device Option I: 110-240VAC Anschluss Option II: PoE+ Netzwerkswitch oder Injector Schließen Sie Adern gemäß des Farbcodes an die Anschlussklem- me an.
- Page 37 ANLEITUNG für iRoom‘s touchDock Installation der Dockingstation 1. Stecken Sie das Flachbandka- Optionaler Schritt bei be- bel für das Touch-Tastenfeld stimmten touchDock Mo- an die obere 5-Pin Buchse auf dellen für bestimmte iPad der Platine der Dockingstation Modelle: Je nachdem, welches touch-...
- Page 38 Ende Flachbandkabels für Stromversorgung (110-240V das Touch-Tastenfeld in die VAC oder PoE+) an, um Buchse auf der Rückseite des die touchDock zu starten magnetischen Glasrahmens und nehmen Sie dann die Konfiguration mit der iOS App „iRoom‘s iDock“ vor. Seite 38...
- Page 39 ANLEITUNG für iRoom‘s touchDock Einsetzen des iPads 1. Drücken und halten Sie 2 der Quick Keys für ca. 2 Sekunden bis die Glassplatte nach vorne herausgleitet. Falls die Quick Keys nicht funktionieren, haben Sie die Installati- on wahrscheinlich mit anliegender Spannung installiert. Trennen Sie die Dockingstation für 3 Minuten vom Stromnetz oder vom...
- Page 40 intelligence. on. Austauschen der Symbole des Touch-Tastenfelds 1. Entnehmen Sie das iPad aus 6. Suchen Sie sich die Symbole der Dockingstation. aus dem mitgelieferten aus, die Sie verwenden möchten. 2. Trennen Sie die Dockingstation von der Stromversorgung. Nehmen Sie den magneti- schen Glasrahmen vorsichtig ab, da das Flachbandkabels für das Touch-Tastenfeld mit dem...
- Page 41 Bereiten Sie das Pad vor Um Ihr iPad in einer iRoom Dockingstation laden zu können und das iRoom Smart Bat- tery Management zum schonenden Laden des Akkus verwenden zu können, muss die Option „USB-Zubehör“ auf Ihrem iPad aktiviert werden.
- Page 42 Konfiguration der Dockingstation Zur Konfiguration ist die iOS App „iRoom‘s iDock“ notwendig und das iPad muss in die Dockingstation eingelegt sein. iRoom‘s iDock iOS App • Installieren Sie „iRoom‘s iDock“ App aus dem iOS App Store auf Ihrem iPad.
-
Page 43: Allgemeine Einstellungen
ANLEITUNG für iRoom‘s touchDock Allgemeine Einstellungen LED Helligkeit Regelt die Hintergrundbeleuchtung der Quick Keys. Sicherheit Ändert das Passwort, um die App zu öffnen. Touch Code Funktionalität Aktiviert den iPad Diebstahlschutz. Entneh- men des iPads kann nur durch Eingabe eines Codes erfolgen. Drücken und halten Sie 2 der Quick Keys für ca. - Page 44 intelligence. on. Allgemeine Einstellungen Touch Code PIN ändern Wenn die Touch Code Funktionalität aktiviert ist, kann man den werkseitigen Touch Code PIN 1 2 3 4 in einen beliebigen 4-stelligen PIN ändern, um unerlaubte Entnahme des iPads zu verhindern. Zeit bis zur autmatischen Verriegelung Definiert die Zeit, während der Entriege- lungsmechansimus geöffnet bleibt (nur bei iTop Tisch- und iTop OnWall-Modellen).
- Page 45 ANLEITUNG für iRoom‘s touchDock Update Firmware Überprüft, ob die aktuelle Firmware instal- liert ist und bietet gegebenfalls die Installati- on einer neueren Firmware an. Seite 45...
- Page 46 Einstellungen Audio Ausgabe via Klinke Ermöglicht das Streamen von Musik vom iPad zu einem Musiksystem oder Verstärker über die 3,5 mm Stereo-Klinkenbuchse auf der Hauptplatine der Dockingstation. Seite 46...
- Page 47 ANLEITUNG für iRoom‘s touchDock Bewegunssensor Einstellungen Auslöseempfindlichkeit Definiert die Entfernung und Genauigkeit des Näherungssensors. Schieberegler ganz links bedeutet geringste Empfindlichkeit und ganz rechts höchste Empfindlichkeit. Bewegen Sie Ihre Hand vor den Quick Keys hin und her, um die Empfindlichkeit auf der Skala darunter zu sehen.
- Page 48 intelligence. on. Dock Befehle Öffnet die Dockingstation, um das iPad zu entnehmen. Achtung! Ändern Sie das App-Passwort nachdem Sie die Dockingstation konfiguriert haben, um eine unerlaubte Entnahme des iPads über die App zu verhindern. Seite 48...
- Page 49 ANLEITUNG für iRoom‘s touchDock Systemeinstellungen Einstellungen laden / speichern / per Email versenden Speichern, laden oder E-Mailen Sie Ihre Konfigurationseinstellungen. Werkseinstellungen wiederherstellen Erfordert die Eingabe des App-Passworts (App Access Code). Neustart iRoom‘s iDock Ein Neustart der Dockingstation über diese Funktion hat keine Auswirkung auf die Funk-...
- Page 50 Technische Daten iRoom’s touchDock Type touchDock mini touchDock-iPad10 touchDock-USB-C-iPad11 touchDock-USB-C-iPad12.9 Außenmaße (BxHxT) 290 x 205 x 80mm 372 x 247 x 78mm 372 x 247 x 78mm 405 x 285 x 88mm Ausschnittmaße (BxHxT) 275 x 190 x 80mm...
-
Page 51: Eingeschränkte Gewährleistung
GmbH bei normalem Gebrauch und Betrieb keine Material- oder Verarbeitungsfehler aufweisen dürfen. Im Rahmen dieser Garantie liegt es im Ermessen der iRoom GmbH, das Produkt, das innerhalb der oben angeführten Fristen nicht der hier defi- nierten Gewährleistung entspricht, zu reparieren oder zu ersetzen. Die Kosten des Aus- und Einbaus sind für alle Produkte nicht in dieser Garantie enthalten. - Page 52 RMA-Nummer finden Sie unter: www.iRoomiO.com/support/warranty Gewährleistungsbedingungen Die oben angeführte Gewährleistung ist nicht anwendbar, wenn das Produkt: Durch andere als die von iRoom GmbH ermächtigten Vertreter ohne schriftliche Genehmigung durch iRoom GmbH abgeändert, umgebaut oder ergänzt wurde; bemalt, umbenannt oder in der Form verändert wurde;...
- Page 53 Gesetzen der Rechtsprechung Ihres Landes unter Anwendung der WEEE-Richtlinie behandelt und recycelt werden. Konformitätserklärung Hiermit erklärt iRoom GmbH, dass dieses iRoom GmbH Gerät mit den grundlegenden Anforderungen und mit den anderen relevanten Bestimmungen der Richtlinie 2014/35/EU & 2014/30/EU übereinstimmt.
Need help?
Do you have a question about the touchDock and is the answer not in the manual?
Questions and answers