Advertisement
Quick Links
Advertisement

Related Manuals for Analogue Nt


Summary of Contents for Analogue Nt
-
Page 2: Table Of Contents
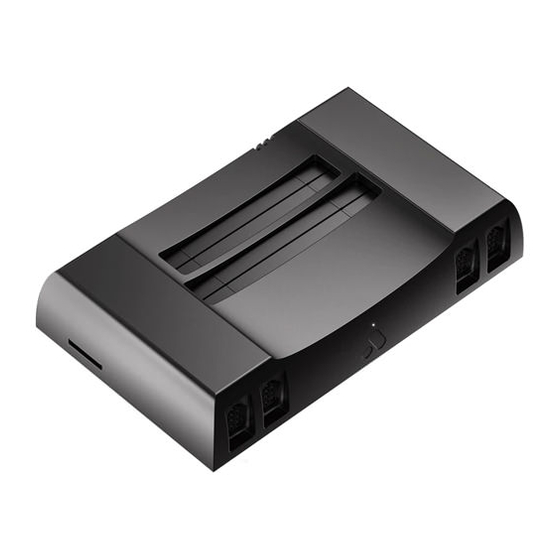
Analogue Nt diagram . . . . . . . . . . . . . . . . . . . -
Page 4: Important Health Warning About Playing Video Games
Important Health Warning About Playing Video Games A very small percentage of people may experience Immediately stop playing and consult a doctor if you a seizure when exposed to certain visual images, experience any of these symptoms . Parents should including flashing lights or patterns that may appear watch for or ask their children about the above in video games . -
Page 5: Please Read
. Cartridges should be inserted and removed in a straight, upward and downward motion to avoid any issues . If the “ANALOGUE” warranty sticker on the bottom of your Analogue Nt is removed, the warranty will be void . - Page 7 To start using your Analogue Nt, insert the AC adapter into the power input and plug in the video cable into the respective input on your TV, monitor or projector . Insert a game and press the red power button .
-
Page 8: Hardware Features
NES games via the NES cartridge slot . physical and analog features. See a list of 826 NES games here . Please read this section to understand everything your Analogue Nt is capable of . Famicom Cartridge Slot Your Analogue Nt is compatible with original Power Button Famicom games via the Famicom cartridge slot . - Page 9 Famicom Expansion Port . See a list of accessories here . Four Player Controller Ports Your Analogue Nt is outfitted with custom designed, NES controller ports . This means your Analogue Nt is compatible with original NES controllers and accessories .
- Page 10 HDTV’s internal upscaler . other issues. See how to play your Analogue Nt in HD, with no compromises, on page 12) S-video Your Analogue Nt outputs the...
- Page 11 Controller Mode Select info@analogue.co. Your Analogue Nt is compatible with 4 player games . Microphone Input You can manually select the mode depending on what region the game you are playing is from (US or Your Analogue Nt is compatible with Famicom JAPAN) .
- Page 12 Audio Adjust Select Your Analogue Nt is designed with three audio controls: MIC: Microphone volume adjust MIX: Stereophonic / Mono adjust Adjust the microphone volume by putting the Mix and de-mix the original 5 sound channels switch in the “MIC” position and use the Audio directly from the CPU to your preference .
-
Page 13: Hdmi Upgrade Features
At a Glance (HDMI upgrade required) HDMI Video Features Upgrading your Analogue Nt with HDMI is the highest • 480p, 720p, and 1080p in NTSC/60Hz quality way to play NES, Famicom and Famicom Disk • 576p, 720p, and 1080p in PAL/50Hz System games in HD . - Page 14 SELECT on your controller . If you would like to save your settings, make sure to select “Save and Update” to save your settings after turning off your Analogue Nt . Resolution Your Analogue Nt supports 480p, 720p, and 1080p in NTSC/60Hz and 576p, 720p, and 1080p in PAL/50Hz .
-
Page 15: Video Options
Video Options Horizontal Stretch Use the LEFT and RIGHT D-PAD buttons on your controller to adjust the horizontal stretch of the game image . The default setting is 4:3 for 16x9 . Scaling Choose from a selection of popular pixel art scalers to alter the way the pixels render . - Page 16 Scanlines Enable scanlines for a CRT feel . Start by selecting the number of scanlines you would like (we suggest NES), and use the LEFT and RIGHT D-PAD buttons on your controller to adjust the scanline depth . Interpolation Turn interpolation on and off (we suggest leaving this off) .
- Page 17 Palette Choose from a selection of color palette’s that modify the aesthetics of the way your games look . Cropping Crop the game frame to your liking . Cropping is useful for eliminating inherent graphical issues in certain games .
- Page 18 Horizontal Position Use the LEFT and RIGHT D-PAD buttons on your controller to adjust the horizontal position of the game image . Despeckle A very small selection of games have pixel speckling or sparkling . If you do come across a rare game that has speckles in the video, then select a different phase until they are eliminated .
-
Page 19: Audio Options
Audio options Chip Enables Your Analogue Nt has full digital support for each of the unique audio chips used in certain games that pushed the boundaries of what the NES/ FC/FDS was capable of . Turn on the respective audio chip for whichever game you are playing to allow this audio channel to function properly . - Page 20 Panning Use the LEFT and RIGHT D-PAD buttons on your controller to adjust the panning on each individual audio channel . The default selections are recommended . Viewer The Viewer is an audio visualizer for your audio selections .
-
Page 21: Settings
Settings Hotkeys Hotkeys provide access to certain features at any point during gameplay via button combinations activated by your controller . Menu – Access the in game menu . Overclock - Overclock the CPU up to 2 .5MHz . Use at your own risk: results may vary, games may not function properly . - Page 22 Underclock - Select the controller hotkeys to underclock the CPU down to 1 .9MHz . Use at your own risk: results may vary, games may not function properly . Short Reset - Select the controller hotkeys to soft reset your Analogue Nt .
- Page 23 Long Reset - Select the controller hotkeys to hard reset your Analogue Nt . Controller for Hotkeys - Select the controller (player one or player two) to access the in game menu and . Selection is activated immediately after leaving sub menu .
- Page 24 DVI Mode Initiate DVI Mode . EDID Disable Disable EDID to force a resolution your monitor does not support . CAUTION: this can create problems and is not recommended . Hold down select on Controller 1 during power cycle to reset .
- Page 25 Audio Clock Selects which clock source will run audio hardware . When overclocking the audio pitch will shift if CPU clock is selected . Save System Settings You can save any system settings by entering the Save and Update menu and selecting Save Settings .
- Page 28 .analogue .co ©Analogue, LLC...
Need help?
Do you have a question about the Nt and is the answer not in the manual?
Questions and answers