
Related Manuals for Godrej Minifresh 2000

Summary of Contents for Godrej Minifresh 2000
- Page 1 Minifresh hot beverage vending machine User Manual Rev.- 0 Item Code: 06268406 Rev. Date: 12-May-2016...
-
Page 2: Foreword
& Boyce Mfg. Co. Ltd. retains the rights to change the product without prior notification. Godrej & Boyce Mfg. Co. Ltd. is not liable for any damage that could affect, directly or indirectly, any person or property as a consequence of …... -
Page 3: Table Of Contents
Contents Foreword………………………………………. …….…………………………………………………2 Introduction ……………………………… ……………………………………………………….4 Know Your Machine ………………. ……………………………………………………….4 Objective …………………………… ……………………………………………………….6 Safety……………………………….. ……………………………………………………….6 Original parts ………………… ……………………………………………………….6 1.3.1 Hygiene……………………….. ……………………………………………………….6 1.3.2 Ventilation holes …………….. ……………………………………………………….6 1.3.3 Water Temperature ………… ……………………………………………………….6 1.3.4 Dispensing time ……………... ……………………………………………………….6 1.3.5 Electrical safety ……………... ……………………………………………………….6 1.3.6 Stability……………………….. -
Page 4: Introduction
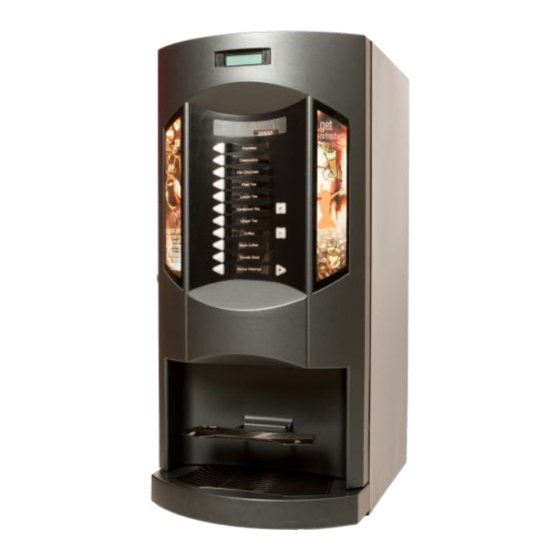
1 Introduction Know Your Machine Figure 1-1 Minifresh 2000/3000 Series Parts Identification Machine Door Programming Keys Main Control Board Cover FRC Protection Lock Overflow Outlet Machine Body Product Container Outlet Spout High Speed Mixer Brew Outlet Drip Tray Cover Drip Tray... - Page 5 Figure 1-3: Minifresh 5000 Series Parts Identification Machine Door FRC Protection Programming Keys Main Control Board Cover Lock Drip Tray Drip Tray Cover Brew Outlet High Speed Mixer Outlet Spout Product Container Machine Body Tea Brewer Waste Collector Bucket Figure 1-3: Minifresh 5000 Series with Tea Brewer ( Minifresh 5300LTB)
-
Page 6: Objective
Original parts 1.2.1 Use only original parts and spare parts made available by Godrej & Boyce Mfg. Co. Ltd. The same applies to the options mentioned. These meet stringent quality requirements so that Minifresh will remain in good working order. If non-original parts are used, the guarantee will lapse and Godrej &... -
Page 7: Functioning
Functioning How the machine works is shown schematically In figure 1-1. Description Water connection Inlet valve Boiler (pressure less) Outlet valve* Boiler drainage clip Product Containers* Mixer systems* *No. Outlet Valves, Product Containers Mixers change depending on model The drinks in the Minifresh are prepared in accordance with the instant principle: a specific amount of hot water and soluble product/s (premix) are dosed in a whipper assembly. -
Page 8: Transport
Transport information: • Storage temperature : + 0º to + 50º Celsius Minifresh 2000/3000 • Dimensions (hxwxd) incl. packaging. : 700 X 350 X 580 mm • Weight (Incl. packaging) : 24 kg. (approx.) Minifresh 4000 •... -
Page 9: Installation
On a horizontal, level, stable base in the vicinity of an easily accessible wall socket (Electrical Outlet) so the plug can be removed in an emergency and should not to be tilted more than 2°. Figure 3-1 : Ventilation space required for Minifresh 2000/3000... - Page 10 Figure 3-2 : Ventilation space required for Minifresh 4000 Figure 3-3 : Ventilation space required for Minifresh 5000...
-
Page 11: Connecting
Connecting WARNING! The Minifresh must be allowed to acclimatize for at least half an hour before it is connected to the mains voltage. Minifresh Vending Machine with Bubble Top ( 10 litre Water Reservoir) 3.2.1 Fill the water reservoir (Bubble top or any other container and connect to the inlet of the Vending Machine). -
Page 12: Introduction
If Power ON Rinse is enabled, Machine asks for Rinse. “WELCOME” indicates that the machine is ready to dispense. PLEASE RINSE.. Godrej Vending WELCOME A multi option keypad has been provided with direct flavour selection keys and the additional keys for special functions like Rinsing, Hot Water, etc. -
Page 13: Weekly Maintenance
5 Maintenance Maintenance by the operator 5.1.1 Introduction Regular maintenance is essential for proper hygiene and flavour of drinks. The dispenser can be kept clean, safely and efficiently if you follow the instructions carefully. WARNING! Never spray water in the Vending Machine! ROUTINE MAINTENANCE 5.1.2 Daily Maintenance (by user or operator) - Page 14 Sr.no. Description Canister Assembly (without Spout) Canister Lid Gear Box Lock Clip Canister Scraper Spring Canister Wheel Canister Canister Cap Spout Holder Spout Lock Spout Short Auger (Plastic/Steel) O Ring Auger Drive (Plastic) Auger Drive (Steel) Figure 5-1: Canister Assembly...
- Page 15 Sr.No. Description Mixer Assembly Complete NMS Steam Trap NMS Funnel NMS Funnel Lock NMS Silicon Tube ID-6 OD-10 Blender NMS Whipper Seal NMS O Ring Whipper Bracket Whipper Chamber NMS Separator Wheel NMS Motor Mounting Bracket NMS Whipper Assembly Pan Phillips head Self tapping screw B7 x 9.5 Cylindrical Screw M3 x 7 Water Inlet Pipe NMS...
- Page 16 Sr.No. Description Tea Brewer Assembly Greared Drive Motor Funnel Filter Assembly Funnel Filter Lock Figure 5-3: Tea Brewer Assembly ( if the Vending Machine is fitted with Tea Brewer)
-
Page 17: Monthly Maintenance
To disassemble the Whipper assembly as shown in above figure, Do the following steps: a. Pull the steam trap (3) to remove. b. Unlock the lever of the Funnel Lock (4) by pushing up fully. Keeping it unlocked, pull the Funnel assembly gently . c. -
Page 18: Keypad Functions
(b) Permanent Count: Press twice and press desired flavour key (c) Press thrice for Temperature & water level readings Key Pad Minifresh 2000/3000 Key Pad Minifresh 5000 Bezel Keys Action Press key once to activate “Stand by”. -
Page 19: Programming
7 Programming 1. To enter into program mode, keep the “A” key pressed for more than 5 seconds. The display will change to “ENTER PASSWORD” with a Beep sound. 2. After a moment the display will show “PASSWORD : ” 3. - Page 20 SUB MENU MENU OPTION DESCRIPTION 1.1.1 SET BUTTON 1 Ensure only two channels are running simultaneously 1.1.1.1 FLAVOR KEY :YES To enable/disable BUTTON with flavor 1.1.1.2 INHIBIT To disable BUTTON 1.1.1.3 PRESELECT To enable/disable BUTTON with Pre-Selection option SUB MENU MENU OPTION DESCRIPTION 1.1.1.1.1...
- Page 21 1.1.12.4 TEST FLAVOUR ? To test the changes in Flavour Parameters (without saving) 1.1.12.5 DRINK PRICE XX.X Set the price of Hot Water 1.1.1.3 PRESELECT :YES Preselect YES/NO (IF YES Then the below Settings) 1.1.1.3.1 PREMIX :CHx Select Premix Channel for preselect option 1.1.1.3.1.1 LESS XX.XX...
- Page 22 Confirm new password P/W CHANGED Indicates password is changed P/W MISMATCH Indicates mismatch between new & confirm password PROGRAM MESSAGE Press “Enter” to modify default message 2.7.1 Godrej Vending Scroll and Press “Enter” for the required message to display 2.7.2 WELCOME...
-
Page 23: Error Messages
8 Error Messages Error Message on LCD Cause/Solution Water Level in Boiler not achieved in 2 minutes, Check water supply SUPPLY WATER ! Bend in hose / hose trapped Scale deposits in water system Set Temperature not achieved in 20 Minutes, Water too cold HEATING FAILED ! Check steam protection (service engineer only) Is the heating element okay? (service engineer only) -
Page 24: Taking Out Of Service
9 Taking out of service If the machine will not be used for an extended period of time ( more than 4 weeks), or if the machine has been out of service for a long period of time, then have an approved service engineer take the following measures for hygiene: 1. -
Page 25: Technical Specifications
Technical Specifications Minifresh 5000/5000HiD/5000LTB 90 – 300 Volts Power Supply 50 - 60 Hz Ambient Temperature +10°C to + 40°C Relative Humidity 80% RH (Max.) Dimensions (HxDxW) 785 X 510 X 350 mm Weight 27 Kg Boiler Capacity 1.75 litre (5 Litre Optional) Containers Capacity 1.7 litre Number of Product Containers... - Page 28 Dealer’s Contact Details...
Need help?
Do you have a question about the Minifresh 2000 and is the answer not in the manual?
Questions and answers