Table of Contents
Advertisement
Quick Links
Advertisement
Table of Contents

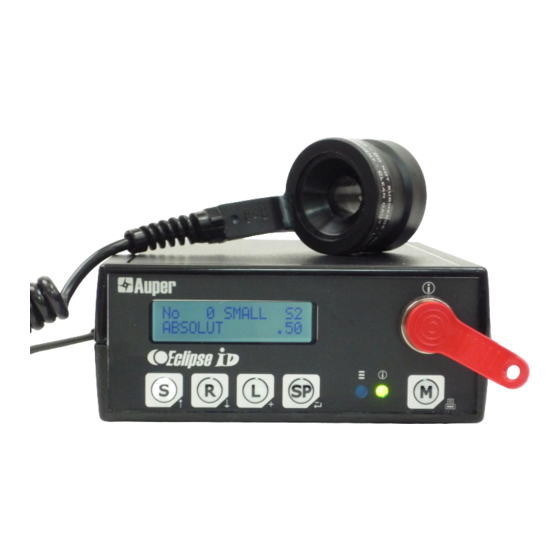
Summary of Contents for Auper Eclipse ID S3
- Page 1 Eclipse ID S3 Auper Electronic Controls Inc Quick User Guide...
- Page 2 Eclipse ID S3 Quick User guide 2010 Auper Electronic Controls Inc Edition EIDS3E 1.0...
-
Page 3: Installation
Eclipse ID S3 Quick User guide INSTALLATION • Mount your Eclipse system, away from areas where liquor spills could fall onto the Eclipse. The system is protected with silicone but it is not guaranteed to be liquid proof. Liquid spills can find their way to the connectors causing corrosion and eventually penetrate the enclosure. -
Page 4: Serial Connection
Eclipse ID S3 Quick User guide SERIAL CONNECTION CONNECTING THE ECLIPSE TO A SERIAL PRINTER To connect a serial printer to the Eclipse , use the RS-232 port. With new printers, the 9-pin female serial cable supplied with the printer is directly compatible. - Page 5 Eclipse ID S3 Quick User guide CONNECTING THE ECLIPSE TO A POS OR CASH REGISTER Interfacing an Eclipse to a POS is achieved using the RS-232 serial port. You can connect your Eclipse to your POS or cash register using a RS-232 null modem cable (P/N: 70- 030).
- Page 6 Eclipse ID S3 Quick User guide RFID POURERS Clean your pourers immediately after taking them off the empties. Do not use soap and do not clean in a dish washer. RFID pourers contain an electronic chip in which you will assign a number between 0 and 255.
- Page 7 Eclipse ID S3 Quick User guide SEALS • Two-part seal Remove a plastic seal from the roll and apply on top of the pourer. Pull both tabs onto the neck. Wrap a seal label around the neck of the bottle and the plastic tabs.
- Page 8 Eclipse ID S3 Quick User guide PROGRAMMING • To access the program modes, press and hold the S button as you apply the manager’s i- button key onto the probe (1 of 6 i-buttons). • To get out of the programming mode, apply the i-button key again.
- Page 9 Eclipse ID S3 Quick User guide MODE 4: POS AND REGISTER INTERFACE If you do not interface your Eclipse to a POS or a cash register, make sure the system is set to POS DISABLED. The next modes only apply when the interface feature is set to enable.
- Page 10 Manager ID+ 2010. A coefficient (K) is the value of a timer to serve 1 oz of a product with a given viscosity. For regular products, K1 is set to 32 with a regular Auper RFID pourer. This value could be different with a different brand of pourer.
- Page 11 Eclipse ID S3 Quick User guide • Insert the bottle in the ring and invert over the graduated cylinder. • Press the R button to delete the current coefficient value. • Press the S button to open and close the pourer. The coefficient value will move up until you close the pourer.
- Page 12 Eclipse ID S3 Quick User guide MODE 10: PRINTER COM PORT SELECTION • Press SP to alternate between RS-232 and RS-422. • If you are connecting the Eclipse to a serial printer using the RS-232 serial port, set to RS-232.
- Page 13 Eclipse ID S3 Quick User guide MODE 16: SYSTEM NUMBER You will use the system number to identify each Eclipse on printed reports or to communicate with the Liquor Manager software. System numbers can be set between 0 and 99. There cannot be two systems with the same number on the same RS-422 network.
- Page 14 Eclipse ID S3 Quick User guide Select PERIOD KEY for the Login/Logoff mode. In this mode, the bartender applies one of the 3 period keys to the probe at the beginning of the shift to login and start the system. The system will remain activated until the same key is applied to the probe again to Logoff or another period key is applied to login in a different period.
- Page 15 Eclipse ID S3 Quick User guide MODE 23: MANAGER KEYS You can enter up to six manager keys in your system. Each key should be identified as Manager 1 to 6 on the plastic fob. The actual electronic code is etched on each key.
- Page 16 Eclipse ID S3 Quick User guide MODE 26: AUTO-POUR DELAY You can program the delay between pour sizes from 1 to 4 seconds in increments of 0.5 seconds. You can try the system in this mode to see if the selected delay suits you.
-
Page 17: Run Mode
Eclipse ID S3 Quick User guide RUN MODE MODE LOGIN/LOGOFF (Period key) • The system will remain on Idle until a period key is applied to the probe to activate it. The green light is off. • Apply a period key to login. The display will change to indicate it is ready to serve. -
Page 18: Printing Reports
Eclipse ID S3 Quick User guide READING THE COUNTERS FROM THE DISPLAY • Press M once. • Press the S button to move up and the R button to move down. MANAGER KEY LOGIN/LOGOFF • Locked-Ready indicate that the system has been activated (Login).

Need help?
Do you have a question about the Eclipse ID S3 and is the answer not in the manual?
Questions and answers