
Subscribe to Our Youtube Channel
Related Manuals for QIWU iGPSPORT iGS620


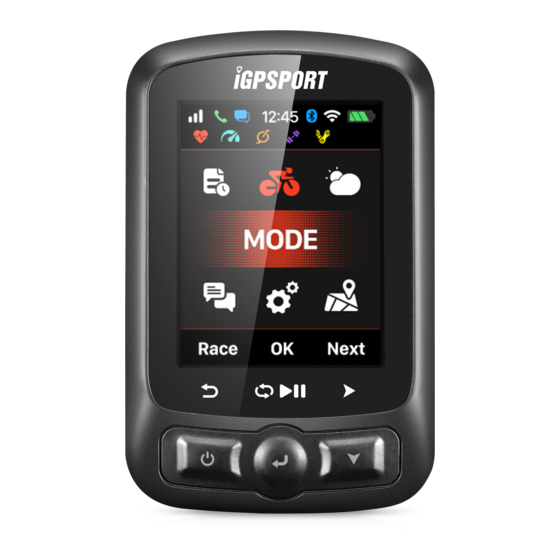
Summary of Contents for QIWU iGPSPORT iGS620
- Page 1 USER MANUAL iGS620 GPS CYCLING COMPUTER www.igpsport.com WUHAN QIWU TECHNOLOGY CO., LTD 1/48...
-
Page 2: Table Of Contents
Getting started ............................... 5 Buttons ................................5 Installation ..............................5 Personal setting ............................6 Setting up gps cycling computer ......................7 connect gps cycling computer ......................8 Setting up gps cycling computer ......................8 Set up WIFI ..............................9 Smart Notifications ........................... 9 Life track .............................. - Page 3 Activity upload ............................25 Upload via BLE ............................25 Upload via USB cable ........................... 25 Advanced setting ............................27 Customizing the data screens ......................27 Page selection ............................27 Data Fields ............................... 28 Auto function ............................30 Auto Start ..............................30 Auto Pause ...............................
- Page 4 North-upward on/off ..........................39 Turning indicator ........................... 39 Route Elevation ............................39 Training ................................40 Zones ................................40 Set Alerts ..............................41 More Setting ..............................42 Riding Mode .............................. 43 Color Setting ............................. 43 Add New Bikes ............................44 Power Saving ..............................44 Auto Functions ............................
-
Page 5: Getting Started
Getting started Buttons Left button: Power on/ Exit/Power off (hold for more than 2s) or Restart(hold for more than 10s) Middle button: Confirm/Recording start/Lap/Recording pause/Recording continue) Right button: Scroll down / Scroll Pages For specific button function, please refer to the button prompts under the screen. Installation 5/48... -
Page 6: Personal Setting
1. Standard bike mount installation 2. Out front bike mount installation (Optional accessory) Personal setting When using iGS620 for the first time, you can set the Language, Gender, Age, Weight, Height and Time Zone as below: While setting the numerical digits, select right button to choose the digit of number, select left/ middle button to plus/minus the number, select middle button to then select right button to enter the save page,... -
Page 7: Setting Up Gps Cycling Computer
It will enter the data display page once the setting finished. For better using on iGS620, please complete more settings as below. Setting up gps cycling computer 7/48... -
Page 8: Connect Gps Cycling Computer
connect gps cycling computer Open Bluetooth for both of phone and device, start App “ iGPSPORT ” , clicks the icon '+' in the upper right corner on the home page or the icon '+' in the middle of the page, choose the device model iGS620 ,... -
Page 9: Set Up Wifi
Set up WIFI In the device management interface, click the WIFI , enter the page of WIFI management, open the WIFI function, the device will search for available WIFI nearby automatically, select the WIFI and input password to complete the connection; if you want to connect to hiden WiFi, click the "other" at the bottom to enter the WiFi name and password to complete the connection. -
Page 10: Life Track
Life track Enter the device management interface, click on life track and share link to third-party applications, for others to view life track . 10/48... -
Page 11: Set Up Interface
Set up interface Time format There are 2 time formats for selection: 12 hour or 24 hour. Enter SETTING-System-Day Time-Time Format Set Altitude The current altitude can be set manually as below: SETTING—System-Other Functions--Set Elevation 11/48... -
Page 12: Connecting With Ant+ Sensors
Connecting with ANT+ sensors If you have ANT+ sensors, for first time using, please search the sensors as below: SENSORS-Search All (It may take some time to finish searching.) Note: please make sure the sensors are in wake-up mode 1.Heart rate monitor should be worn directly on skin just around the chest. 2.Cadence sensor should be installed on the crank arm of no-drive side, then rotate the crank arm. -
Page 13: Screen Display Indicator Icons
Screen display Indicator icons When sensors are connected, the indicator icons will be shown in the upper screen as below: Bike setting It is necessary to set the bike circumference if using ANT+ speed sensor. 13/48... - Page 14 Please enter the BIKE menu, choose the selected bike, set the circumference, save, and exit as below: Common wheel size and circumference: Wheel Size L (mm) Wheel Size L (mm) 12 × 1.75 27 × 1 2145 14 × 1.5 1020 27 ×...
-
Page 15: Acquiring Satellite Signals
650 x 25C 26 x 24 × 1 1753 1952 1(571) 24×3/4 Tubular 1785 650 × 35A 2090 24 × 1-1/8 1795 650 × 38A 2125 24 × 1-1/4 1905 650 × 38B 2105 24 × 1.75 1890 700 × 18C 2070 24 ×... - Page 16 Strong satellite signals Normal satellite signals No satellite signals( position not fixed) GPS closed In main menu, select left button to enter the data display page, the icon in upper left screen also shows the satellite signals intensity. GPS satellite signals intensity When motion detected, iGS620 will start count down automatically, wait till count down finished or select the middle button to start recording, or select the left button to cancel the recording.
-
Page 17: Pause And Continue
Under recording mode, the icon in upper right screen beside the battery icon will show recording status too. Recording status Pause and continue When you stop moving, , iGS620 will detect and pause the recording automatically. The icon will shift between record and pause accordingly. -
Page 18: Scroll Pages
Scroll pages Scroll page down/up In data display page, select right button to shift from selected pages. The red indicating bar at the bottom of the screen shows the current page. For more setting on pages, please refer to the Advanced Setting-MODE-Page Selection-Set Pages If you want to analyze the data in one segment, select the middle button under recording mode to start laps, it will notice a new lap and show the riding time of last Lap. -
Page 19: Stop Recording
Stop recording Select the left button to end a ride, select the middle button to save the ride. When the ride is ended, the recording indicator icon on the upper right will disappear accordingly. Power off iGS620 under recording mode, will also save the riding data automatically. Reviewing your ride Check the activities under MEMORY menu as below: 19/48... -
Page 20: Activity Summary
Activity summary Choose an activity to check its activity summary. Button function under activity summary page: Left button: return to activities menu Middle button: enter the extended menu(Laps/Graph/Delete) Right button: page down Note: 1. The invalid data will be ignored without display, for example, there will be no heart rate or power data if you have not connect with heart rate sensor or power meter with iGS620 while cycling. - Page 21 2. There will be no data on Pwr Left%//Pwr Right%/L.TQ.Effect/R.TQ.Effect/L. Ped.Smooth./R. Ped.Smooth if the power meter you are using does not support these functions. 3. Data of Pwr NP Avg/Pwr TSS/Pwr IF/Pwr watts/kg/kilojoules/Pwr Left%//Pwr Right%/L.TQ.Effect/R.TQ.Effect/L. Ped.Smooth./R. Ped.Smooth will be only displayed on firmware V1.05 or above, firmware below V1.05 will be unavailable to display these data.
- Page 22 Summary chart: data curve, route diagram and altitude diagram.( as below picture) Graph of Heart rate zones: show the time of 5 heart rate zones( only supported in Firmware V1.05 or above) and the average and max heart rate. Graphic of power zones: show the time of 7 power zones ( only supported in Firmware V1.05 or above) and the NP and max power.
-
Page 23: Graph Of Heart Rate Zones
2. Route graph: show the route track, ride distance and moving time. 3. Altitude graph: show the altitude, elevation and average gradient. Graph of Heart rate zones 23/48... - Page 24 Graph of heart rate zones is added in data display page, it can be turn on or off in page setting menu. It shows the time of 5 heart rate zones and the average and max heart rate. Current heart rate will be marked out in color Black 24/48...
-
Page 25: Activity Upload
Activity upload To analyze the activities, please upload them into iGPSPORT App via BLE or data analysis website via USB cable. Upload via BLE Choose SENSORS in main menu, select Bluetooth, select middle button to open the Bluetooth, search iGS620 device through the installed application in smart phone, screen will show Connect once successfully connected, then you can use iGPSPORT app to upload activities. - Page 26 1) Power off iGS620. 2) Connect iGS620 to your computer via USB cable. 3) Select left button to enter connection mode, then battery icon will light up. 4) Computer will recognize iGS620 as a new disk, then copy the activity files in folder as below :\iGPSPORT\Activities\***.fit to computer.
-
Page 27: Advanced Setting
Advanced setting Customizing the data screens iGS620 support customized setting on data display pages, including page selection, display columns and data items. Page selection Choose MODE, select from Race Mode, Training mode and Indoor mode ( or the added new mode, ★... -
Page 28: Data Fields
Data Fields Please set the pages as below, select middle button to enter in, select right button to shift from 1- 10 columns, select middle button to confirm the setting. After set the data columns, select middle button to enter the data items setting. Select right button to move into the selected column, then set up the data items. - Page 29 Select right button till the cursor blink on Distance column, select middle button to enter Choose Group, select Other Functions, select Time of Day, select left button to save and exit. Data items supported for selection are as below: Group Data items Speed/Avg Speed Tot./Avg Speed Mov./Max Speed/Lap Speed /Pre Lap Speed...
-
Page 30: Auto Function
Altitude/Grade/VAM/ VAM 30s/Elevation(+)/Elevation(-)/Max Altitude/Min Altitude/ VAM+ Avg / VAM - Avg / VAM+ Max / VAM - Max/Avg Grade+/ Altitude Avg Grade - /Max Grade +/ Max Grade-/ Lap Elev +/ Pre Lap Elev + / Lap functions VAM+ / Pre Lap VAM+/Lap Grade +/ Pre Lap Grade + Time Tot. -
Page 31: Auto Pause
Note: when Auto Save function is on and GPS satellite signals are weak, iGS620 may start count down even device is in resting mode, using a speed sensor may help void this problem. Auto Pause When iGS620 is on recording and the Auto Pause function is on, device will auto pause when you stop riding. -
Page 32: Auto Lap
Auto Lap Under riding mode, you can choose Auto Lap function based on position or distance. Auto Lap location: Device will mark the lap by position(at a specific position) automatically. Auto Lap distance: device will mark the lap by distance( at a specific distance) automatically. Customize the distance as below: 32/48... -
Page 33: Auto Scroll
Auto Scroll You can use Auto Scroll Pages function to automatically cycle through all of the data display pages. 33/48... -
Page 34: Display Setting
Display setting Please set the Backlight Time, Night Backlight, Color Mode and Day Bright as below: Color Mode Set the device to display day(white screen with black font) or night(black screen with white font) colors. You can select the auto option to allow the device to set the day or night colors automatically based on the time of day. -
Page 35: Height Page
Note: you can only set the Day Bright for data display pages , the backlight of menu interfaces are default as 100% in day time. Height page When the height page is turned on, you can check the height of history routes in current lap. The height page can be turned on/off under the ride mode, you can also set the display area and items in height page under the MODE menu-Set Pages. -
Page 36: Choose Line
choose line Enter the device management interface, click on the road book, select the route from the button "recommend" or "My", and swipe left and click sending, send the route to the device automatically Location You can record and store the locations in the device. 36/48... -
Page 37: Road Map
Enter NAVIGATION-History Routes to open the activity list, select the wanted routes, device will show its GPS track, choose Navigation or Return, select middle button to enter the data display pages, select middle button to zoom in or zoom out. Note: the activities under MEMORY menu can be also opened by navigation: MEMORY-Saved Activity-Last Activity/All Activities/Historical-Map Road map... -
Page 38: Import Map From Usb
Import map from USB Navigation background map 1. Download the map file from our website 2. Connect iGS620 to computer via USB cable 3. Copy the map file(name the map file within 28 characters) into iGPSPORT/Navigation folder. 4. Disconnect iGS620 from computer. Note: 1. -
Page 39: Navi Setting
Navi Setting Customize Data-On /Off It will show 1-2 data items if choose on Set Page Set data items, same setting as the Set page under the Race Mode menu. Set up maps auto rotate Enter the APP device management interface, enter the navigation, and select "north up" or "automatic rotation"... -
Page 40: Training
Custom Data Off Custom Data On Route Elevation On Training Zones Take heat rate training zones setting for example: Enter SETTING-Zones-Hr Zone 40/48... -
Page 41: Set Alerts
Enter your Max HR, the zone values will update automatically; and you can also edit each value manually. The setting for Power Zone and Cadence Zone will be same as above. Set Alerts Select MODE-Training Mode/Race Mode-Set Alerts as below: 41/48... -
Page 42: More Setting
Take Heart Rate Alerts setting for example: You can set the Max and Min Heart Rate and turn on the alarm, when the heart rate is above or below the specific range of values, device will alert and notify you with message and sound. Same setting for set alarms for Time, Distance, Calorie, Cadence and Power. -
Page 43: Riding Mode
Riding Mode There are 3 default riding modes for selection: Race Mode, Training Mode and Indoor Mode. Select middle button to choose a mode(★ means the selected mode), You can also customize 5 more new modes by Add New+ Color Setting You can customize the color for each mode for distinguish easily. -
Page 44: Add New Bikes
Add New Bikes There are two default bikes: Bike 1/2, and iGS620 support adding 3 bikes more(★ means the selected Bike), when connecting with ANT+ sensors, the sensors’ ID will connect with selected bike automatically, and if shift into a new bike, sensors will connect with the new bike automatically. Power Saving Auto Functions Enter SETTING-System-Auto Functions... -
Page 45: Other Functions
Power Save Smart means device will shift from on or off automatically based on the reality of usage. It is suggested to set GPS as Power Save On/Smart to lengthen the battery working time. Note: GPS speed and accuracy may fluctuate lightly under GPS Power Save On mode. Other Functions Manually Pause Enter SETTING-Other Functions-Lap function-Yes to set Manually Pause. -
Page 46: Auto-Upgraded Firmware
auto-upgraded firmware The device connects with Bluetooth and WIFI, enters "firmware detection" from the device management interface, and APP decides whether the device needs to be updated. If there is a new firmware, it can click the button and update itself. Other setting For more customized settings, you will find them during your usage. -
Page 47: Igpsport App Download
2) iGS620 support charging during working.( first power on, then charge) 3) Do not overstretch the USB plug for keeping waterproof and dust-proof. iGPSPORT App Download Scan below QR code( or search in Google play / Apple store) to download iGPSPORT App Android Android Smart Phone Requirements: Android 5.0 or above, built-in Bluetooth 4.0... -
Page 48: Contact Us
We reserve the right to change or improve our products and to make changes in the content of this manual without obligation to notify any person or organization of such changes or improvements. All rights reserved by Wuhan Qiwu Technology Company, Ltd. 48/48...
Need help?
Do you have a question about the iGPSPORT iGS620 and is the answer not in the manual?
Questions and answers