
Related Manuals for Seiki SC-1070AU9FLCO


Summary of Contents for Seiki SC-1070AU9FLCO
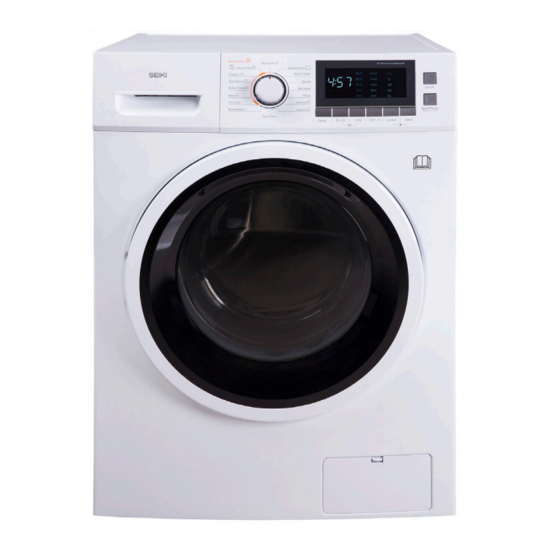
- Page 1 10KG/7KG FRONT LOAD WASHER/DRYER COMBO SC-1070AU9FLCO INSTRUCTION MANUAL Please read this manual carefully before using, and keep it for future reference.
-
Page 3: Table Of Contents
CONTENTS General Safety Product Overview Getting Started Levelling the appliance Connecting the water inlet hose Connecting the Drain Hose Instructions Operations Cleaning and Maintenance FAQs Specifications Customer Helpline... -
Page 4: General Safety
GENERAL SAFETY IMPORTANT INFORMATION Read this manual thoroughly before you start using the Front Load Washing Machine. The safety precautions instructions reduces the risk of fire, electric shock and injury when correctly complied to. Please follow all instructions and take notice of all warnings. Pay close attention to messages that follow this safety alert symbol or the words DANGER, WARNING or CAUTION. - Page 5 GENERAL SAFETY INSTRUCTIONS (Cont.) To reduce risk of fire, electric shock or injury, always follow these basic precautions and accident prevention measures when using this appliance, including the below: NOTE: This appliance should be installed by an authorised technician else warranty will be void.
- Page 6 GENERAL SAFETY INSTRUCTIONS (Cont.) USAGE CONDITIONS AND RESTRICTIONS • Supervision over children is to ensure that they do not play with the appliance. Never allow them to use, play with or crawl inside the appliance. Cleaning and maintenance must not be done by children. •...
- Page 7 GENERAL SAFETY INSTRUCTIONS (Cont.) • The only part that can be changed is the filter, other than this nothing else in the dryer contains user serviceable parts. Do not open, disasseble or try to repair the appliance yourself. Only have this appliance serviced by a qualified technician. •...
- Page 8 GENERAL SAFETY INSTRUCTIONS (Cont.) CAUTION • Do not use the tumble dryer if industrial chemicals have been used for cleaning. • Do not dry unwashed items in the dryer. • Do not allow lint to accumulate around the tumble dryer. Clean the Lint Trap and filter after every use.
-
Page 9: Product Overview
PRODUCT OVERVIEW Top Cover Water Supply Hose Control Panel Power Cord Supply Detergent Dispenser Drum Door Drain Hose Service Filter Accessories Transport Hole Supply Hose Plug Cold Water... - Page 10 PRODUCT OVERVIEW (Cont.) CONTROL PANEL On/Off button: Product is switched on or off Start/Pause button: Press the button to start or pause the washing cycle. Options: This allows you to select an additional function and will light when selected. Programs: Available according to the laundry type. LED Screen display: The display shows the settings, estimated time remaining, options, and status messages for your washer.
- Page 11 OPERATIONS Pre Wash The Prewash function can get an extra wash before main wash,it is suitable for washing the dust rises to surface of the clothes;You need to put detergent into the Case (I) when select it. Extra Rinse The laundry will undergo extra rinse once after you select it. Speed Wash The function can decrease the washing time.
- Page 12 OPERATIONS (Cont.) Other Functions My Cycle Reload This operation can be executed during the washing progress. When the drum is still rolling and there is large amount of water with high temperature in the drum. The state is unsafe and the door cannot be opened forcefully. To press [Start/Pause] for 3 sec.
- Page 13 OPERATIONS (Cont.) Child Lock To avoid mis-operation by children. CAUTION Press the two button 3sec. also to be released the function. • The “Child Lock” will lock all buttons except [ On/Off ]. • Cut off the power supply , the kid’s protection is to be released. •...
- Page 14 OPERATIONS (Cont.) Drying hints • Clothes could be dried after spinning • To ensure quality dry the textiles,please classify them according to their kinds and the drying temperature. • Synthetic should be set the proper drying time . • If you want to iron the clothes after drying,please put them for a while. Clothes not suitable for drying •...
-
Page 15: Getting Started
GETTING STARTED Before installing your appliance, read all safety instructions in this manual, especially the sections on electrical safety and installation. UNPACKING • When unpacking the appliance, be sure to keep all the packaging materials until you have made sure your new appliance is undamaged and in good working order. -
Page 16: Levelling The Appliance
GETTING STARTED (Cont.) LEVELLING THE APPLIANCE IMPORTANT! Make sure to level the appliance carefully with a spirit level to ensure the most accurate levelling of the appliance. This is a must if your floor in unbalanced to level the washing machine. •... -
Page 17: Connecting The Water Inlet Hose
GETTING STARTED (Cont.) CONNECTING THE WATER INLET HOSE IMPORTANT! To prevent leakage or water damage please follow the below instructions. Do not kink, crush, modify or sever the water inlet hose. Minimum Inlet Water Pressure: 0.05MPa/Maximum Inlet Water Pressure: 1MPa Be sure to only use new hose sets when connecting the washing machine. -
Page 18: Connecting The Drain Hose
GETTING STARTED (Cont.) CONNECTING THE DRAIN HOSE Do not kink or protract the drain hose. Position the drain hose correctly otherwise damage will result in water leakage. There are two ways to place the end of drain hose: 1. Put it through the water trough. 2. - Page 19 GETTING STARTED (Cont.) Electrical connection • As the maximum current through the unit is 10A when you are using its heating function, please make sure the power supply system (current, power voltage and wire) at your home can meet the normal loading requirements of the electrical appliances. •...
-
Page 20: Instructions
INSTRUCTIONS BEFORE FIRST USE • Before any first wash make sure everything is installed correctly. Make sure to do one wash with no items inside to clean out the tube before your first loaded wash. After the above steps have been completed, In a few simple steps shown below you can select the type of wash you want and get started. - Page 21 INSTRUCTIONS (Cont.) • As for the agglomerated or ropy detergent or additive, before they are poured the detergent box, it is suggested to use some water for dilution to prevent inlet of detergent box from being blocked and overflowing while filling water. •...
- Page 22 INSTRUCTIONS (Cont.) WASH CARE SYMBOLS When choosing a wash program, check for any labels on your clothes and follow the instructions. below are some commonly used symbols. DETERGENT DISPENSER Only use low-subsiding detergents and clothing care preparations that are for use in a front load washing machine.
- Page 23 INSTRUCTIONS (Cont.) WASHING PROGRAMS TABLE Speed: the highest speed; Other as the default. • Half load for 10.0Kg machine: 7Kg. • “Cotton ECO 60°C ” is the standard washing programs to which the information in the label and the fiche relates, Energy test program: Cotton ECO 60°C and they are suitable to clean normally soiled cotton laundry and that they are the most efficient programmes in terms of combined energy and water consumptions for washing that type of cotton laundry, that the actual water temperature may differ from the declared...
-
Page 24: Operations
OPERATIONS PROGRAMS Select the desired programs according to the clothes that are being washed. PROGRAMS Cotton Hard-wearing textiles, heat-resistant textiles made of cotton or linen. Synthetic Wash synthetic articles such as shirts, coats, etc... While washing knitting textiles, detergent quantity should be reduced as it can easily form bubbles. - Page 25 OPERATIONS (Cont.) MY CYCLE Save your most frequently used washing cycle as a favourite. To do this: 1. Press and hold Speed/Temp for 3 seconds while your desired cycle is in progress. 2. When starting a load of washing, Turn the dial to “My Wash” then “Start/Pause” to begin. CHILD SAFETY LOCK: Press and hold “Delay”...
-
Page 26: Cleaning And Maintenance
CLEANING AND MAINTENANCE WARNING: • Before starting maintenance, ensure that the appliance is unplugged and close the tap. CLEANING THE CABINET Proper maintenance on the washing machine can extend its working life. The surface can be cleaned with diluted non-abrasive neutral detergents when necessary. If there is any water overflow, use a wet cloth to wipe it off immediately. - Page 27 CLEANING AND MAINTENANCE (Cont.) CLEANING THE INLET FILTER Washing the filter in the tap Close the tap Remove the water supply hose from the tap Clean the filter Reconnect the water supply hose Washing the filter in the washing machine Screw off the inlet pipe from the back of appliance Pull out the filter with long nose pliers and reinstall after being washed Use the brush to clean the filter...
- Page 28 CLEANING AND MAINTENANCE (Cont.) CLEANING THE DETERGENT DISPENSER 1. Press down the arrow location on softener cover inside the dispenser drawer. 2. Lift the clip up and take out softener cover and wash all grooves with water. 3. Restore the softener cover and push the drawer into position. Pull out the dispenser Clean the dispenser Clean inside the recess...
-
Page 29: Faqs
FAQs Problem Possible Cause Solution Washing Door is not Restart after the door is closed, check if the machine is not clothes are stuck closed properly starting Washer’s Door can’t be Disconnect the power and restart safety protection opened the appliance is active The connection between inlet... - Page 30 CLEANING AND MAINTENANCE (Cont.) • Outlet hose • Wash and is blocked or straighten outlet Drain problem twisted hose. while washing • Drain pump is • Wash drain pump blocked filter • Restart the Water overflow washer • Please try again first or call the Others customer helpline...
-
Page 31: Specifications
SPECIFICATIONS Power Supply 220-240V~50Hz Standard Water Pressure 0.05MPa~1MPa Washing Capacity 10 KG Drying Capacity 7 KG Rated Power 1950W Drying Power 1300W Max. Current Max Spin Speed 1400 RPM Dimensions 595 (w) x 595 (d) x 850 (h) mm Weight: Net: 76 kg / Gross: 82 kg... - Page 32 CUSTOMER HELPLINE: info@ayonz.com DISTRIBUTED BY: Ayonz Pty Ltd...
Need help?
Do you have a question about the SC-1070AU9FLCO and is the answer not in the manual?
Questions and answers