
Related Manuals for Seiki SC-7000AU7TLW


Summary of Contents for Seiki SC-7000AU7TLW
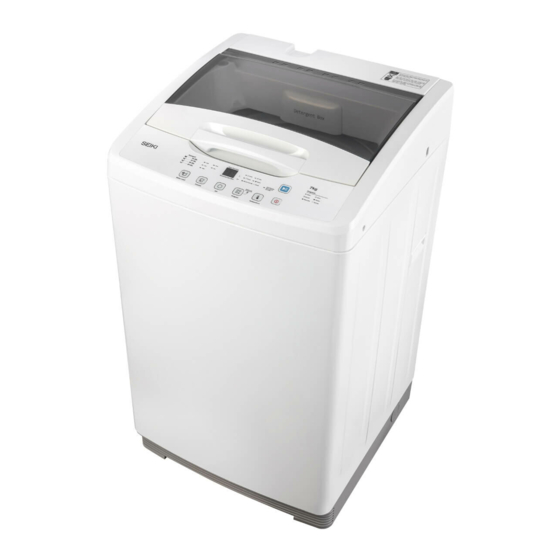
- Page 1 TOP LOAD WASHING MACHINE SC-7000AU7TLW INSTRUCTION MANUAL Please read this manual carefully before using, and keep it for future reference.
-
Page 3: Table Of Contents
CONTENTS General Safety Product Overview Control Panel Getting Started Installing Bottom Cover Levelling the appliance Connecting the water inlet hose Connecting the Drain Hose Before First Use Operations Programs How to Use Delayed Washing Adding detergent to a delayed wash Hot / Cold / Warm Water Wash Setting the water level and other processes Set Different Water Levels... -
Page 4: General Safety
GENERAL SAFETY IMPORTANT INFORMATION Read this manual thoroughly before you start using the Top Load Washing Machine. The safety precautions instructions reduces the risk of fire, electric shock and injury when correctly complied to. Please follow all instructions and take notice of all warnings. Pay close attention to messages that follow this safety alert symbol or the words DANGER, WARNING or CAUTION. - Page 5 GENERAL SAFETY INSTRUCTIONS (Cont.) ELECTRICAL SAFETY • Voltage: Plug the appliance to a 230-240V ~ 50Hz, properly earthed power outlet, it must be in good working order. • Power connection: Do not use an adaptor or an extension cord. Plug the power plug directly into a separate power point that cannot be accidentally turned off, and that is easily accessible so you can switch it off if needed.
- Page 6 GENERAL SAFETY INSTRUCTIONS (Cont.) USAGE CONDITIONS AND RESTRICTIONS • Supervision over children is to ensure that they do not play with the appliance. Never allow them to use, play with or crawl inside the appliance. Cleaning and maintenance must not be done by children. •...
- Page 7 GENERAL SAFETY INSTRUCTIONS (Cont.) CLEANING AND MAINTENANCE • Before cleaning or maintenance, always unplug the appliance from the power socket. Make sure you pull by the plug, not the cord as this can damage the power cord and cause a hazard. •...
-
Page 8: Product Overview
PRODUCT OVERVIEW... -
Page 9: Control Panel
PRODUCT OVERVIEW (Cont.) CONTROL PANEL 1. DETERGENT These are indicators to show you how much detergent to use. 2. WASH Select the Process button below for the desired WASH process. PROGRAM (indicator light above process button indicates wash process). 3. WATER Choose the appropriate water level that matches your load size. -
Page 10: Getting Started
GETTING STARTED Before installing your appliance, read all safety instructions in this manual, especially the sections on electrical safety and installation. UNPACKING • When unpacking the appliance, be sure to keep all the packaging materials until you have made sure your new appliance is undamaged and in good working order. -
Page 11: Levelling The Appliance
GETTING STARTED (Cont.) LEVELLING THE APPLIANCE IMPORTANT! Make sure to level the appliance carefully with a spirit level to ensure the most accurate levelling of the appliance. This is a must if your floor in unbalanced to level the washing machine. •... -
Page 12: Connecting The Water Inlet Hose
GETTING STARTED (Cont.) CONNECTING THE WATER INLET HOSE IMPORTANT! To prevent leakage or water damage please follow the below instructions. Do not kink, crush, modify or sever the water inlet hose. • Connect the inlet pipe as indicated, there are two ways of connecting the inlet pipe. -
Page 13: Connecting The Drain Hose
GETTING STARTED (Cont.) CONNECTING THE DRAIN HOSE • Do not kink or protract the drain hose. Position the drain hose correctly other wise damage will result in water leakage. • The height of the water drain hose can be from 70 to 100cm. •... -
Page 14: Before First Use
INSTRUCTIONS BEFORE FIRST USE • Make sure the washing machine is completely level as to previous instructions on how to level your washing machine. • Make sure the water inlet hose is installed correctly. • Make sure that the washing machine is plugged into the power socket. •... - Page 15 INSTRUCTIONS (Cont.) • Make sure that the appliance is in a correct working temperature (0-40˚C). If the appliance is used under 0˚C the inlet valve and draining system may be damaged. • Make sure that all labels are checked on items if they can be washed. •...
- Page 16 INSTRUCTIONS (Cont.) WASH CARE SYMBOLS When choosing a wash program, check for any labels on your clothes and follow the instructions. below are some commonly used symbols.
-
Page 17: Operations
OPERATIONS PROGRAMS Select the desired programs according to the clothes that are being washed. *COTTON - is the standard washing programs to which the information in the energy efficiency label relates, and they are suitable to clean normal soiled cotton laundry and they are the most efficient programs in terms of energy and water consumption for washing that type of cotton laundry, the actual water temperature may differ from the declared cycle temperature. -
Page 18: How To Use
HOW TO USE Follow the below instructions on how to use the washing machine and the process involved. For this example, we will use the BLANKET program wash. Use this program for washing blankets or other bulky items. It will automatically select the highest water level, but you can adjust this manually down to a lower level according to the size of your bulky item(s). -
Page 19: Delayed Washing
HOW TO USE (Cont.) DELAYED WASHING This washing machine has a 0–24 hour delay start function which you can set to determine the time when the washing program will finish. NOTES: DELICATE This function is not available for the program. To avoid water leakage when using this function, make sure the water taps are open, the drain hose is properly installed and the washing load and detergent are properly prepared. -
Page 20: Hot / Cold / Warm Water Wash
HOW TO USE (Cont.) HOT / COLD / WARM WATER WASH This top load washing machine must be connected to both a cold and a hot water tap. With both hoses connected to a cold and hot water tap, you can set the washer to use either just cold water for a cold water wash, or just hot water for a hot water wash, or both hot and cold water for a warm water wash. -
Page 21: Others
OTHERS LOAD SENSOR (FUZZY CONTROL) This washing machine is equipped with a fuzzy logic function that will automatically detect the weight of your wash and choose the correct water level and wash and spin times for NORMAL HEAVY DUTY CUSTOM programs, and the correct water level for the QUICK programs. -
Page 22: Cleaning And Maintenance
CLEANING AND MAINTENANCE WARNING: • Before starting maintenance, ensure that the appliance is unplugged and close the tap. CLEANING THE CABINET Proper maintenance on the washing machine can extend its working life. The surface can be cleaned with diluted non-abrasive neutral detergents when necessary. If there is any water overflow, use a wet cloth to wipe it off immediately. - Page 23 CLEANING AND MAINTENANCE (Cont.)
- Page 24 CLEANING AND MAINTENANCE (Cont.) CLEANING THE DRAIN PUMP FILTER...
-
Page 25: Troubleshooting
TROUBLEHSOOTING... -
Page 26: Specifications
SPECIFICATIONS Power Supply 230-240V~50Hz Standard Water Pressure 0.03MPa~0.8MPa Washing Capacity Rated Input Power 400W Water Capacity Spin Speed 850 RPM 540 (w) x 562 (d) x 930 (h) mm - Dimensions (1240mm door open) Weight Net: 33 kg / Gross: 37 kg... -
Page 28: Customer Helpline
CUSTOMER HELPLINE: info@ayonz.com DISTRIBUTED BY: Ayonz Pty Ltd...
Need help?
Do you have a question about the SC-7000AU7TLW and is the answer not in the manual?
Questions and answers