Advertisement
Quick Links
CAUTION: READ
OPERATOR'S MANUAL
BEFORE USE
Visit www.hamiltonbeach
.com.tw for our complete line
of products and Use and Care
Guides – as well as delicious
recipes and tips.
www.hamiltonbeach
.com.tw
Hamilton Beach Brands, Inc.
4421 Waterfront Drive
Glen Allen, VA 23060 USA
840283801
11/17
Dicing Food Processor
English – Original Translation........... 2
................................................... 25
Advertisement

Related Manuals for Hamilton Beach Professional 70825-TW


Summary of Contents for Hamilton Beach Professional 70825-TW
- Page 1 CAUTION: READ OPERATOR’S MANUAL BEFORE USE Dicing Food Processor Visit www.hamiltonbeach .com.tw for our complete line of products and Use and Care Guides – as well as delicious recipes and tips. www.hamiltonbeach .com.tw Hamilton Beach Brands, Inc. 4421 Waterfront Drive Glen Allen, VA 23060 USA English –...
- Page 2 IMPORTANT SAFEGUARDS When using electrical appliances, basic safety precautions should always be followed to reduce the risk of fire, electric shock, and/or injury to persons, including the following: 1. Read all instructions. 12. Keep hands and utensils away from moving blade and disc 2.
- Page 3 23. Never use appliance for a longer period or with a larger 27. Do not use appliance for other than intended use. amount of ingredients other than that recommended by 28. CAUTION! In order to avoid a hazard due to unattended appliance manufacturer.
-
Page 4: Parts And Features
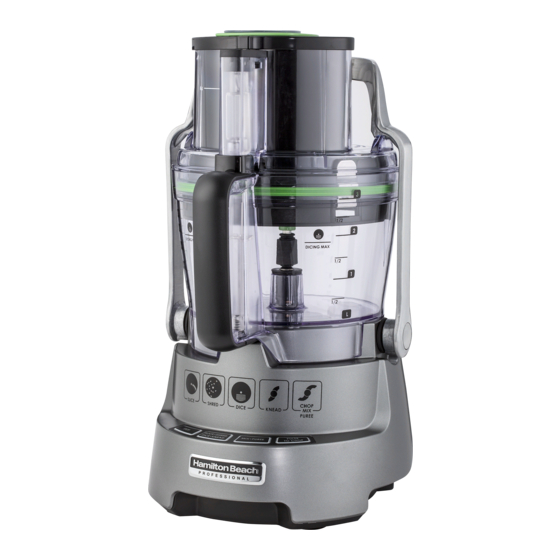
Parts and Features BEFORE FIRST USE: Unpack processor and remove protective covers from the blades and discs to prevent damage and scratches to work bowl. Note that the removable dicing grid will fall out of the dicing disc when turned upside down. Handle blades and discs carefully;... - Page 5 Storage Case, Parts, and Control Panel If the lights on the control panel are flashing, then the food processor is Dicing Assembly (3) not yet assembled correctly. Either the locking arm is not in place or the large food pusher is missing. When all parts are properly installed, the NOTE: The cutting disc and control panel lights will be lit continuously.
- Page 6 How to Use Dicing Assembly Laceration Hazard. w WARNING Handle blades carefully; they are very sharp. Press STOP and unplug before inserting or removing blades. Place work bowl on base with To insert the dicing assembly, lower the dicing disc onto the motor Secure four latches of the dicing handle facing forward.
- Page 7 NOTE: Dicing parts are color- How to Use Dicing Assembly coded green to remind you to (cont.) use the medium pusher when dicing and the green cleaning tool to clean out the grid. Press button. For best results use medium or small pusher. When finished, press STOP ( ) Remove lid from bowl.
- Page 8 How to Use w WARNING Laceration Hazard. Handle disc carefully; it is very sharp. Press STOP ( ) and unplug before inserting or removing blades. Adjustable Slicing Disc Place work bowl on base with handle facing forward. Adjust disc Carefully place disc onto motor shaft. Place lid on work bowl. to desired thickness by turning the adjustment post.
- Page 9 How to Use Adjustable Slicing Disc (cont.) Press button. NOTE: If the large pusher is removed, the last setting When finished, press STOP ( ) Remove lid. will be remembered. This setting will blink. To start slicing again, and unplug. Push locking arm back simply insert the large pusher.
- Page 10 How to Use Shredding Disc Laceration Hazard. w WARNING Handle disc carefully; it is very sharp. Press STOP ( ) and unplug before inserting or removing blades. Place work bowl on base with Carefully place disc onto motor shaft. Place lid on work bowl so the handle facing forward.
- Page 11 How to Use Shredding Disc (cont.) Push locking arm back to unsnap Press button. When finished, press STOP ( ) and unplug. and lower onto counter. Remove lid. Carefully remove blade from motor shaft using finger holes.
- Page 12 How to Use Chopping/Mixing Blade Laceration Hazard. w WARNING Handle blade carefully; it is very sharp. Press STOP ( ) and unplug before inserting or removing blades. Place work bowl on base with Carefully slide blade straight Place food to be chopped/mixed Place lid on work bowl so the handle facing forward.
- Page 13 How to Use Chopping/Mixing Blade (cont.) If the lights on the control panel are flashing, then the food processor is not assembled correctly. Either the locking arm is not in place or the large food pusher is missing. When all parts are properly installed, the control panel lights will be lit continuously.
-
Page 14: How To Use Dough Blade
How to Use Dough Blade Place work bowl on base with Carefully slide blade straight Place lid on work bowl so the handle facing forward. down onto the motor shaft. chute lines up with the handle. NOTE: Operate using only one blade or disc at a time. - Page 15 How to Use Dough Blade (cont.) If the lights on the control panel are flashing, then the food processor is not assembled correctly. Either the locking arm is not in place or the large food pusher is missing. When all parts are properly installed, the control panel lights will be lit continuously.
-
Page 16: Tips And Techniques
Tips and Techniques Processing Charts • For a more uniform consistency, • Do not puree or mash starchy When using attachments, do not process past the MAX LEVEL on the work bowl. start with pieces of food that vegetables like potatoes as are similar in size. -
Page 17: Care And Cleaning
Care and Cleaning w WARNING Electrical Shock Hazard. Disconnect power before cleaning. Do not immerse cord, plug, or base in water or any other liquid. w WARNING Laceration Hazard. Handle blades and discs carefully; they are very sharp. Wipe base, control panel, and NOTE: If food particles get trapped in the back of the food chute, cord with a damp cloth or place openings on sides of enclosure under running water to rinse... -
Page 18: Processing Times
Processing Times RECOMMENDED BLADE TYPE RECOMMENDED FOOD PROCESSING TIME RECOMMENDED AMOUNT Bread dough 1 1/2–2 minutes 3 cups (375 g) bread flour, 2 tablespoons (30 ml) oil, 1 cup (237 ml) water, 1 pkg (21 g) yeast Pizza dough 1 1/2–2 minutes 3 cups (360 g) all-purpose flour, 1 tsp (5 ml) sugar, 2 tablespoons (30 ml) oil, 1 cup (237 ml) water, 1 pkg (21 g) yeast, 1 tsp (5 ml) salt Chickpeas/hummus... - Page 19 Processing Times (cont.) RECOMMENDED DISC TYPE RECOMMENDED FOOD PROCESSING TIME RECOMMENDED AMOUNT Cabbage 5–10 seconds per wedge 1 wedge, approx. 100 g Carrots 5–10 seconds per carrot 2 large, approx. 140 g Hard cheese 5–10 seconds per block 1 block, approx. 140 g Potatoes 5–10 seconds per potato half 1 half, 75–80 g...
-
Page 20: Food Processing
Food Processing FOOD BLADE OR DISC PROCESS FOOD BLADE OR DISC PROCESS Nut Butters Chopping/Mixing Blade (5) Apples Adjustable Slicing Disc (1) Nuts Chopping/Mixing Blade (5) Dicing Assembly (3) Onions Adjustable Slicing Disc (1) Baby Foods Chopping/Mixing Blade (5) Chopping/Mixing Blade (5) Bread Dough Dough Blade (4) Dicing Assembly (3) -
Page 21: Troubleshooting
Troubleshooting PROBLEM PROBABLE CAUSE/SOLUTION Unit does not operate • Is the unit plugged in? Does the outlet work? on any speed or Pulse. • Is the lid latched in place? See “How to Use” sections. Place lid on work bowl, making sure to align the pour spout on the lid with the pour spout on the work bowl. - Page 22 Troubleshooting (cont.) PROBLEM PROBABLE CAUSE/SOLUTION Lid will not sit flush with the • Dicing assembly may not be properly installed. See “How to Use” section on page 6. work bowl. • Clips are not latched on dicing assembly. Remove lid. Latch the four metal clips on dicing assembly. Place lid on work bowl and move locking arm up and snapped into place.
-
Page 23: Limited Five-Year Warranty
Limited Five-Year Warranty This warranty applies to products purchased and used in Taiwan and will not be re-issued. This product is warranted to be free from defects in material and workmanship for a period of five (5) years from the date of original purchase or 9,500 cycles. During this period, your exclusive remedy is repair or replacement of this product or any component found to be defective, at our option;... - Page 24 Notes...
- Page 27 : +886-2995-9258 : shop@Quoview.com...
- Page 31 1/32” 1/4” 0.8...
- Page 46 Name and Content of Hazardous Substances in Product Restricted substances and their chemical symbols Unit Hexavalent Polybrominated Polybrominated chromium biphenyls diphenyl ethers (Pb) (Hg) (Cd) (PBB) (PBDE) / Motor – PCB / Power Supply PCB – – PCB / Control PCB –...
- Page 47 Type/ Capacity/ Rating/ Model/ FP28 3000 110 V~ 60 Hz 600 W 70825-TW Dist.: Hamilton Beach Brands, Inc., Glen Allen, VA 23060 U.S.A. © 2017 Hamilton Beach Brands, Inc. USA 1-800-851-8900...
- Page 48 +886-2995-9258 shop@Quoview.com 24158 646-1 www.hamiltonbeach.com.tw ________________________________ ____________________________________ ____________________________________ ____________________________________ ____________________________________ ________________________________ 840283801 11/17...
Need help?
Do you have a question about the 70825-TW and is the answer not in the manual?
Questions and answers