Table of Contents
Advertisement
Available languages
Available languages
Quick Links
STYLE SELECTIONS and logo design
are trademarks or registered trademarks
of LF, LLC. All rights reserved.
Serial Number
Questions, problems, missing parts? Before returning to your retailer, call our customer
service department at 1-877-888-8225, 8 a.m. - 8 p.m., EST, Monday - Sunday. You could
also contact us at partsplus@lowes.com or visit www.lowespartsplus.com.
AS21312
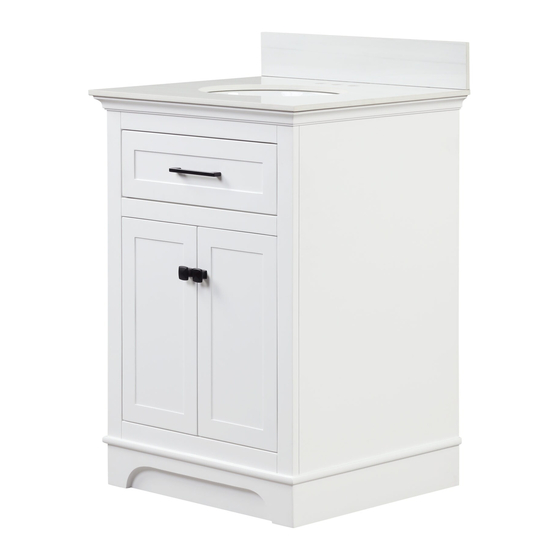
VANITY WITH TOP AND MIRROR
Purchase Date
1
ITEM #4063178
MODEL #BV-8533
ATTACH YOUR RECEIPT HERE
Advertisement
Chapters
Table of Contents

Subscribe to Our Youtube Channel
Related Manuals for Style selections BV-8533 4063178


Summary of Contents for Style selections BV-8533 4063178
- Page 1 ITEM #4063178 VANITY WITH TOP AND MIRROR MODEL #BV-8533 STYLE SELECTIONS and logo design are trademarks or registered trademarks of LF, LLC. All rights reserved. ATTACH YOUR RECEIPT HERE Serial Number Purchase Date Questions, problems, missing parts? Before returning to your retailer, call our customer service department at 1-877-888-8225, 8 a.m.
-
Page 2: Table Of Contents
TABLE OF CONTENTS Package Contents ..........................3 Hardware Contents ..........................4 Safety Information ..........................4 Warning ..............................4 Preparation .............................4 Tools Required (Not included) .......................5 Installation Instructions ...........................5 Care and Maintenance ..........................8 Warranty ..............................8 Replacement Parts List ........................9... -
Page 3: Package Contents
PACKAGE CONTENTS Carefully check all components for damages and/or missing parts prior to installation. If there are any damages or if you are missing parts, do not proceed with the installation. Report damages and/or missing parts immediately to the manufacturer. Do not dispose of packaging before you are satisfied with your new utility sink. -
Page 4: Hardware Contents
HARDWARE CONTENTS Note: Hardware not shown to size. Touch-Up Pen Wall Anchor Screw Optional Nickel Pull Optional Nickel Knob Qty: 2 Qty: 2 Qty: 1 Qty: 1 Qty: 2 SAFETY INFORMATION Please read and understand this entire manual before attempting to assemble, operate or install the product. -
Page 5: Tools Required (Not Included)
TOOLS REQUIRED (NOT INCLUDED) Phillips Screwdriver Utility Knife Sealant Power Drill With Drill Bit Measuring Tape Hammer INSTALLATION INSTRUCTIONS Step 1: Vanity Drawer Removal 1a. Open the preassembled drawer as far as possible. Simultaneously press the plastic cards on the bottom of drawer left side and right side inward. - Page 6 INSTALLATION INSTRUCTIONS Step 2: Hinge Adjustable for Door Alignment 2. If the doors preassembled to vanity (A) require adjustment, follow the below options as needed: To adjust door up or down, loosen screws (a), adjust door and retighten screws. To adjust door left and right, turn screw (b) in or out.
- Page 7 INSTALLATION INSTRUCTIONS Step 4: Backsplash Installation 4. To mount the backsplash (C) to the wall, apply a thin bead of silicone compound (not included) to the unpolished back side and bottom of the backsplash (C). Position backsplash (C) as shown onto vanity top (B) and against the wall.
-
Page 8: Care And Maintenance
INSTALLATION INSTRUCTIONS Optional Step 6 : Replace hardwares 6. Open the doors and drawer, remove the preassembled screws, change the optioanal nickel pulls and relock the srews. CARE AND MAINTENANCE • Dust the vanity regularly with a soft, non-lint producing cloth or household dusting product. •... -
Page 9: Replacement Parts List
REPLACEMENT PARTS LIST For replacement parts, call our customer service department at 1-877-888-8225, 8 a.m. - 8 p.m., EST, Monday - Sunday. You could also contact us at partsplus@lowes.com or visit www.lowespartsplus.com. Printed in Vietnam... - Page 10 ARTÍCULO #4063178 TOCADOR CON PARTE SUPERIOR Y ESPEJO STYLE SELECTIONS y el diseño del logotipo MODELO #BV-8533 son marcas comerciales o marcas registradas de LF, LLC. Todos los derechos reservados. ADJUNTE SU RECIBO AQUÍ Fecha de compra Número de serie ¿Preguntas, problemas, piezas faltantes? Antes de volver a la tienda, llame a nuestro...
- Page 11 ÍNDICE Contenido del paquete ........................12 Aditamentos ............................13 Información de seguridad ........................13 Advertencia ............................13 Preparación ............................13 Herramientas necesarias (no se incluyen) ...................14 Instrucciones de instalacion ........................14 Cuidado y mantenimiento ........................16 Garantía ..............................16 Lista de piezas de repuesto ........................18...
-
Page 12: Contenido Del Paquete
CONTENIDO DEL PAQUETE Verifique detenidamente que ninguno de los componentes esté dañado o que no falte ninguna pieza antes de la instalación. Si hay piezas dañadas o faltantes, no continúe con la instalación. Informe al fabricante de inmediato sobre los daños y las piezas faltantes. No elimine el empaque antes de estar satisfecho con su nuevo lavamanos para uso general. -
Page 13: Aditamentos
ADITAMENTOS Nota: los aditamentos no se muestran en tamaño real. Aplicador Tirador de Ancla de Perilla de Tornillo níquel Cant: 2 expansión de retoque níquel opcional opcional para pared Cant: 1 Cant: 1 Cant: 2 Cant: 2 INFORMACIÓN DE SEGURIDAD Lea y comprenda completamente este manual antes de intentar ensamblar, usar o instalar el producto. -
Page 14: Herramientas Necesarias (No Se Incluyen)
HERRAMIENTAS NECESARIAS (NO SE INCLUYEN) Destornillador Phillips Cuchillo para uso general Sellador Taladro eléctrico con broca Cinta métrica Martillo INSTRUCCIONES DE INSTALACIÓN Paso 1: retiro de la gaveta del tocador 1a. Abra la gaveta preensamblada lo máximo que sea posible. Presione simultáneamente las tarjetas de plástico en la parte inferior de la gaveta del lado izquierdo y del lado derecho hacia adentro. - Page 15 INSTRUCCIONES DE INSTALACIÓN Paso 2: bisagra ajustable para alineación de la puerta 2. Si las puertas preensambladas al tocador (A) requieren ajuste, siga las opciones a continuación, según sea necesario: para ajustar las puertas hacia arriba o hacia abajo, afloje los tornillos (a), ajuste la puerta y vuelva a apretar los tornillos.
- Page 16 INSTRUCCIONES DE INSTALACIÓN Paso 4: Instalación del protector contra salpicaduras 4. Para montar el protector contra salpicaduras (C) en la pared, aplique un cordón delgado de compuesto de silicona (no se incluye) en la parte posterior sin pulir y en la parte inferior del protector contra salpicaduras (C).
-
Page 17: Cuidado Y Mantenimiento
INSTRUCCIONES DE INSTALACIÓN Paso 6 (opcional) : reemplazo de los aditamentos 6. Abra las puertas y la gaveta, retire los tornillos preensamblados, cambie los tiradores de níquel opcionales y vuelva a fijar los tornillos. CUIDADO Y MANTENIMIENTO • Limpie el tocador regularmente con un paño suave que no deje pelusas o con un producto de limpieza doméstico. -
Page 18: Lista De Piezas De Repuesto
LISTA DE PIEZAS DE REPUESTO Para obtener piezas de repuesto, llame a nuestro Departamento de Servicio al Cliente al 1-877-888- 8225, de lunes a domingo de 8 a.m. a 8 p.m., hora estándar del Este. También puede ponerse en contacto con nosotros a través de partsplus@lowes.com o visitar www.lowespartsplus.com. Impreso en Vietnam...
Need help?
Do you have a question about the BV-8533 4063178 and is the answer not in the manual?
Questions and answers