Advertisement
Quick Links
INSTALLATION & OPERATION
GSM Retail Australia Pty Ltd ABN: 53 007 582 475
For Warranty and technical queries: 1300 373 199 Aust OR 0800 764 912 NZ www.belliniappliances.com.au
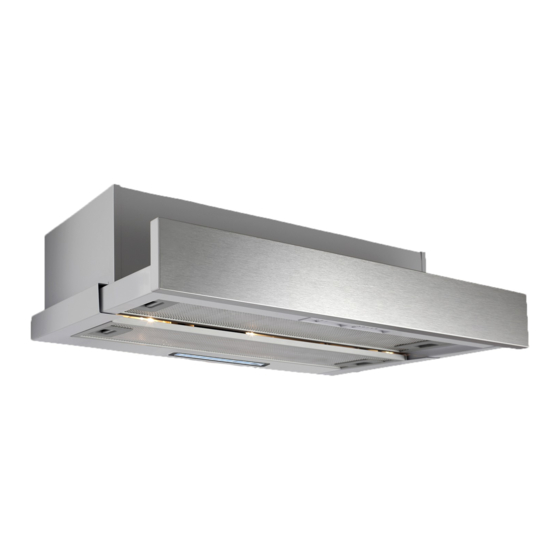
Model: BR603FRW2-F FN0195629 60CM Recirculating Slide Out Rangehood
INSTRUCTIONS
60cm Recirculating Slide Out
Rangehood
Model No
BR603FRW2
BR603FRW2-F
FINELINE:0195629
V3 Sep20
Advertisement

Related Manuals for GSM Bellini BR603FRW2

Summary of Contents for GSM Bellini BR603FRW2
- Page 1 Model No BR603FRW2 BR603FRW2-F FINELINE:0195629 V3 Sep20 GSM Retail Australia Pty Ltd ABN: 53 007 582 475 For Warranty and technical queries: 1300 373 199 Aust OR 0800 764 912 NZ www.belliniappliances.com.au Model: BR603FRW2-F FN0195629 60CM Recirculating Slide Out Rangehood...
- Page 2 For all warranty and technical queries please contact 1300 373 199 GSM Retail Australia Pty Ltd ABN: 53 007 582 475 For Warranty and technical queries: 1300 373 199 Aust OR 0800 764 912 NZ www.belliniappliances.com.au Model: BR603FRW2-F FN0195629 60CM Recirculating Slide Out Rangehood...
-
Page 3: Table Of Contents
Start using your Range hood-----------------10 Maintenance and cleaning -------------------11 Warranty------------------------------------------12 GSM Retail Australia Pty Ltd ABN: 53 007 582 475 For Warranty and technical queries: 1300 373 199 Aust OR 0800 764 912 NZ www.belliniappliances.com.au Model: BR603FRW2-F FN0195629 60CM Recirculating Slide Out Rangehood... -
Page 4: Safety Instructions
Safety Instructions This manual explains the proper installation and use of your range hood, please read it carefully before using even if you are familiar with the product. The manual should be kept in a safe place for future reference. In case of failure, only the Authorised Technical Servicemay repair this range hood. - Page 5 GSM Retail Australia Pty Ltd ABN: 53 007 582 475 For Warranty and technical queries: 1300 373 199 Aust OR 0508123108 NZ www.belliniappliances.com.au Model: BR603FRW2-F FINELINE:5102733 60CM Recirculating Slide Out Rangehood...
-
Page 6: Product Description
Product Description Accessories bag Description Picture Installation & User Manual Metal plate L bracket Outlet( diameter 120mm) Dry wall anchors plugs Screw (M4x10mm) Screw(ST4x30mm) Screw (ST3x12mm)* Washer* Screw (M4x35mm)* *Used in installation method B Component list: Technical data: 1. L bracket(used installation A method) 2. -
Page 7: Operation
Operation Mode Your range hood can be operated in two optional modes, choose the m ode suitable for your kitchen before installation. Air Extraction For air extraction mode, a ducting kit is required, the air is drawn in and cleaned by the grease filters and directed outside. -
Page 8: Installation
Installation BR603FRW2, BR603FRW2-F Installation: Warning: Check that the installatio n complies with the standards of local building, gas and electrical authorities. Before connecting to the mains supply ensure the mains vo ltage corresponds to the voltage on the applian ce rating plate inside the range hood. - Page 9 A: Install against wall Using a spirit level mark a vertical centre line on the wall where the hood is to be positioned, and a horizontal line where the hood base will be. NOTE: The distance from the horizontal line to an electrical cooktop underneath must be minimum of 600mm &...
- Page 10 Fit the outlet and flexible exhaust pipe on top of range hood body. Hang on the range hood, fasten 2pcs Screw(ST4x30mm) and L bracket onto two higher holes(with distance to horizontal line 516mm), and then fasten 2pcs Screw (M4x10mm) and L bracket onto body. Warning: Failure to install the screws or fixing device in accordance with these instructions may result in electrical hazards B: Install into cabinet...
- Page 11 Fit the outlet on top of range hood body. Install the range hood onto the bottom of cabinet board, fasten 6pcs Screw (M4x35mm) with washers. If gap is there between range hood back and cabinet end, fasten 2pcs Screw (ST3x12mm) and metal plate onto body to fill it.
-
Page 12: Start Using Your Range Hood
Start Using Your Range Hood ○ ○ Speed –select speed to suit cooking conditions Lamp – Turn on/off light “O” – to switch off motor “O” – to switch off light Low( )– light frying/boiling “ ” – to switch on light Medium( ) –... -
Page 13: Maintenance And Cleaning
Maintenance and cleaning Caution: GREASE MESH FILTERS • Before maintenance or cleaning is carried out, the The mesh filters can be cleaned either by hand or in range hood should be disconnected from the main the dishwasher. After cleaning ensure that the filters power supply. -
Page 14: Warranty
1.1.1 Australian Consumer Law means the law as set out in Schedule 2 of the Competition and Consumer Act 2010; 1.1.2 Company means GSM Retail Australia Pty Ltd ABN 53 007 682 475 of 142-144 Fullarton Road, Rose Park SA 5067. Telephone 1300 373 199. Email admin@gsmretailaust.com.au... - Page 15 GSM Retail Australia Pty Ltd reserves the right to discontinue items, modify designs and change specifications without incurring obligation.
Need help?
Do you have a question about the Bellini BR603FRW2 and is the answer not in the manual?
Questions and answers