Table of Contents
Advertisement
Available languages
Available languages
Advertisement
Chapters
Table of Contents

Related Manuals for Cooke & Lewis CLIND1BK-C


Summary of Contents for Cooke & Lewis CLIND1BK-C
- Page 1 CLIND1BK-C Barcode 5052931055784...
- Page 2 [01] x 1 [03] x 2 [02] x 2...
- Page 3 CLIND1BK-C Induction Hob Table de cuisson à induction Installation...
-
Page 4: Table Of Contents
Let's get started... started... Getting Before you start Safety more detail... Product functions Operation Care and maintenance Troubleshooting Recycling and disposal Technical and legal information Guarantee CE Declaration of conformity Appendix Installation... -
Page 5: Getting Started
Before you start Safety... - Page 6 Before you start Before you start To avoid the risks that are always present when you use an electrical appliance it is important that this appliance is installed correctly and that you read the safety instructions carefully to avoid misuse and hazards. Please keep this instruction booklet for future reference and pass it on to any future owners.
- Page 7 Safety These instructions are for your safety. Please read through them thoroughly prior to installation and retain them for future reference. • All installation work must be carried out by a competent person or qualified electrician. • This appliance must be installed correctly by a suitably qualified person, strictly following the manufacturer’s instructions.
- Page 8 Safety We also recommend that great care be taken during use and cleaning. Read the cleaning and maintenance sections for this appliance carefully. A steam cleaner is not to be used. The appliance is not intended to be operated by means of external timer or separated remote-control system.
-
Page 9: In More Detail
more detail... Product functions Operation Care and maintenance Troubleshooting Recycling and disposal Technical and legal information Guarantee CE Declaration of conformity... -
Page 10: Product Functions
Operation Product functions > The induction hob caters for all kind of cooking, with its electromagnetic cooking zones and its electronic touch controls and multi-functions, making it the ideal choice for the modern family. > The induction hob is extremely user-friendly, durable and safe. Working principle iron pot magnetic circuit... - Page 11 Operation Detection of small or non-magnetic items When an unsuitably sized or non-magnetic pan (e.g. aluminium) or some other small item (e.g. knife, fork, key) has been left on the hob, the hob switches automatically to standby one minute later. Residual heat indicator When the hob has been operating for some time, there will be some residual heat.
-
Page 12: Operation
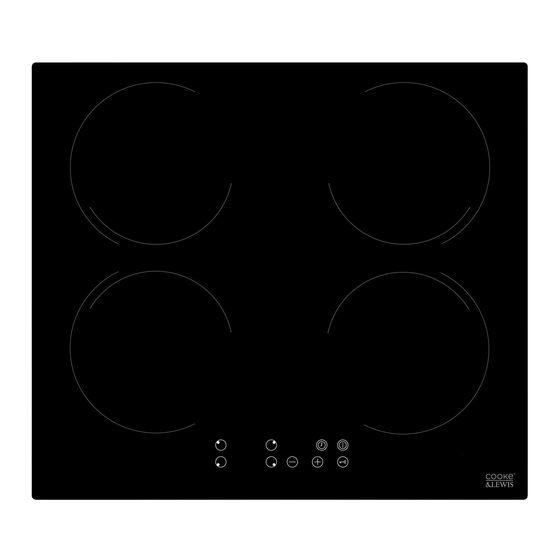
Operation Operation Heating zone selection Key Timer key ON/OFF Power regulating key Child lock Reference Description Heating zone selection key Power regulating key (reduce) Power regulating key (increase) Child lock ON / OFF Timer key Preparation before use > When the power is switched on, the buzzer will sound once and all the indicators will switch on for one second and then switch off. - Page 13 Operation Operating instructions Caution • When the ON/OFF key (E) is pressed, the induction hob returns to standby mode if no other operation is carried out within one minute. • The four zones can take a maximum power of 3000 W. Consequently, the hob automatically reduces the maximum output power by allowing a maximum sum of total power levels of 12.
- Page 14 Operation Timer function 1. Press the timer key and the indicator will start to flash. 2. Then set the time for between 1 and 99 minutes by pressing the "+" and "-" keys. 3. Pressing the "+" key once increases the time by one minute; pressing the "-"...
- Page 15 Operation Safety mode (Child lock) To ensure the safety of children, the induction hob is fitted with an interlock device. To lock: 1. Hold down the "Lock" ; the hob then switches to "Lock" mode. 2. The timer displays "LO" and the rest of the keys are disabled except the "ON/OFF"...
- Page 16 Oil Frying Pan Stainless steel pot Iron pan Enamel cooking Iron plate utensil You may have a number of different cooking vessels This induction hob can identify a variety of cooking vessels, which you can test by one of the following methods: 1.
-
Page 17: Care And Maintenance
Care and maintenance Warning Always switch off the electricity supply before performing maintenance work. In the event of a fault, contact an official distributor or authorised dealer. Care and maintenance Damaged power cables should be replaced by a competent person or qualified electrician. For domestic use only. - Page 18 Care and maintenance Do not leave metal objects, such as knives, forks, spoons and lids on the hob as they may get hot. Do not store detergents or flammable materials beneath the hob. Care and maintenance Appliance cleanliness Caution • The glass surface is tough but not unbreakable. •...
-
Page 19: Troubleshooting
Care and maintenance Troubleshooting The following circumstances may not be a problem. Do not contact the customer services until the problem has been confirmed. If your appliance is still not functioning properly after making the checks below, please contact the customer services. Potential failure mode Potential cause Corrective action... -
Page 20: Recycling And Disposal
Care and maintenance Recycling and disposal Environmental Protection Waste electrical products should not be disposed of with household waste. Please recycle where facilities exist. Check with your Local Authority or retailer for recycling advice. The symbol on the product or its packaging indicates that this product cannot be treated as normal household waste. -
Page 21: Technical And Legal Information
Technical and legal information Power supply V / Hz 220-240 V~/50 Hz External dimensions 590 x 55 x 520 (WxHxD) Net weight Legal information The Manufacturer declines all liability for damage caused to persons and objects due to incorrect or improper installation of the appliance. - Page 22 Technical and legal information All installation work must be carried out by a competent person or qualified electrician. Before connecting the mains supply ensure that the mains voltage corresponds to the voltage on the rating plate inside the cooker hood. Warning: THIS APPLIANCE MUST BE EARTHED.
- Page 23 Technical and legal information Electrical Requirements Any permanent electrical installation must comply with the latest I.E.E. Regulations and local electricity company regulations. For your own safety a qualified electrician or contractor who is on the roll of the National Inspection Council for Electrical Installation Contracting (NICEIC) should undertake the electrical installation.
-
Page 24: Guarantee
Technical and legal information Manufacturer's Guarantee This appliance is covered by a full manufacturer’s 24 month parts and labour guarantee and covers all parts and labour costs associated with the repair of the appliance in a domestic environment. We will repair any defect that arises due to faulty materials or workmanship and use genuine manufacturers parts. - Page 25 Technical and legal information Exclusions to the guarantee (continued) Claims arising from non-domestic use or commercial environment. Any gas appliance not fitted by a gas safe qualified installer. If no fault is found then GAA reserves the right to charge for the call out at the going rate of £55.00 plus VAT.
-
Page 26: Ce Declaration Of Conformity
We herebyc ertify that them entioned accessoryc ompliesw itht he essentialr equirements of theE uropeanD irectivesa pplicable,i ncluding theirm odifications andt he corresponding transpositions from the national law. MACHINE APPLICATION: CLIND1BK-C Induction Hob TYPE: Comply with the following European Directives 2006/95/CE:... - Page 27 C'est parti... Pour bien commencer... Avant de commencer Sécurité dans le détail... Fonctions du produit Fonctionnement Entretien et maintenance Résolution des problèmes Recyclage et élimination Information technique et légale Garantie Déclaration de conformité CE Annexe Installation...
-
Page 28: Pour Bien Commencer
Pour bien commencer... Avant de commencer Sécurité... - Page 29 Avant de commencer Avant de commencer Pour éviter les risques liés à l’utilisation d’un appareil électrique, veillez à ce que l'appareil soit correctement installé et lisez attentivement les consignes de sécurité afin d’éviter tout danger ou dommage causé par une mauvaise utilisation.
- Page 30 Sécurité Ces instructions ont été rédigées pour votre sécurité. Veuillez les lire attentivement avant toute installation et les conserver pour toute consultation ultérieure. • Toute installation doit être effectuée par une personne compétente ou un électricien qualifié. • Cet appareil doit être installé par une personne qualifiée et conformément aux instructions d’installation du fabricant.
- Page 31 Sécurité Un grand soin doit être porté lors de l’utilisation et du nettoyage de l’appareil. Veuillez lire attentivement les sections Nettoyage et Maintenance de cette brochure. Ne pas utiliser de jet de vapeur pour nettoyer votre appareil. L’appareil n’est pas prévu pour fonctionner au moyen d’un minuteur externe ou d’un système de commande à...
-
Page 32: Et Dans Le Détail
dans détail... Fonctions du produit Fonctionnement Entretien et maintenance Résolution des problèmes Recyclage et élimination Information technique et légale Garantie Déclaration de conformité CE... -
Page 33: Fonctions Du Produit
Fonctionnement Fonctions du produit > Avec ses foyers électromagnétiques et ses touches sensitives et multifonctions, la table à induction convient parfaitement à tous les types de cuisson, ce qui en fait l'appareil incontournable de la famille moderne. > La table de cuisson est très facile à utiliser, résistante et peut être utilisée en toute sécurité. - Page 34 Fonctionnement Détection des récipients trop petits ou non magnétiques La table de cuisson se met automatiquement en veille après une minute si un récipient au diamètre trop petit ou un récipient non magnétique (par ex. en aluminium) ou si des objets plus petits (couteau, fourchette, clé, etc.) sont laissés posés sur la table de cuisson.
- Page 35 Fonctionnement Fonctionnement Sélection du foyer de cuisson Minuteur MARCHE/ARRÊT Sélection du niveau de puissance Sécurité enfant Référence Description Sélection du foyer de cuisson Réduction du niveau de puissance Augmentation du niveau de puissance Sécurité enfant MARCHE / ARRÊT Minuteur Avant la première utilisation >...
- Page 36 Fonctionnement Instructions de fonctionnement Avertissement • Lorsque la touche MARCHE/ARRÊT (E) est enfoncée, la table à induction revient en mode veille si aucune autre opération n’est effectuée dans la minute qui suit. • Votre table de cuisson peut atteindre une puissance maximale de 3000 W.
- Page 37 Fonctionnement Fonction minuteur 1. Appuyez sur la touche minuteur. L’indicateur commence à clignoter. 2. Réglez ensuite la durée souhaitée (entre 1 et 99 minutes) en appuyant sur les touches "+" et "-" 3. Si vous appuyez une fois sur la touche "+" la durée augmente d’une minute;...
- Page 38 Fonctionnement Sécurité enfant Pour assurer la sécurité des enfants, la table de cuisson à induction est équipée d’un dispositif de verrouillage. Verrouillage : 1. Maintenez la touche Sécurité enfant enfoncée ; la table est alors verrouillée. 2. Le minuteur affiche "LO" et toutes les touches sont désactivées à l'exception de la touche "MARCHE/ARRÊT".
- Page 39 Récipient en acier Poêle à frire Récipient en acier inoxydable Casserole en émail Plaque de fer Il existe différents types de récipients compatibles à la cuisson à induction. Pour savoir si vos récipients sont compatibles, vous pouvez effectuer les tests suivants : 1.
-
Page 40: Entretien Et Maintenance
Entretien et maintenance Avertissement Toujours couper l’alimentation électrique avant d’effectuer des travaux de maintenance. En cas de problème, veuillez contacter votre distributeur officiel ou revendeur agréé. Entretien et maintenance Les câbles électriques endommagés doivent être remplacés par une personne compétente ou un électricien qualifié. - Page 41 Entretien et maintenance Ne pas poser d'objets en métal, tels que les couteaux, fourchettes, cuillères et couvercles sur la plaque de cuisson car ils peuvent devenir très chauds. Ne pas stocker de produits d’entretien ou de produits inflammables sous la table de cuisson. Entretien et maintenance Nettoyage de l'appareil Avertissement...
-
Page 42: Résolution Des Problèmes
Entretien et maintenance Résolution des problèmes En cas de problème, veuillez vous assurer qu'il s'agisse bien d'une défaillance de l'appareil avant de contacter le service après-vente. Si votre appareil ne fonctionne pas correctement après avoir effectué les vérifications ci-dessous, veuillez contacter le service après-vente. Mode d'échec possible Cause possible Que faire ? -
Page 43: Recyclage Et Élimination
Entretien et maintenance Recyclage et élimination Protection de l'environnement Les déchets de produits électriques ne doivent pas être jetés avec les déchets domestiques. Veuillez recycler là où des installations appropriées existent. Contactez les autorités locales ou votre revendeur pour des conseils en matière de recyclage. -
Page 44: Information Technique Et Légale
Information technique et légale Alimentation électrique V / Hz 220-240 V~/50 Hz Dimensions 590 x 55 x 520 (LxHxP) Poids net Informations légales Le fabricant décline toute responsabilité en cas de dommages corporels ou matériels causés par une mauvaise utilisation ou une installation incorrecte de l’appareil. - Page 45 Information technique et légale Tous les travaux d'installation doivent être effectués par une personne compétente ou un électricien qualifié. Avant la connexion à l'alimentation secteur, assurez-vous que la tension du réseau corresponde à la tension de la plaque signalétique de l'appareil. Avertissement : CET APPAREIL DOIT ETRE RACCORDE A LA TERRE.
- Page 46 Information technique et légale Réglementations électriques Toute installation électrique permanente doit être conforme aux règlementations de l’I.E.E. et aux réglementations de la compagnie d’électricité locale en vigueur. Pour votre sécurité, un électricien qualifié ou un technicien agréé de l'organisme de certification national doit vérifier la conformité...
-
Page 47: Garantie
Information technique et légale Garantie du fabricant Cet appareil est couvert par une garantie totale de 24 mois, pièces et main- d’œuvre. Cette garantie couvre le remplacement des pièces et les frais de main-d’œuvre relatifs à la réparation de l’appareil dans un environnement domestique. - Page 48 Information technique et légale Exclusions de la garantie (suite) Toute demande d’intervention SAV sur un produit utilisé dans le cadre d’un environnement commercial ou non-domestique. Tout appareil fonctionnant au gaz non installé par un technicien agréé. Si aucun problème n’est constaté lors de l’intervention SAV, GAA se réserve le droit de facturer le coût du déplacement au tarif en vigueur de 75,00 €...
-
Page 49: Déclaration De Conformité Ce
Directives Européennes en vigueur, y compris leurs modifications et les transpositions transpositions from the national law. correspondantes de leurs législations nationales. MACHINE APPLICATION: CLIND1BK-C MACHINE APPLICABLE : CLIND1BK-C Induction Hob TYPE: TYPE: Table de cuisson à... -
Page 50: Installation
Appendix... Annexe... Installation Installation... - Page 51 Installation Caution The ceramic hob must be installed by a suitably qualified person. Never try to install the appliance yourself. The ceramic hob must not be installed above refrigerators, freezers, dishwashers or tumble dryers. The wall and the area above the hob should be able to withstand heat.
- Page 52 Installation Avertissement La table de cuisson à induction doit être installée par une personne qualifiée. Ne pas tenter de l’installer soi-même. La table de cuisson à induction ne doit pas être installée au-dessus d’un réfrigérateur, congélateur, lave-vaisselle ou lave linge. Le panneau arrière et les surfaces adjacentes à la table de cuisson doivent pouvoir résister à...
- Page 53 Installation Clearance Warning Good ventilation is required around the appliance for easier dissipation of heat and low power consumption. Sufficient clearance is required around the appliance. The gap between the hob and any cupboard above it should be at least 750mm. 750mm 750mm At least...
- Page 54 Installation Espace requis autour de l’appareil Avertissement Une bonne aération est nécessaire autour de l'appareil pour une meilleure évacuation de la chaleur et une faible consommation électrique. Un espace suffisant est requis autour de l'appareil. L'espace entre la table de cuisson et le placard situé au-dessus doit être d'au moins 750 mm.
- Page 55 Installation Installation instructions Remove all the packing materials plus disposal statement. Siting (See fig.1) Caution Good ventilation is required around the appliance for easier dissipation of heat and low power consumption. Sufficient clearance is required around the appliance. The appliance should not be placed near anything that may echo.
- Page 56 Installation Instructions d'installation Retirez les emballages et les instructions relatives à l'élimination. Encastrement (Voir fig.1) Avertissement Une bonne aération est nécessaire autour de l'appareil pour une meilleure évacuation de la chaleur et une faible consommation électrique. Un espace suffisant est nécessaire autour de l'appareil.
- Page 57 Installation mini 750 mm Air exit mini 5 cm mini 5 mm [04] x 1 mini 2 cm Air intake Cut out worktop to supplied dimensions shown in (fig 1) with suitable equipment and seal the cut edge with appropriate sealant. ion: Effectuez une découpe dans le plan de travail conformément aux dimensions y, the gap between the hob and any cupboard above it should be at least 750 mm.
- Page 58 Installation [02] [03] Place hob into the worktop and tighten screws underneath the hob to secure in place. Insérez la table dans le plan de travail et fixez en serrant fermement les vis situées sous la table. Note: For electrical connection see Technical and legal information section Note: Pour les raccordements électriques, se reporter à...
- Page 59 Notes...
- Page 60 B&Q plc Chandlers Ford, Hants SO53 3LE United Kingdom 0845 609 6688 www.diy.com Castorama Parc d'Activités B.P.101 59175 Templemars - France 0 810 104 104 www.castorama.fr...
Need help?
Do you have a question about the CLIND1BK-C and is the answer not in the manual?
Questions and answers