Table of Contents
Advertisement
Quick Links
Advertisement
Table of Contents

Subscribe to Our Youtube Channel
Related Manuals for Akuvox EM63

Summary of Contents for Akuvox EM63
- Page 1 Akuvox EM63 User Manual...
-
Page 2: Table Of Contents
Content 1. Overview..................3 1.1. Introduction....................3 1.2. Features.....................4 2. Installation..................5 2.1. Check package contents................5 2.2. Connection diagram.................. 5 3. Configuration.................6 3.1. Expansion module selection..............8 3.2. Backlight Setting..................8 3.3. Ext Key Configuration................10 4. Software update................14 5. Troubleshooting................15... -
Page 3: Overview
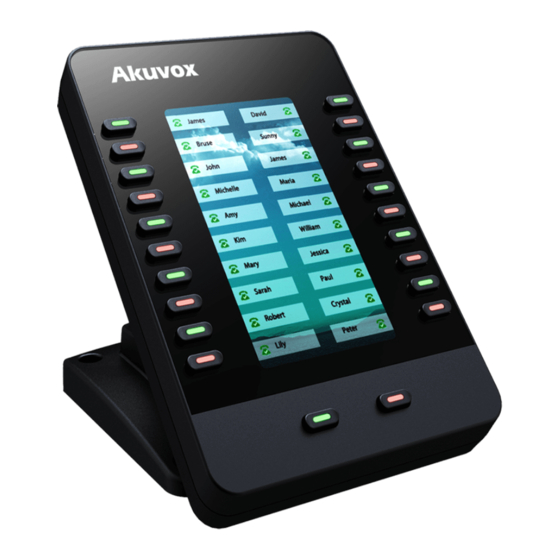
1.Overview 1.1. Introduction EM63 is an Expansion Module for Akuvox IP Phones, EM63 with large graphic LCD display. 22 programmable keys and 22 dual-color LEDs, and can be programmed to various features include BLF, BLF List, Speed Dial, Hot Desking, Record, XML Browser,... -
Page 4: Features
1.2. Features Highlights 4.3‘’ 272x480 Color Graphical LCD with Backlight Powered by Akuvox IP Phone SP-R59P 22 Keys and 22 dual-color LEDs Features Different icons for each function Multi-Language Support Programmable keys for BLF, BLF List, Speed Dial, Hot Desking, Record, XML ... -
Page 5: Installation
Installation 2.1. Check package contents Please refer to the package list below to check the completeness of package Name Quantity EM63 unit User Guide RJ-12 Cable Jointbar Stand Screws 2.2. Connection diagram... -
Page 6: Configuration
3.Configuration The EM63 expansion module supports 20 DSS Ext keys. The only way to configure the Ext keys is to access to the web interface of the sip phone. To login the web interface, you should obtain the IP address of the IP phone in advance. Press the OK key when the phone is idle after connecting to the network, and the phone will display the IP address and some other status. - Page 7 Go to the path: Phone->Ext Key to see the configuration of each Ext key. Allow user to assign specific feature to the designated Ext key. For Ext key, the available feature list: DND, Menu, MSG, Status, Book, Fwd, PickUp, Group PickUp, Intercom, Speed Dial, History, Favorites, Redial, Account, ACD, BLF, BLFList, Call Return, Hot Desking, Record, XML Browser, DTMF.
-
Page 8: Expansion Module Selection
3.1. Expansion module selection Several expansion modules can be chained together to connect to a SP-R59P IP phone, so that you can have many more Ext keys to use at the same time. Up to six expansion modules can be daisy-chained to a single SP-R59P IP phone. Before configuring the Ext keys, you should choose the right expansion module first. -
Page 9: Backlight Setting
3.2. Backlight Setting Backlight level Set the screen backlight level of the expansion module. There are five levels of the backlight intensity, default is level 3. Go to the path: Phone->Ext Key->Backlight Intensity; Choose the backlight level; Press Submit to accept the change. - Page 10 Backlight Duration Set the duration of backlight of the expansion module. Default value is 20s. Go to the path: Phone->Ext Key->Backlight Time; Choose the backlight time; Press Submit to accept the change.
-
Page 11: Ext Key Configuration
3.3. Ext Key Configuration Go to the path: Phone->Ext Key->key; Choose the function of each Ext key in the drop-down menu; Fill in the value of each item: ”Label”、”Value”、”Account”、”Extension” (Not all of items are necessary for each function); ... - Page 12 For Example: Go to the path: Phone->Ext Key->key; Choose DND function of each Ext key in the drop-down menu; Fill in the value of Label, such as: Do not disturb; Press Submit to accept the change.
- Page 13 BLF(Busy Field Lamp) Go to the path: Phone->Ext Key->key; Choose BLF function of each Ext key in the drop-down menu; Fill in the value of each item, such as: Label->Pick up; Value->1005; Extension->**; Account->Account1; Press Submit to accept the change.
-
Page 15: Software Update
4.Software update To select an upgrade rom file from local side, then press Submit to access the upgrading. Note: Please make sure it’s in right file format for right model. -
Page 16: Troubleshooting
5.Troubleshooting Issue 1:The EM63 LCD is blank If more than two expansion modules are connected to a SP-R59P IP phone, ensure that at least one expansion module is plugged into a functional adapter. Issue 2:The EM63 LCD is back ...
Need help?
Do you have a question about the EM63 and is the answer not in the manual?
Questions and answers