Table of Contents
Advertisement
Quick Links
Advertisement
Table of Contents

Related Manuals for Partizan PNK-3A-PTZ 1.0

Summary of Contents for Partizan PNK-3A-PTZ 1.0
- Page 1 PNK-3A-PTZ 1.0 network PTZ controller user manual WWW.PARTIZAN.GLOBAL 2019...
-
Page 2: Table Of Contents
INDEX Overview ........................2 Features ........................2 Technical Specification ....................2 Package Contents ......................2 1. Appearance ......................3 1.1 Front panel and function keys introduction ............3 1.2 Rear panel interface introduction ................3 2. Function & operation ....................4 2.1 Connection ...................... -
Page 3: Overview
Overview This Network Keyboard can be used to control the speed dome, as well as support 1 channel of video view at up to 1080P encoder. It is easy to operate and configure settings. Features 5’’ LED screen, 3-axis joystick; Support H.265, Onvif 2.4 compatible. -
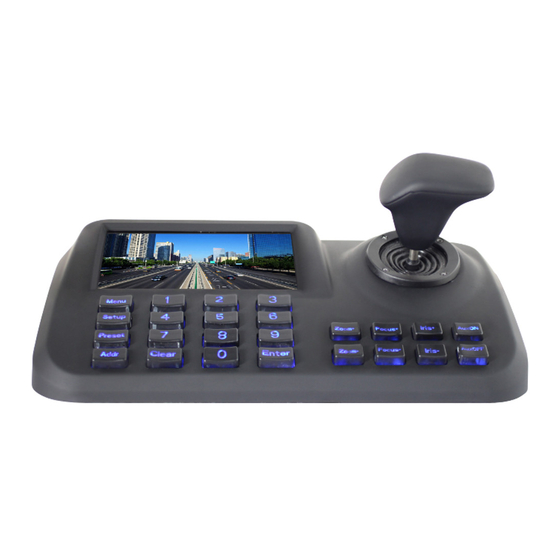
Page 4: Appearance
1. Appearance 1.1 Front panel and function keys introduction Fig.1 1.2 Rear panel interface introduction Fig.2 Input power : DC12V/2A Power Switch Power indicator ④ USB interface :reserved ⑤ RJ45 : for LAN ⑥ HDMI : available to connected to the monitor... -
Page 5: Function & Operation
2. Function & Operation 2.1 Connection Fig.3 As Fig.3 show, make sure the keyboard in the same LAN with the devices. Remark: The keyboard supports up to 255 device in each segment, when in “0” &“1” segment, the keyboard can manage the device of both segment together. 2.2 Power on and add device 2.2.1 User management Log in... -
Page 6: Add Device
User management To change the password or add operator press “ “ key and then choose user, you will see. Fig.5 You can change the password or you can create operator and password. Remark: after create the operator, it can not modified the operator name. 2.2.2 Add device After log in, the keyboard will search the IP device and assign a Dome ID for each device automatically, as below picture(Fig.6) shows. -
Page 7: Automatic Search And Manually Add Device
2.2.3 Automatic search and manually add device Automatic search If user want to add the more device, please press the “Menu” button, Fig.7 move the cursor to choose the “device management” and click “Enter” to enter the sub -menu, select “Search and Add” to confirm. Move the cursor to select “search”... -
Page 8: Ptz Control And Image Switching
Remark: 1. Please make sure IP port, password and all of information is correct before add IP address manually 2. Here the “Menu” button is also the return button. 2.3 PTZ control and image switching 2.3.1 Device switching As the above fig. 6 show, the user could switch Dome by the corresponding Dome ID which is on the left of IP address list. -
Page 9: Preset Operation Instruction
Key Operation 【Focus+】/【Focus-】: Manual adjust focus value of zoom module to get clear image. ( default of zoom module is auto-focus.) 【Zoom+】/【Zoom-】: zoom+/- get the ideal image. 【Iris+】【 Iris-】: Adjust the aperture to get brighter or darker image gradually. ( Some zoom module is only with Auto Iris function) 【Setup】: [Setup]+number+[Enter] to set the preset point of the camera or set the short commands of the keyboard (See 2.5). -
Page 10: Delete Preset
2.4.3 Delete preset 1. Press “ ” button; 2. Input the preset point need to delete; 3. Press “ ” to delete preset point. 2.5 Shortcut commends. If speed dome supported shortcut commend, user can use the keyboard controller to call the shortcut commend to enable the function easily. -
Page 11: Main Stream And Sub Stream Switching
2.7 Main stream and sub stream switching This Keyboard controller with the 5” LED screen, supports both main Stream and sub-Stream display Press the button “ ”Enter to the Main OSD, find the “System” item and choose the “Main Stream” or “Sub Stream”, press “Enter” Remark: 1. -
Page 12: Troubleshooting
3.0 Troubleshooting Issue Possible Reason Solution Change either IP address of IP address of the IP camera and Can’t add the Camera controller is same keyboard or IP address of camera The command is inconsistent Check the dome manual, make Can’t run the Tour with dome connected sure the right commend to run...
Need help?
Do you have a question about the PNK-3A-PTZ 1.0 and is the answer not in the manual?
Questions and answers