Table of Contents
Advertisement
Quick Links
Advertisement
Table of Contents

Subscribe to Our Youtube Channel
Summary of Contents for Waygate Technologies Krautkramer USM 10
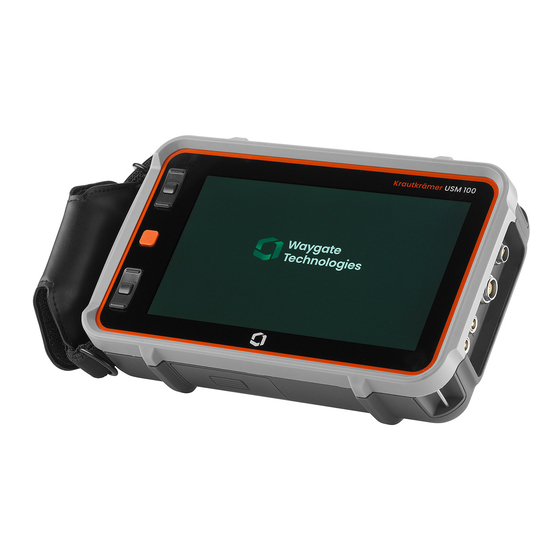
- Page 1 Krautkrämer USM 100 Operating Manual Id. No. 160M4395 Rev. - (09/2021)
- Page 2 This Rev. - (09/2021) applies to software version: 1.0 (September 2021) You will find the software version and the serial number of your instrument in the About section (see page 104) in the General Settings menu (see page 99). © Baker Hughes Digital Solutions GmbH | Technical content subject to change without notice.
- Page 3 Overview Command bar Switch between Command bar icons Reset envelope curve Switch to the next panel Select the Gain Step (see page ) Switch to the previous panel Magnify Gate (see page ) A-scan freeze (Freeze, see page 66) Pause data recording Set the echo to defined screen height Continue data recording (AutoXX, see page 66)
- Page 4 Command bar (continued) Quick save Export CSV file Load settings Save screen capture Save settings Save report Load data Save multiple page report Save data Lock the touchscreen operation Rev. - (09/2021) Krautkrämer USM 100...
- Page 5 Function group icons A-Scan Auto Calibration Material Probe Probe Angle Pulser Receiver Evaluation UT Setup Setup (Data Recorder) Gates Display (Data Recorder) An alphabetical list of all functions in the function groups can be found in the UT Function directory (see page 206). Krautkrämer USM 100 Rev.
- Page 6 Status indicators Power level indicators Reject function is active DAC mode = TCG is active (see following page) Freeze active (Freeze), DGS reference echo has AGT is active display is „frozen“ been recorded Angle probe 30° … 90°, flat DGS reference echo has Magnify gate is active surface, been recorded,...
- Page 7 Power level indicators Internal Second Battery is charged, remaining operating time in hours (approx. value) Battery charge level, remaining operating time in hours (approx. value) Warning: Low battery charge Battery is empty Power adapter is connected, percentage of battery charge level (approx. value) Krautkrämer USM 100 Rev.
- Page 8 Key functions Move up on a menu or list, decrement a numeric parameter Select an item from a menu or list Move down on a menu or list, increment a numeric parameter Navigate between major areas of the screen to select items for action On the back: Increase gain or move right On the back: Decrease gain or move left N o t e...
-
Page 9: Table Of Contents
Contents Introduction Echo display comparison method ..28 1.3 The Krautkrämer USM 100 ... .29 1.1 Safety information ....20 USM 100 Standard . - Page 10 Contents 3.3 Connecting a probe ....51 Information line ..... 77 3.4 Inserting a USB stick .
- Page 11 Contents Remote Connection ....104 Envelope Color .....112 Updates .
- Page 12 Contents Probe Angle ..... . 118 LED Alarm......124 Probe X-Value.
- Page 13 Contents Gate C Width ..... .133 Gate A Threshold ....137 Gate C Threshold .
- Page 14 Contents Effective Diameter....141 Calibrating the probe delay and velocity . 145 Delay Velocity ..... 142 Choice of the measuring point .
- Page 15 Contents Documentation Recording a reference echo and turning the DGS curve on ..... .163 6.1 Test reports ..... . .178 Locks, error messages .
- Page 16 Maintenance and care Interfaces and Peripherals 7.1 Maintenance ..... 192 8.1 Interfaces ......200 Overview .
- Page 17 Contents 10 Specifications General features ....220 Environmental..... .221 Display .
- Page 18 Rev. - (09/2021) Krautkrämer USM 100...
-
Page 19: Introduction
Introduction Krautkrämer USM 100 Rev. - (09/2021) -
Page 20: Safety Information
1 Introduction Safety information 1.1 Safety information A T T E N T I O N The Krautkrämer USM 100 has been designed and Risk of injury due to electric energy! tested according to IEC 61010-1, Safety requirements The pulse voltage on the probe ports of the for electrical equipment for measurement, control and USM 100 is exceeding 50 V but limited in laboratory use, and was technically in perfectly safe and... -
Page 21: Battery Operation
Lithium batteries, identified as being defec- Only lithium-ion batteries recommended and tive for safety reasons, or that have been supplied by Waygate Technologies may be damaged, that have the potential of produc- used for instrument operation. ing a dangerous evolution of heat, fire or short circuit are forbidden for transport by air. -
Page 22: Software
1 Introduction Safety information Software Defects/errors and exceptional stresses According to the current state of the art, software is nev- If you have reason to believe that a safe operation of er completely free from errors. Before using any soft- your USM 100 is no longer possible, you have to discon- ware-controlled test equipment, it is therefore neces- nect the instrument and secure it against unintentional... -
Page 23: Fcc Compliance
Safety information 1 Introduction FCC compliance This device complies with part 15 of the FCC Rules. Op- eration is subject to the following two conditions: This device may not cause harmful interference. This device must accept any interference received, including interference that may cause undesired operation. -
Page 24: Important Information On Ultrasonic Test
1 Introduction Important information on ultrasonic testing 1.2 Important information on Operator training ultrasonic testing The operation of an ultrasonic test device requires prop- er training in ultrasonic test methods. Please read the following information before using your Proper training comprises for example adequate knowl- USM 100. -
Page 25: Technical Test Requirements
Waygate Technologies regularly holds specialized train- ing courses in the field of ultrasonic testing. The sched- uled dates for these courses will be given to you on re- quest. -
Page 26: Ultrasonic Wall Thickness Measurement
1 Introduction Important information on ultrasonic testing Ultrasonic wall thickness measurement Effect of the test object material All ultrasonic wall thickness measurements are based If the material of the test object is not homogeneous, the on a time-of-flight measurement. Accurate measure- sound waves may propagate at different velocities in dif- ment results require a constant sound velocity in the test ferent parts of the test object. -
Page 27: Effect Of Temperature Variations
Important information on ultrasonic testing 1 Introduction Effect of temperature variations Ultrasonic evaluation of flaws The sound velocity within the test object also varies as In present-day test practice, there are basically two dif- a function of the material's temperature. This can cause ferent methods of flaw evaluation: appreciable errors in measurements if the instrument If the diameter of the sound beam is smaller than the ex-... -
Page 28: Echo Display Comparison Method
1 Introduction Important information on ultrasonic testing Echo display comparison method The ultrasonic wave is attenuated in any material. This sound attenuation is very low, e.g. in parts made of fine- The echo from a small, natural flaw is usually smaller grained steel, likewise in many small parts made of oth- than the echo from an artificial comparison flaw, e.g. -
Page 29: The Krautkrämer Usm 100
The Krautkrämer USM 100 1 Introduction 1.3 The Krautkrämer USM 100 Due to its design, the Krautkrämer USM 100 can be used in most flaw detection applications in a wide range Krautkrämer USM 100 of industries, including aerospace, power generation, automotive, as well as oil and gas. -
Page 30: Usm 100 Standard
1 Introduction The Krautkrämer USM 100 USM 100 Standard ● Selectable 10 to 2,000 Hz pulse repetition rate ● Configurable sidebar for placement of critical parameters ● Square-wave pulser, 50 to 350 volts, tunable 40 to 2,500 ns pulse width ●... -
Page 31: Usm 100 Pro
The Krautkrämer USM 100 1 Introduction USM 100 Pro ● Selectable 10 to 2,000 Hz pulse repetition rate ● Configurable sidebar for placement of critical parameters ● Square-wave pulser, 50 to 350 volts, tunable 40 to 2,500 ns pulse width ●... -
Page 32: Usm 100 Digital
1 Introduction The Krautkrämer USM 100 USM 100 Digital ● Selectable 10 to 2,000 Hz pulse repetition rate ● Configurable sidebar for placement of critical parameters ● Square-wave pulser, 50 to 350 volts, tunable 40 to 2,500 ns pulse width ●... -
Page 33: How To Use This Manual
How to use this manual 1 Introduction 1.4 How to use this manual Attention and note symbols A T T E N T I O N General The ATTENTION symbol indicates peculiar- This operating manual applies to all instrument versions ities and special aspects in the operation of the USM 100. - Page 34 1 Introduction How to use this manual Rev. - (09/2021) Krautkrämer USM 100...
-
Page 35: Standard Package And Accessories
Standard package and accessories Krautkrämer USM 100 Rev. - (09/2021) -
Page 36: Standard Packages
2 Standard package and accessories Standard packages 2.1 Standard packages Part No. Short code Description 150M5734 USM 100 Standard Instrument USM 100 Standard Instrument Package 150M5734C USM 100 Standard Instrument with CERT Same as 150M5734 with ISO Certificate 150M5735 USM 100 Pro Instrument USM 100 Pro Instrument Package 150M5735C USM 100 Pro Instrument with CERT... -
Page 37: Accessories
Accessories 2 Standard package and accessories 2.2 Accessories Part No. Short code Description USM 100 Standard accessories AC adapter/charger, 1 x Li-ion internal battery, 2 x lithium-ion removable battery, external battery charger, transport case, wrist strap, shoulder strap, USB C dock, Quick Start Guide, Operating Manual on USB flash drive. - Page 38 2 Standard package and accessories Accessories Part No. Short code Description USM 100 Digital accessories AC adapter/charger, 1 x Li-ion internal battery, 2 x lithium-ion removable battery, external battery charger, transport case, wrist strap, shoulder strap, USB C dock, Quick Start Guide, Operating Manual on USB flash drive.
- Page 39 Accessories 2 Standard package and accessories Part No. Short code Description 151M4757 Cable extension for USBC Docking Station Cable extension for USB-C docking station 148M5852 Magnetic pipe stand Magnetic pipe stand 151M4758 USM 100 Adapter Cable for USM 100 adapter cable for MUT-ODI-SINGLEPROB mini quadrature encoder MUT-ODI-...
- Page 40 2 Standard package and accessories Accessories Part No. Short code Description 148M5829 USM 100 Transport case USM 100 transport case 148M5843 USB Type-C Adapter Docking Hub USB-C dock for connecting to external monitor through VGA/HDMI, SD card/USB & Ethernet 148M5831 Shoulder Strap 2-point shoulder strap 159M0234...
- Page 41 Accessories 2 Standard package and accessories Part No. Short code Description 022-506-187 PART--CBL 6" DU 00LM-FBNC Dual Lemo #00 to BNC (female) adapter 291-556-200 CBL DU 6.25' MLMD-MLRA00LEMO Dual right angle Lemo #00 to Microdot cable 0110084 KABEL,SEKG 2-GO 2 M STECKER OO - 1 Probe cable: 2 Lemo 00-90°...
- Page 42 2 Standard package and accessories Accessories Part No. Short code Description 021-999-101 SCHOL-UT-L2-L Ultrasonic Testing Level II 021-999-196 UT Levels I &II-Practical Training (E) UT Levels I & II, Practical Training, a supplement to eLearning 021-999-245 Ultrasonic Testing Level I Ultrasonic Testing Level I 021-999-023 Ultrasonic Testing Level II eLearning...
-
Page 43: Initial Start-Up
Initial start-up Krautkrämer USM 100 Rev. - (09/2021) -
Page 44: Instrument Positioning
3 Initial start-up Instrument positioning 3.1 Instrument positioning 3.2 Power supply Fold out the prop-up stand on the rear side of the The USM 100 can be operated either with the external USM 100 and position the instrument on a flat base so power adapter or with one (internal) or two (internal and that you can easily read the display. - Page 45 Power supply 3 Initial start-up Connecting the instrument Connect the USM 100 to the mains socket-outlet by means of the corresponding power adapter. The socket- contact for connecting the power adapter is located on the right side of the instrument. –...
-
Page 46: Using The Batteries
(hot swapping). A T T E N T I O N Only lithium-ion batteries recommended and supplied by Waygate Technologies may be used for instrument operation. Changing the battery The battery compartment is located on the bottom of the instrument. - Page 47 Power supply 3 Initial start-up – Flip up the battery compartment cover and slide it back to its original position until it is firmly closed. – To remove the battery, open the battery compartment as described above and carefully pull the battery out by the tab (3).
- Page 48 3 Initial start-up Power supply Power level indicators Two power level indicators on the screen allow to esti- mate the remaining operating time of the instrument. The left battery symbol (1) represents the internal bat- tery, the right symbol (2) the hot-swappable second bat- tery.
- Page 49 Power supply 3 Initial start-up Internal Second Battery is charged, remaining operating time in hours (approx. value) Battery charge level, remaining operating time in hours (approx. value) Warning: Low battery charge Battery is empty Power adapter is connected, percentage of battery charge level (approx. value) Krautkrämer USM 100 Rev.
-
Page 50: Charging The Batteries
A T T E N T I O N Internal charging Only chargers recommended and supplied by Waygate Technologies may be used for Charging starts automatically as soon as you connect instrument operation. the power adapter to the USM 100 and to the mains power supply. -
Page 51: Connecting A Probe
T/R (red ring) – transmitter/receiver connection (2) To prepare the USM 100 for operation, you have to con- nect a probe to it. Any Waygate Technologies probe can be used for the USM 100, provided the appropriate ca- ble is available and the operating frequency is within an adequate range. -
Page 52: Inserting A Usb Stick
3 Initial start-up Inserting a USB stick 3.4 Inserting a USB stick You can use any USB stick for data transfer to and from – Slide the lid (1) on the top of the instrument to the the USM 100. right side until it swings open upwards. -
Page 53: Other Connections
Other connections 3 Initial start-up 3.5 Other connections You can use a USB-C docking hub to connect the – Slide the lid (1) on the top of the instrument to the USM 100 to the LAN network and connect other periph- right side until it swings open upwards. -
Page 54: Starting The Usm 100
3 Initial start-up Starting the USM 100 3.6 Starting the USM 100 Powering On The Power key (1) is located on the top of the instru- ment. – Press the Power key for two seconds. The software is initialized, the instrument carries out a self-check and then switches over to stand-by mode. -
Page 55: Powering Off
Starting the USM 100 3 Initial start-up Powering Off A T T E N T I O N In order to power the instrument off correctly, always use the Shutdown function. If the power supply is interrupted (pulling out the mains plug while the batteries are completely discharged), the operation does not end cor- rectly. -
Page 56: Remote Connection Setup
3 Initial start-up Remote Connection Setup 3.7 Remote Connection Setup VNC Client To view and control the instrument‘s screen remotely The USM 100 supports Virtual Network Computing you must have a VNC client installed on your computer. (VNC). As VNC is a standard protocol, any client application The VNC client displays the screen contents of a remote which supports VNC protocol can be used to remotely device on a local computer (client) and in return sends... - Page 57 Remote Connection Setup 3 Initial start-up Network connection The USM 100 does not have a native RJ45 connector for network connection. You can connect a USB-C docking hub with network in- terface to the USM 100 and connect the hub to the net- work via its RJ45 connector (see page 53).
- Page 58 3 Initial start-up Remote Connection Setup Establishing the remote connection – Check that the USB-C hub is correctly connected to the USM 100. – Check that the computer and the USB-C hub are con- nected to the same network. – Check that the remote control is enabled in the USM 100 (see page 57).
-
Page 59: Principles Of Operation
Principles of operation Krautkrämer USM 100 Rev. - (09/2021) -
Page 60: Main Menu
4 Principles of operation Main menu 4.1 Main menu In the Main menu you will find the basic settings and functions for working with the USM 100. Return to the A-scan view Application desktop (see page 61) File management (see page 187) Mentor server connection, only visible if no Application is launched InspectionWorks Connect... -
Page 61: Application Desktop
Application desktop 4 Principles of operation 4.2 Application desktop Applications contain a variety of UT data display capa- bilities, guides and illustration as well as text references. An application’s architect determines its specific con- tents, the inspection parameters displayed, which pa- rameters are adjustable by the user, and to within what range of values a particular parameter can be set. - Page 62 4 Principles of operation Application desktop Launching an application N o t e You can launch any application saved in the instrument. The Startup Application function allows You can choose whether the application should be used you to select an application that will be auto- with its basic settings or whether the last used settings matically launched with the last used settings should be applied.
- Page 63 Application desktop 4 Principles of operation Installing new applications If a new application is available, you can save it in the instrument and then launch it. Application files have the extension iwp. – Insert a USB stick with one or more application files into the socket on the top of the instrument (see page 52).
- Page 64 4 Principles of operation Application desktop Deleting applications You can delete applications that are no longer needed. N o t e Before deleting, you can back up the applica- tions to a USB stick (see page 188). The de- letion can not be undone. –...
-
Page 65: A-Scan View
A-scan view 4 Principles of operation 4.3 A-scan view Main menu (see page 60) UT function groups icons (see page 106) Command bar (see page 66) Status indicators (see page 75) Switching Command bar icons (see page 78) Measurement line (see page 76) Panel selector (see page 72) A-scan representation (see page 70) Function groups and functions (see page 73) -
Page 66: Command Bar
4 Principles of operation A-scan view Command bar AutoXX The Command bar gives you a quick and direct access to frequently used functions, regardless of the specific type of task. You can automatically set the first echo to a certain screen height. - Page 67 A-scan view 4 Principles of operation Clear Magnify Gate You can deleted the calibrated data including the probe This function causes the selected gate to span over the delay, velocity, probe angle, and x-value. entire displayed range. You can select the gate for this function (see page 125).
- Page 68 4 Principles of operation A-scan view Load settings Load data You can load and use instrument settings saved in a file. You can load UT settings and data together. The A-scan The instrument settings are immediately active after will be redrawn on the screen. loading (see page 98).
- Page 69 A-scan view 4 Principles of operation Save report Lock You can save a single test report. A test report can con- You can lock the touchscreen to prevent unintended op- tain different information and data, as well as screen eration. When the lock is active, the icon is colored and captures.
-
Page 70: A-Scan Representation
4 Principles of operation A-scan view A-scan representation A-scan display in the normal mode: The USM 100 has a high-resolution display screen for the display of the A-scan. The A-scan can be displayed in normal mode or in zoom mode. In the zoom mode, the measurement line is not visible. - Page 71 A-scan view 4 Principles of operation Gates Gate display in the normal mode: The gates are displayed as colored areas in the A-scan. With the function Magnify gate (see page 67) in the Command bar you can span a selected gate over the entire displayed range.
-
Page 72: Panel Selector (See Page 72)
4 Principles of operation A-scan view Panel selector Applications (see page 61) include one or more panels containing, among others, a variety of UT data display capabilities, guides, and references. An application’s architect determines its specific con- tents, the inspection parameters displayed, which pa- rameters are adjustable by the user, and to within what range of values a particular parameter can be set. -
Page 73: Function Groups And Functions
A-scan view 4 Principles of operation Function groups and functions The icons (3) for selecting a function group are always displayed in the A-scan when you briefly tap in the A- scan. After a short time, the icons are automatically hid- den again. -
Page 74: Main Functions Sidebar
4 Principles of operation A-scan view Main functions sidebar Independent of individual function groups, you can quickly access the main functions (2) of a specific panel (1) by sliding the sidebar from the left edge of the A-scan into the screen (see page 79). You can close the sidebar by sliding it back. -
Page 75: Status Indicators
A-scan view 4 Principles of operation Gain The current gain value (2) and the selected dB step val- ue (3) are always displayed in the top left corner above the A-scan. You can change the step size for quick gain adjustment with the function Gain step (1) in the Command bar (see page 67). -
Page 76: Measurement Line
4 Principles of operation A-scan view Measurement line The measurement line on top of the A-scan shows a number of measurement readings (1), also one or two specific functions (3). Size and number of the boxes de- pend on the currently selected panel (see page 72). In addition to the measurement reading, the measuring point (peak or flank) is displayed with a symbol in sound path measurements:... -
Page 77: Information Line
A-scan view 4 Principles of operation Information line Example: Information on the current application The information line at the bottom of the screen shows various information, notes, instructions and warnings depending on the situation. You can tap on an instruction or warning to hide it. Example: Instruction for calibration Example: Warning Krautkrämer USM 100... -
Page 78: Operation With Touchscreen
4 Principles of operation Operation with touchscreen 4.4 Operation with touchscreen Executing or selecting a function Command bar The Command bar gives you a quick and direct access to frequently used functions, regardless of the specific type of task (see page 66). –... - Page 79 Operation with touchscreen 4 Principles of operation Function groups and main functions sidebar All functions are arranged in function groups. The pos- sible selection of function groups always depends on the currently selected panel (see page 72). – Tap in the A-scan to display the available function group icons (3).
- Page 80 4 Principles of operation Operation with touchscreen Gain functions There is no icon in the A-scan for the function group Gain with the gain functions. The function group Gain for setting the gain and the related functions is always accessible, regardless of the selected panel. –...
- Page 81 Operation with touchscreen 4 Principles of operation Functions in the measurement line The measurement line on top of the A-scan may also show one or two specific functions (1). You can set these functions directly without having to go via the function groups.
- Page 82 Settings Many functions are parameters for which you can set a value, for example the Display Range. – Select the panel Setup and display the function group A-scan (see page 79). The functions and their current settings are displayed. – Tap on the function Display Range (1). The value se- lector is displayed.
-
Page 83: Selection Lists
Operation with touchscreen 4 Principles of operation Selection lists For various functions, you can select the desired setting from a list, for example the Probe Name. – Select the panel Setup and display the function group Material probe (see page 79). The functions and their current settings are displayed. - Page 84 4 Principles of operation Operation with touchscreen Incompatible settings When the values for two or more related functions or pa- rameters create an incompatibility, the functions with in- compatible settings are highlighted by a red back- ground. This incompatibility can occur, for instance, between the gate start and gate width, or if the PRF is too high and the gate is too far out in time.
- Page 85 Operation with touchscreen 4 Principles of operation Locked functions Individual functions may be locked. It is then not possi- ble to change their settings. Locked functions can be identified by the lock symbol near the function name. Reasons for locked functions can be: ●...
-
Page 86: Positioning The Gates
4 Principles of operation Operation with touchscreen Positioning the gates You can move and adjust the gates directly on the touchscreen. – To move the entire gate, touch the center of the gate. The gate border is highlighted. – Slide the gate to the desired position. –... -
Page 87: Overview Of Key Functions
Overview of key functions 4 Principles of operation 4.5 Overview of key functions The USM 100 is designed for convenient touchscreen operation. Nevertheless, all settings and operating pro- cedures can alternatively also be performed with the keys (see page 88). The fastest way to set the gain is with the keys on the back. -
Page 88: Operation With Keys
4 Principles of operation Operation with keys 4.6 Operation with keys If it is not possible or not desired to operate an element on the screen, for example an icon or a function, by tap- ping, you can mark the respective areas on the screen with the keys and then execute the corresponding ac- tions with the keys as well. -
Page 89: Executing Or Selecting A Function
Operation with keys 4 Principles of operation Executing or selecting a function You must first select a screen area (see page 88). If it concerns a single function, you can immediately ex- ecute or set this function in the next step. If the selected area contains several functions, you must first select the desired function and can then execute or set the func- tion. - Page 90 4 Principles of operation Operation with keys Command bar You can operate the Command bar with the keys as well. – Press the red key repeatedly to mark the Waygate icon (5). – Press the black center key (3) to access the Com- mand bar.
- Page 91 Operation with keys 4 Principles of operation Function groups and functions You can select function groups and functions with the keys as well. The possible selection of function groups always depends on the currently selected panel (see page 72). – Press the red key repeatedly to mark the whole A- scan area (5).
-
Page 92: Settings
4 Principles of operation Operation with keys Settings You can set the value of a function with the keys as well, for example the Display Range. – Select the function Display Range from the function group A-scan (see page 91). The value selector is displayed. -
Page 93: Multi-Color Led
Multi-color LED 4 Principles of operation 4.7 Multi-color LED The multi-color LED (1) next to the screen gives you var- ious information about the device status and special events. With the instrument switched off: Blue The batteries are charged Krautkrämer USM 100 Power adapter not connected With the instrument switched on:... - Page 94 4 Principles of operation Multi-color LED Rev. - (09/2021) Krautkrämer USM 100...
-
Page 95: Operation
Operation Krautkrämer USM 100 Rev. - (09/2021) -
Page 96: Important Basic Settings
5 Operation Important basic settings 5.1 Important basic settings Before you start working with the USM 100, you should configure the most important basic settings. From the function group Gates (see page 126): From the General settings (see page 99): ●... -
Page 97: Saving The Settings
Saving the settings 5 Operation 5.2 Saving the settings You can save the current instrument settings to a file in the device memory or on an inserted USB stick (see page 52). The filename extension is .ups. N o t e The filename must not contain any of the fol- lowing characters: / \ : * ? „... -
Page 98: Loading Settings
5 Operation Loading settings 5.3 Loading settings You can load and use instrument settings saved in a .ups file. The instrument settings are immediately active after loading. N o t e The settings must match the currently loaded application. Otherwise an error message is displayed. -
Page 99: General Settings
General settings 5 Operation 5.4 General settings You find all general instrument settings in the General settings menu. – Tap the Main Menu icon (see page 65) to display the Main Menu (see page 60). – Tap on the General settings button. Krautkrämer USM 100 Rev. - Page 100 5 Operation General settings System Color Scheme You can switch between LIGHT and DARK to match the color scheme on the screen to the working environment. The screen colors are switched immediately. You can set the color of the A-scan separately (see page 113) as well as the grid color (see page 113).
- Page 101 General settings 5 Operation BackLight Time Autostart to PCLive The backlight of the screen requires a relatively large When connected via LAN network the dedicated soft- amount of energy. To save energy, you can select a ware USM 100 PC can be used, besides other things, to time period after which the backlight is automatically control the instrument.
- Page 102 5 Operation General settings Date and Time Date Format You can choose the format for displaying the date on the A T T E N T I O N screen and in reports. Always ensure that you are using the correct = Month in numbers date and time for documentation purposes.
- Page 103 General settings 5 Operation Regional Language You can select the language for the screen texts. The language is changed immediately. Distance Units You can switch the distance units between METRIC and INCHES any time. All values are adjusted accordingly. Decimal You can choose the decimal separator mark.
-
Page 104: License
5 Operation General settings License Allow Remote Access You can allow the remote access via the network either You can import licenses, which will then unlock addition- for viewing the screen only (eye icon) or for full remote al functions for your instrument. For this you need a val- control (eye/mouse icon) of the USM 100. -
Page 105: Measurement Line Configuration
Measurement line configuration 5 Operation 5.5 Measurement line configuration You can select which measurement values are dis- played in the different boxes of the measurement line. You can make the selection separately for each box. – Tap on a box (1) in the measurement line. A dialog box opens. -
Page 106: Ut Function Groups
5 Operation UT function groups 5.6 UT function groups Icon Name Page Gain In the following chapters, the functions are described no icon according to their order in the respective function group, or in the context of certain tasks, for example calibration. A-Scan Some functions are included in several function groups for reasons of more efficient operation. -
Page 107: Gain
Gain 5 Operation 5.7 Gain Gain You can use the gain to adjust the sensitivity necessary The function group Gain is always accessible, regard- for making echoes from reflectors to be detected visible less of the selected panel. The current gain value and on the display screen at the required height. -
Page 108: Transfer Correction
5 Operation Gain Transfer Correction Auto XX Amplitude If the test object has a rough surface, part of the incident You can set the desired screen height (default = 80%) sound energy will be scattered at its surface and is not for the echo amplitude, when using the AutoXX function available for the test. -
Page 109: A-Scan
A-Scan 5 Operation 5.8 A-Scan Display Range The display range must be adjusted to the sound veloc- This function group provides all important settings for ity used (function Velocity) and to the connected probe the A-scan representation. You have to set the sound (function Probe Delay). -
Page 110: Display Delay
5 Operation A-Scan Display Delay Velocity You can use this function to choose whether to display You can use the function Velocity to set the sound ve- the adjusted display range (for example 250 mm) start- locity in the test object. ing from the surface of the test object or in a section of A T T E N T I O N the test object starting at a later point. -
Page 111: Freeze Mode
A-Scan 5 Operation Freeze Mode B Freeze * The A-scan is frozen automatically when the signal The instrument offers you various options for freezing touches the gate B. This setting is suitable e.g. for mea- the A-scan on the display automatically. You can surements on hot test objects, for measurements in dif- choose between the following options. -
Page 112: Envelope
5 Operation A-Scan Envelope Envelope Color In addition to the live A-scan, a frozen A-scan is dis- You can choose the color of the envelope curve, inde- played as an envelope curve in the background. The fro- pendent of the selected Color Scheme (see page 100). zen A-scan is updated every time the maximum ampli- tudes are exceeded. -
Page 113: Range Ruler
A-Scan 5 Operation Range Ruler A-Scan Color You can switch on a ruler at the bottom of the A-scan. You can choose the color of the A-scan, independent of For this range ruler several options in [mm] and [µs] are the selected Color Scheme (see page 100). -
Page 114: Ref. A-Scan Color
5 Operation A-Scan Ref. A-Scan Color Color Leg You can choose the color of the reference A-scan, inde- For better orientation, the instrument can mark the legs pendent of the selected Color Scheme (see page 100). for the first three reflections with different background colors. -
Page 115: Filename Prefix
A-Scan 5 Operation FileName Prefix You can enter a character string as a prefix for the auto- matically generated file names, for example when sav- ing screen captures or test reports. This prefix will be placed at the beginning of the file name, before the au- tomatically generated data year-month-day-time. -
Page 116: Material Probe
5 Operation Material Probe 5.9 Material Probe Part Type You need to specify the surface shape of the test object. In this function group you can set the data for the test material and the probe. Select Curved when working with circular curved sur- faces, e.g. -
Page 117: Thickness
Material Probe 5 Operation Thickness Probe Selection You can use this function to set the wall thickness of the By selecting the number of the connected probe, you test object. This value is required for the automatic cal- can quickly and correctly set the settings (name, probe culation of the true depth of a reflection. -
Page 118: Frequency
5 Operation Material Probe Frequency Probe X-Value With this function you can set the frequency of the re- With this function you can set the X value (distance of ceiver according to the frequency of your probe. probe front edge from the probe index or sound exit point) of the connected probe. -
Page 119: Pulser Receiver
5.10 Pulser Receiver Voltage If your instrument is equipped with a square-wave puls- In this function group you will find all functions for setting er and the square-wave pulser is chosen as pulser type, the pulser and the receiver. then you can set the pulser voltage within the range of 100 …... -
Page 120: Pulse Width
5 Operation Pulser Receiver Pulse Width PRF Mode You can use this function to adjust the pulse width for You can choose between the Auto and the Manual the square-wave pulser. You can adjust a value within mode for the PRF (pulse repetition frequency) setting. the range of 40 …... -
Page 121: Averaging
Pulser Receiver 5 Operation Averaging Filter This function is used to optimize the A-scan representa- You can optimize the signal by setting a frequency filter tion by averaging several A-scan frames to one frame. until a clear echo is visible. Filter and damping influence each other. -
Page 122: Rectify
5 Operation Pulser Receiver Rectify Dual Mode You can toggle between single-element and dual mode. You can use this function to select the rectification mode of the echo pulses according to your application. This setting is for single-element operation. The probe RF (radio frequency) must be connected to the T/R socket (see page 51). -
Page 123: Ut Setup
UT Setup 5 Operation 5.11 UT Setup Gain This is the same function as in the function group In this function group you will find the settings for gain Gain (see page 107). control, alarms and output signals. AGC Mode Even smaller variations of the echo amplitude can lead to incorrect measurement results in wall thickness mea- surements. -
Page 124: Agc Max Amp / Agc Min Amp
5 Operation UT Setup Alarm Output When the automatic gain control is switched on, further functions are displayed with which you can configure You can assign an alarm event to the corresponding the AGC (see below). alarm output. If the alarm event occurs, a signal is out- put via the alarm output (see page 203). -
Page 125: Magnify Gate
UT Setup 5 Operation Magnify gate You can choose a gate for the Magnify Gate function in the Command bar (see page 67). The setting of this function causes the selected gate to span over the en- tire displayed range. Analog Output You can output measurement results via analog output (see page 203) for external further processing. -
Page 126: Gates
5 Operation Gates 5.12 Gates Tasks of the gates The gates monitor the area of the test object where you In this function group you will find all functions for setting expect to detect a flaw. If an echo exceeds or falls below the gates. -
Page 127: Gate A Start
Gates 5 Operation Gate A Start Gate A Threshold This function can also be set for gate B, C and IF. This function can also be set for gate B, C and IF. You can set the starting point of the gate by entering the You can set the threshold of the gate by entering the ex- exact numerical values. -
Page 128: Gate A Tof Mode
5 Operation Gates Gate A TOF Mode Two measurement arrows are used in order to clearly identify readings and to avoid any misinterpretations. This function can also be set for gate B, C and IF. The display shows The sound path measurement by means of the echo ●... - Page 129 Gates 5 Operation Peak J-Flank / First Peak The amplitude and the time-of-flight are measured at These are special parameters for the Japanese market. the absolutely highest amplitude value within the gate Both use the displayed A-scan for evaluation. with maximum resolution of the instrument. The time-of-flight is measured as in the case of Flank, the amplitude measurement before the 1st change of di- Flank...
- Page 130 5 Operation Gates Measurement between zero crossings Accurate measurements can be achieved by a corre- sponding choice of the measuring point even if the shape of an echo has changed, e.g. due to phase rever- sal in immersion test applications. Measurement errors may occur if there is noise within the range of the gate before the signal to be evaluated.
-
Page 131: Gate A Logic
Gates 5 Operation Gate A Logic Gate B Start This function can also be set for gate B, C and IF. This function corresponds to Gate A Start (see page 127). You can set the criteria for triggering a gate alarm. N o t e Gate B Width For the configuration of the alarm output, see... -
Page 132: Gate B Start Mode
5 Operation Gates Gate B Start Mode The gate B is normally positioned starting from the initial The start of the gate B is normally positioned starting pulse. from the initial pulse as in the case of gate A. You can alternatively specify the start of the gate B in re- lation to an event in gate A. -
Page 133: C/If Gate Mode
Gates 5 Operation C/IF Gate Mode Gate C TOF Mode With this function you first select the gate for which the This function corresponds to Gate A TOF Mode (see following settings are to apply. You can set the settings page 128). -
Page 134: Gate If Width
5 Operation Gates Gate IF Width This function corresponds to Gate A Width (see page 127). Gate IF Threshold This function corresponds to Gate A Threshold (see page 127). Gate IF TOF Mode This function corresponds to Gate A TOF Mode (see page 128). -
Page 135: Auto Calibration
Auto Calibration 5 Operation 5.13 Auto Calibration Velocity Cal Type The USM 100 provides two calibration modes: In this function group you will find all functions for the dif- ferent calibration procedures. For the description of the ● Multi BW (see from page 146) calibration procedures see from page 145. -
Page 136: Probe Angle
5 Operation Probe Angle 5.14 Probe Angle The current probe index angle is influenced, among oth- er things, by different materials or by the wear of the probe contact face. In this function group you will find all functions for defin- ing the current index angle of a probe on a specified A T T E N T I O N reference block. -
Page 137: Angle Cal Source
Probe Angle 5 Operation Angle Cal Source Gate A Start You can choose between the A-scan and the envelope This is the same function as in the function group curve as basis for the probe angle calculation. Gates (see page 127). SDH Diameter Gate A Threshold With this function you must set the side-drilled hole di-... -
Page 138: Evaluation
5 Operation Evaluation 5.15 Evaluation The available methods depend on the activated instru- ment options and the loaded application (see page 61). In this function group you can choose a method for eval- The use of the various methods is described in the re- uating the measured reflector echoes. -
Page 139: Eval Mode
Evaluation 5 Operation Eval Mode Eval Points Source You must choose the evaluation mode before setting This parameter is only visible when DAC, JISDAC or the following parameters. CNDAC has been selected in Eval Mode. For creating and editing the DAC curve points you have dbRef Mode two options: ●... -
Page 140: Dac Point
5 Operation Evaluation DAC Point Offset Mode This parameter is only visible when DAC, JISDAC or You can set an offset mode for the evaluation lines. CNDAC has been selected in Eval Mode. Fixed Select the point number for the following DAC Distance value. -
Page 141: Curve Color
Evaluation 5 Operation Curve Color Probe Name You can select the color for the DAC / TGC curve. This parameter is only visible when DGS has been se- lected in Eval Mode. DGS Mode This is the same function as in the function group Material Probe (see page 117). -
Page 142: Delay Velocity
5 Operation Evaluation Delay Velocity Reference Size This parameter is only visible when DGS has been se- This parameter is only visible when DGS has been se- lected in Eval Mode. lected in Eval Mode. This is the same function as in the function group You must enter the reference size for the recording. -
Page 143: Test Attenuation
Evaluation 5 Operation Test Attenuation JISDAC Mode This parameter is only visible when DGS has been se- This parameter is only visible when JISDAC has been lected in Eval Mode. selected in Eval Mode. You can enter a value for the sound attenuation in the You can switch this function on or off. -
Page 144: Acceptance Level
5 Operation Evaluation Acceptance Level Defect Length This parameter is only visible when CNDAC has been This parameter is only visible when CNDAC has been selected in Eval Mode. selected in Eval Mode. Code Acceptance Line This parameter is only visible when CNDAC has been This parameter is only visible when CNDAC has been selected in Eval Mode. -
Page 145: Calibration
Calibration 5 Operation 5.16 Calibration Choice of the measuring point The sound path measurement by means of the echo Calibrating the probe delay and velocity evaluation depends on the choice of measuring point (see Gate A TOF Mode, page 128). Before working with the USM 100, it must be calibrated. -
Page 146: Calibration With Multi Bw
5 Operation Calibration Calibration with Multi BW – Couple the probe to the calibration block. – Position the gates A and B on the first and on the sec- With Multi BW (multi backwall), the calibration only ond backwall echo. needs one reference value S Ref 1 / S Ref 2. -
Page 147: Calibration With Multi Step
Calibration 5 Operation Calibration with Multi Step – Couple the probe to the 5 mm calibration block. – Position the gate on the first backwall echo. With Multi Step, the calibration needs two reference values S Ref 1 / S Ref 2 and S Ref 1 / S Ref 2. The –... -
Page 148: Calibration Using Dual-Element Probes
5 Operation Calibration Calibration using dual-element probes With thin wall thicknesses, the effect described above leads to an echo amplitude drop which has to be espe- Dual-element probes are especially used for wall thick- cially taken into account with thicknesses <2 mm. ness measurements. -
Page 149: Defining The Probe Angle
Defining the probe angle 5 Operation 5.17 Defining the probe angle The calculated angle is briefly displayed in the informa- tion line at the bottom edge of the display screen. The function group Probe Angle on the Probe Angle Cal. panel provides all functions to define the current in- dex angle of a probe on a reference block. -
Page 150: Db Ref
5 Operation dB REF 5.18 dB REF Recording a reference echo Before using the dB-difference measurement, you have With the dB-difference measurement method (db REF) to first record a reference echo. you can evaluate reflector echoes by means of refer- ence echoes. -
Page 151: Echo Height Comparison
dB REF 5 Operation Echo height comparison You can compare the echo from any chosen reflector with the reference echo. The following values are available for indication in the Measurement line (see page 76). ● dBrA dB-difference between the reference echo and the highest echo in the gate A. -
Page 152: Dac
5 Operation 5.19 DAC You can evaluate reflector echoes by means of the dis- – In the A-scan tap on the Evaluation icon to display tance-amplitude correction (DAC). the function group. After selecting DAC in the function Eval Mode in (see page 139) the function group Evaluation provides you with all the functions needed for the echo height com- parison between a reflector echo and a reference echo. -
Page 153: Recording A Dac Curve
5 Operation Recording a DAC curve A T T E N T I O N Before starting to record a reference curve, the instrument has to be correctly calibrated (see page 145). As soon as a new curve is recorded, a possibly already existing curve must be deleted (see page 155). - Page 154 5 Operation – Position the gate A on the first DAC echo (see page 86). – In the Command bar tap on AutoXX (see page 66) to automatically set the echo to the required screen height. – In the Command bar tap on Calibrate (see page 66) to record the first DAC point.
-
Page 155: Turning The Dac Evaluation Off
5 Operation Turning the DAC evaluation off Deleting the DAC curve You can turn the DAC evaluation off at any time. You can delete the DAC curve at any time. After this, the DAC evaluation is not possible until you have recorded –... -
Page 156: Multiple Dac Curves
5 Operation Multiple DAC curves You can activate multiple DAC curves and, at the same time, define the offsets between the multiple curves and the recording curve. You can use fixed offsets for all curves or individual off- sets for each curve. –... -
Page 157: Echo Evaluation Using Dac/Tcg
5 Operation Echo evaluation using DAC/TCG Change in the probe delay with DAC/TCG Generally, a change in the probe delay automatically To be able to evaluate a flaw echo by means of the also affects the shape of the sound field. This means DAC, certain conditions must be met: that a new recording of the reference echo would be the- ●... - Page 158 5 Operation Automatic variation of the measuring point in TOF mode An echo amplitude evaluation is normally carried out at the echo peak of the signal under examination because this is the only way of ensuring that the displayed echo amplitude and the sound path (projection distance, depth position) always belong to the highest echo in the gate.
-
Page 159: Dgs
5 Operation 5.20 DGS ● Distance D between the probe coupling face and the circular disk-shaped equivalent reflector You can use the DGS mode (distance - gain - size) to ● Difference in gain G between a circular disk-shaped compare the reflecting power of a natural flaw in the test equivalent reflector and a reference reflector, e.g. - Page 160 5 Operation The following parameters of the probe affect the curve You can adjust these parameters in the USM 100 in shape: such a way that you can use the DGS method with many different probes and on various materials. ●...
-
Page 161: Validity Of The Dgs Method
5 Operation Validity of the DGS method ● The evaluation must be carried out using the same probe that was used for recording the reference echo. Echo amplitude evaluations using the DGS method are Another probe of the same type can be used after re- only reliable and reproducible under the following condi- cording a new reference echo. - Page 162 5 Operation Change in the probe delay with DGS Automatic variation of the measuring point in TOF mode Generally, a change in the probe delay automatically also affects the shape of the sound field. This means An echo amplitude evaluation is normally carried out at that a new recording of the reference echo for the DGS the echo peak of the signal under examination because setting would be theoretically required.
-
Page 163: Settings For The Dgs Measurement
5 Operation Settings for the DGS measurement Recording a reference echo and turning the DGS curve on – In the A-scan tap on the Evaluation icon to display the function group. To be able to display the required DGS curve, you have to record the reference echo. -
Page 164: Locks, Error Messages
5 Operation Locks, error messages Taking the general DGS diagram as a basis, the USM 100 calculates the required test sensitivity for dis- As long as a valid reference echo is stored, no functions playing the 3 mm curve with its maximum at 80 % can be changed which could cause an incorrect DGS screen height, and makes this setting. -
Page 165: Sound Attenuation And Transfer Correction165
5 Operation Sound attenuation and transfer correction Using multiple DGS curves There are two possibilities for setting the sound attenu- After turning the DGS evaluation on, at least one curve ation in the test object: is displayed for a certain ERS (equivalent reflector size). For some test specifications according to DGS, certain ●... -
Page 166: Turning The Dgs Evaluation Off
5 Operation Turning the DGS evaluation off Deleting a DGS reference echo You can turn the DGS evaluation off at any time. You can delete the echo of the reference reflector. After this, the DGS evaluation is not possible until you have –... -
Page 167: Probe Data
5 Operation Probe data (Using SDH as reference reflector) Probe name Wavelength Min. diameter of Near-field length Min. distance in steel SDH (1.5 λ) in steel (N) in steel (1.5 N) [mm] [mm] [mm] [mm] B1-S B2-S B4-S MB2-S MB4-S MB5-S 7 …... - Page 168 5 Operation Probe Wavelength in steel Focus depth in steel [mm] [mm] MSEB-2 8 ±2 MSEB-4 10 ±2 MSEB-4 0° 18 ±4 MSEB-5 10 ±2 SEB-1 20 ±4 SEB-2 KF5 6 ±2 SEB-4 KF8 6 ±2 SEB-2 15 ±3 SEB-4 12 ±2 SEB-2 0°...
- Page 169 5 Operation N o t e The DGS curves for the dual-element probes are not derived from the general DGS diagram but have been individually mea- sured for steel (5920 m/s) and stored in the instrument. You can only carry out a DGS evaluation with one of the dual-element probes available if the sound velocity is between 5330 and 6500 m/s.
-
Page 170: Truedgs Angle-Beam Probes
5 Operation ® trueDGS angle-beam probes The following probes using the trueDGS technology are currently available: ® trueDGS angle-beam probes generate a rotationally ● MWB45-2 tD (probe # 35) symmetric sound field in the material to be tested like vertically beaming circular elements. ●... -
Page 171: Aws D1.1 / Aws D1.5
AWS D1.1 / AWS D1.5 5 Operation 5.21 AWS D1.1 / AWS D1.5 with: ● A = flaw gain (in dB) You can evaluate defects in welds according to the Absolute instrument gain with which the maximum specifications AWS D1.1 or AWS D1.5. flaw echo is at 50 % (±5 %) echo height. - Page 172 5 Operation AWS D1.1 / AWS D1.5 N o t e Make sure that all instrument options for the – In the A-scan tap on the Evaluation icon to display specific test are calibrated before starting the the function group. rating according to AWS D1.1 or AWS D1.5.
- Page 173 AWS D1.1 / AWS D1.5 5 Operation – Select the specific AWS parameters in the measure- ment line (see page 105). – Couple the probe to the reference standard and max- imize the echo from the 1.5 mm side-drilled hole. –...
-
Page 174: Jisdac
5 Operation JISDAC 5.22 JISDAC The USM 100 has a DAC function for the echo evalua- tion by means of the distance-amplitude correction (DAC) and an additional class rating according to JIS Z3060-2002. With the function JISDAC, you can activate a distance- amplitude curve according to JIS including three evalu- ation lines marked with the letters L (low), M (medium), and H (high). -
Page 175: Cndac
CNDAC 5 Operation 5.23 CNDAC Evaluations according to CNDAC After recording the reference echo, the CNDAC shows CNDAC (China Distance Amplitude Correction) is an the reference lines RL, SL, and EL depending on the evaluation method for ultrasonic weld testing, based on corresponding choice in the functions Code (standard) the standards JB/T4730 and GB 11345 of the People's and Cal Block (reference block). -
Page 176: Standards And Reference Blocks
5 Operation CNDAC Standards and reference blocks Code Cal Block Ø SDH (mm) Wall thickness (mm) RL (dB) SL (dB) EL (dB) 11345A – DAC – 10 DAC – 16 11345B – DAC – 4 DAC – 10 DAC – 16 11345C –... -
Page 177: Documentation
Documentation Krautkrämer USM 100 Rev. - (09/2021) -
Page 178: Test Reports
6 Documentation Test reports 6.1 Test reports Printing test reports The USM 100 is not meant to be directly connected to a Saving test reports printer. You can use standard software (text and image editors) You can use the USM 100 to save test reports. Test re- on your computer to view, edit, and print out the test re- ports are stored as PDF files. -
Page 179: Displaying Test Reports
Test reports 6 Documentation Displaying test reports You can display test reports saved in the instrument on the screen of the USM 100. Test report setup A test report can contain different information and data, as well as screen captures. Test report templates are created and edited with the software Mentor Create, which is described in a sepa- rate manual. -
Page 180: Screen Captures
6 Documentation Screen captures 6.2 Screen captures You can save an image of the entire screen. Screen captures are saved in the selected default directory. The file name is generated automatically and consists of the name of the current application, the date and the time, for example USM100_Standard_2021-03-02_16.09.49. -
Page 181: Data Recorder
Data Recorder 6 Documentation 6.3 Data Recorder You can store readings in a grid matrix and, in this way, structure them according to the test tasks. The grid ma- trix consists of rows and columns. All functions and settings for documentation with the data recorder can be found on the Data Recorder panel In this way, you can e.g. -
Page 182: Switching Between Views
6 Documentation Data Recorder Switching between views Together with the grid matrix the A-scan is displayed. This allows you to change UT settings without having to switch to another panel. As an alternative the split-screen view, you can display either the A-scan or the data recorder matrix in full screen. -
Page 183: Creating A Data Recorder File
Data Recorder 6 Documentation Creating a data recorder file A T T E N T I O N After generating the file, you can no longer change the number of rows and columns. – Tap in the grid matrix to display the available function group icons. - Page 184 6 Documentation Data Recorder FileName Prefix You can enter a name for the Data Recorder file. If you You can set the name of the first field (top left) of the grid start a new grid matrix and do not change the name, a matrix.
- Page 185 Data Recorder 6 Documentation Num of Rows Advance Dir You can set the total number of rows for the grid matrix. You can set select the automatic filling advance direc- Together with the number of columns (Num of Cols), tion for the grid matrix. With the setting Row, a row is this then results in the total size of the grid matrix.
-
Page 186: Display
6 Documentation Data Recorder Display TOF Palette Based on the stored TOF reading, the fields of the grid With the Display settings you can matrix are shaded in color. You can select the color pal- ette for these colors. TOF Color Range This function can be set in the software Mentor Create only, which is described in a separate manual. -
Page 187: File Management
File management 6 Documentation 6.4 File management All file management functions can be found in the Main menu (see page 60) under File management. For special information on handling application files, see page 61. The functions for saving reports, settings and screen- shots as well as for loading settings and data can be found in the Command bar (see page 66). -
Page 188: File Management Functions
6 Documentation File management File management functions Import You can import files from a USB stick or from the Icon Function Page InspectionWorks server to the instrument's internal memory, for example settings or applications. Import If you want to import one or more files from a USB stick, then first insert the USB stick into the socket on the top Export of the instrument (see page 52). -
Page 189: Export
File management 6 Documentation Export Rename You can export files from the instrument's internal mem- You can rename the files stored in the instrument's in- ory to a USB stick or to the InspectionWorks server, for ternal memory. example for backup purposes or for forwarding or fur- –... -
Page 190: Delete
6 Documentation File management Delete You can delete the files from the instrument's internal memory. N o t e Before deleting, you can export the files for backup purposes (see page 189). The dele- tion can not be undone. – In the list of files (see page 187) tap the check boxes of the files you want to delete. -
Page 191: Maintenance And Care
Maintenance and care Krautkrämer USM 100 Rev. - (09/2021) -
Page 192: Maintenance
7 Maintenance and care Maintenance 7.1 Maintenance 7.2 Instrument care The USM 100 requires basically no maintenance. Clean the instrument and its accessories using a moist cloth. The following are exclusively recommended for A T T E N T I O N cleaning: Any repair work may only be carried out by ●... -
Page 193: Battery Care
Battery care 7 Maintenance and care 7.3 Battery care Before transporting by air, ● make sure that the battery charge is below 30%, Transport and storage ● pay attention to the information on transport and stor- age in the technical documentation of the specific battery, A T T E N T I O N Lithium batteries, identified as being defec-... -
Page 194: Charging
7 Maintenance and care Battery care Charging Battery life and temperature The capacity and life of batteries mainly depend on the The amount of time that the USM 100 can be run on fully correct handling. Therefore, please observe the tips be- charged batteries (and the heat generated internally) is low: directly related to current consumption in the instrument... -
Page 195: Disposal Of Batteries
Battery care 7 Maintenance and care Disposal of batteries Lithium batteries are marked with the symbol of the crossed out symbol. The symbol reminds you that batteries should not be disposed of with household waste, but must be collect- ed separately (see Disposal of batteries, page 217). To prevent short circuits and the associated heating lith- ium batteries must never be stored or transported un- protected (see Transport and storage, page 193). -
Page 196: Software Updates
7 Maintenance and care Software updates 7.4 Software updates Installing an update A T T E N T I O N You can install the latest software updates for the USM 100 yourself. During the update process, the power supply must not be interrupted. -
Page 197: Update In Case Of Malfunction
Software updates 7 Maintenance and care Update in case of malfunction In the event of a system crash or if the instrument can no longer be started in the normal way, you can reset or reinitialize the operating system with a software update. To do this, you need a valid update file (extension .mup) on a USB stick. -
Page 198: License Upgrade
7 Maintenance and care License upgrade 7.5 License upgrade You can import licenses, which will then unlock addition- al functions for your instrument. For this you need a val- id license file (extension .mlp). You can import the license file from a USB stick. –... -
Page 199: Interfaces And Peripherals
Interfaces and Peripherals Krautkrämer USM 100 Rev. - (09/2021) -
Page 200: Interfaces
8 Interfaces and Peripherals Interfaces 8.1 Interfaces Overview The interfaces are located on the top and on the right side of the instrument. – To access the interfaces on the top of the instrument, slide the lid (1) to the right side until it swings open up- wards. -
Page 201: Usb-A Interface
Interfaces 8 Interfaces and Peripherals USB-A interface USB-C interface The USB interface type A (see page 200) is used for The USB interface type C (see page 200) can be used data exchange between the instrument and a standard to connect a USB-C docking hub. USB stick (see page 52). -
Page 202: Wlan
8 Interfaces and Peripherals Interfaces WLAN The USB interface type A (see page 200) can be used to connect a WLAN adapter. N o t e It is recommended to plug in the WLAN adapter together with an extraction tool to make it easier to pull out the very small adapter later. -
Page 203: I/O Interface
(com- bined for all gates or individual for one selected gate), analog output, encoder inputs and signals for service purposes for the Waygate Technologies customer sup- port. Krautkrämer USM 100 Rev. - (09/2021) - Page 204 8 Interfaces and Peripherals Interfaces Function Color on cable 156M2384 Lemo LM.SDA311.[A][B] Output Analog signal, analog voltage corresponding to Light blue gate amplitude or TOF within the gate, 0 … 5V, I = 5 mA Output SAP, external trigger, 5 V TTL, I = 5 mA Pink Output...
-
Page 205: Appendix
Appendix Krautkrämer USM 100 Rev. - (09/2021) -
Page 206: Ut Function Directory
9 Appendix UT Function directory 9.1 UT Function directory N o t e Some functions are only available if the cor- responding options are enabled by entering the license code. Gain Function name Page 2-Point Cal Source A-Scan Color Acceptance Level Acceptance Line AGC Mode AGC Max Amp / AGC Min Amp... - Page 207 UT Function directory 9 Appendix Gain Function name Page Analog Output Angle Cal Source Auto XX Amplitude Averaging AWS Mode Block Bold Line C/IF Gate Mode Cal Block CNDAC Mode Code Color Leg Color Palette Curve Color Krautkrämer USM 100 Rev.
- Page 208 9 Appendix UT Function directory Gain Function name Page Custom Gain Step DAC / TCG DAC Distance DAC Point Damping dbRef Mode Defect Length Define Points Delay Velocity DGS Curve DGS Mode Display Delay Display Range Dual Mode Rev. - (09/2021) Krautkrämer USM 100...
- Page 209 UT Function directory 9 Appendix Gain Function name Page Effective Diameter Envelope Envelope Color Eval Mode Eval Source Eval Points Source Evaluation Line FileName Prefix Filter Freeze Mode Frequency Gain Gain Step Gate A Logic Krautkrämer USM 100 Rev. - (09/2021)
- Page 210 9 Appendix UT Function directory Gain Function name Page Gate A Start Gate A Threshold Gate A TOF Mode Gate A Width Gate B Logic Gate B Start Gate B Start Mode Gate B Threshold Gate B TOF Mode Gate B Width Gate C Logic Gate C Start Gate C Threshold...
- Page 211 UT Function directory 9 Appendix Gain Function name Page Gate C Width Gate Selection Grid Grid Color JISDAC Mode LED Alarm Magnify gate Offline Gain Offset Offset 1 Offset Mode Outer diameter Part Type PRF Mode Krautkrämer USM 100 Rev. - (09/2021)
- Page 212 9 Appendix UT Function directory Gain Function name Page PRF Value Probe Angle Probe Delay Probe Name Probe Selection Probe X-Value Pulse Width Range Ruler Recording Line Rectify Ref. A-Scan Color Ref. Envelope Color Reference Attenuation Reference Size Rev. - (09/2021) Krautkrämer USM 100...
- Page 213 UT Function directory 9 Appendix Gain Function name Page Reference Type S Ref 1 / S Ref 2 S Ref 1 / S Ref 2 SDH Depth SDH Diameter Test Attenuation Thickness Transfer Correction Velocity Velocity Cal Type Voltage Krautkrämer USM 100 Rev.
-
Page 214: Manufacturer
Should you nevertheless detect an error on your instru- F +49 (0) 22 33 601 402 ment, power the instrument off and remove the batter- ies. Inform your local Waygate Technologies customer service and support, indicating the error and describing Rev. - (09/2021) -
Page 215: Service Contacts
Service contacts 9 Appendix 9.3 Service contacts Region Location Contact Europe Germany / Headquarters waygate.service.utsp@bakerhughes.com +49 2233 601 111 Europe waygate.service.uk@bakerhughes.com +44 845 601 5771 Europe France waygate.service.fr@bakerhughes.com +33 4 72 17 92 16 +33 4 72 17 92 22 +33 4 72 17 92 23 Europe Spain... -
Page 216: Environmental Protection Regulations
WEEE directive (Waste Electrical and Electronic Equipment) If you need more information on the collection, reuse, and recycling of recyclable material, please contact your Waygate Technologies is an active participant in Eu- local waste management company. rope's Waste Electrical and Electronic Equipment Visit ec.europa.eu/environment/waste/weee/index- (WEEE) take-back initiative, directive 2012/19/EU. -
Page 217: Disposal Of Batteries
Environmental protection regulations 9 Appendix Disposal of batteries What do the markings mean? Batteries and accumulators must be marked (either on This product contains batteries that cannot be disposed the battery, on the accumulator, or on their packaging, of as unsorted municipal waste in the European Union. depending on the size) with the separate collection sym- Please read carefully the data sheets for the battery bol. - Page 218 9 Appendix Environmental protection regulations The risks and your role in minimizing them ● Lead is poisonous in all compounds. It accumulates in the body so that any form of exposure is critical. In- By participating in the proper waste disposal, you would gestion and inhalation of lead can cause severe inter- make a valuable contribution towards reducing the dam- nal injuries.
-
Page 219: Specifications
Specifications Krautkrämer USM 100 Rev. - (09/2021) -
Page 220: General Features
10 Specifications General features Dimensions (W × H × D) 216 mm × 138 mm × 60 mm Weight 1.2 kg (including two batteries) Input supply voltage +15 V DC Battery operational time Number and type of batteries 2 × Li-Ion, 1 for hot swap Storage temperature –20 …... -
Page 221: Environmental
10 Specifications Environmental Protection grade IP 67 Shock IEC 60068-2-27 Vibration IEC 60068-2-6 Humidity EN 60068-2-30:2005 EN 61326-1, EN 55011 Low Voltage Directive IEC 61010 Display Screen size and resolution 1024 × 600 pixels Range of sound velocities 250 … 16000 m/s Available views A-scan;... -
Page 222: Interfaces
10 Specifications Highest digitized frequency according to ISO 22232-1 30 MHz Time base error <+/- 0,5% Interfaces Power input Lemo 0S Probe connectors Lemo 00 Input/Output Lemo 1B, 14 pin USB 2.0 Type A USB 3.0 Type C Transmitter Pulse repetition frequency 10 …... -
Page 223: Receiver
10 Specifications Receiver Maximum input voltage 40 Vpp Linearity of vertical display +/-2% Frequency response 0,2 … 30 MHz (-3 dB) Digital filters 12 bandpass and high pass filters Dead time after transmitter pulse < 5 µs Equivalent input noise <80 nV/SQR (Hz) Gain range 110 dB... -
Page 224: Data Acquisition
10 Specifications Data acquisition Maximum number of samples per A-scan 1024 points Data storage, internal 64 GB Gates Number of gates 3 (one can be used as interface gate) Measurement modes flank, peak, zero crossing before, zero crossing after, J-flank, first peak Threshold (all gates) 5 …... -
Page 225: Index
Index Krautkrämer USM 100 Rev. - (09/2021) - Page 226 11 Index Numerics alarm output 203 LED 124 2-Point Cal Source 135 Alarm Output 124 Allow Remote Access 104 Amp Color Range 186 A Freeze 111 Amp Palette 186 AB Freeze 111 Amplitude Ruler 112 About 104 Analog Output 125 AC power adapter 44 Analog output 203 Acceptance Level 144...
- Page 227 11 Index normal mode 70 Battery overview 65 care 193 zoom mode 70 charge level 7, 47 charging 194 A-Scan (function group) 109 disposal 195, 217 A-Scan Color 113 life and temperature 194 Auto Calibration (function group) 135 storage 193 Auto Reverse 185 transport 21, 193 Auto XX Amplitude 108...
- Page 228 11 Index Color Leg 114 Color Palette 113 C/IF Gate Mode 133 Color Ruler 186 Cal Block 144 Color Scheme 100 Calibrate 66 Command bar 65, 66 Calibration 135, 145 icons 3, 4 dual-element probes 148 key operation 90 measuring point 145 Compare 111 Multi BW 146 Connection...
- Page 229 11 Index views 182 Data Source 184 DAC 6, 152 Date 102 Curve color 141 Date Format 102 Echo evaluation 157 multiple DAC curves 156 dB increment 107 DAC / TCG 140 dB REF 6, 150 DAC curve dB step 75, 80, 107 deleting 155 dB-difference measurement 150 recording 153...
- Page 230 11 Index deleting a reference echo 166 Disposal error message 164 batteries 195, 217 locks 164 instrument 216 multiple curves 165 WEEE directive 216 recording a reference echo 163 Distance Units 103 settings 163 Distance-amplitude correction 152 turning off 166 Download file 189 DGS Curve 141 Dual Mode 122...
- Page 231 11 Index Eval Mode 139 functions 188 Eval Points Source 139 FileName Prefix 115, 184 Eval Source 139 Files iwp 63 Evaluation (function group) 138 mlp 198 Evaluation Line 144 mup 196 Evaluation mode 139 ups 97, 98 Evaluation of flaws 27 Filter 121 Evaluation source 139 First Peak 129...
- Page 232 11 Index Auto Calibration 135 selecting 78, 89 Evaluation 138 UT Function directory 206 Gain 107 Gates 126 icons 5 Gain 75, 80, 107, 123 Material Probe 116 Automatic gain control 123 overview 106 Offline Gain 108 Probe Angle 136 Gain (function group) 107 Pulser Receiver 119 UT Setup 123...
- Page 233 11 Index Gate B Start Mode 132 Information line 65 Warnings 77 Gate mode (gate C/IF) 133 Instrument settings 99 Gate Selection 126 Interfaces 200 Gate tracking 132 alarm output 203 Gates 71 I/O 200, 203 Gates (function group) 126 LAN 201 General settings 99 power adapter 200...
- Page 234 11 Index Keyboard 201 Keys Magnify Gate 67 functions 8, 87 Magnify gate 6, 125 locking 69 Main functions 79 operation 88 Main menu 60 Maintenance 192 Malfunction 197 LAN 201 Manufacturer 214 Language 103 Material LED Alarm 124 instrument 216 LED signals 93 test object 26 License 104, 198...
- Page 235 11 Index Multi-color LED 93 keys 88 touchscreen 78 Multiple page report saving 69 Operator training 24 Orientation 101 Outer diameter 117 Output Negative HW (Rectify) 122 alarm 124 Network 201, 202 analog 125 Network connection 53, 57 Overview 3, 29 Num of Cols 185 A-scan 65 Num of Rows 185...
- Page 236 11 Index Positive HW (Rectify) 122 calibration 145 Power adapter 44, 200 Probe Name 117 Power level indicators 7, 48 Probe Selection 117 Power supply 44 Probe X-Value 118 Powering Off 55 Pulse repetition frequency 120 Powering On 54 Pulse Width 120 Prerequisites Pulser Receiver (function group) 119 testing 24...
- Page 237 11 Index Readings 76 Remote Connection 104 Recording Renaming 189 DAC curve 153 Repair 192 reference echo 150 Report Recording a reference echo (DGS) 163 saving 69 Recording Line 144 RF (radio frequency) 122 Rectify 122 Ruler 112, 113 Ref. A-Scan Color 114 Ref.
- Page 238 11 Index SDH Depth 137 Start (gate) 127 SDH Diameter 137 Start mode (gate B) 132 Selected 185 Start up problem 197 Service contacts 215 Starting 54 Settings 82 Status indicators 6, 65, 75 incompatible 84 Symbols 7, 48 loading 68, 98 Command bar 3, 4 saving 68, 97 function groups 5...
- Page 239 11 Index Test object material 26 operation 78 Test report 178 Transfer Correction 108 deleting 178 Transfer correction 165 displaying 179 Transfer loss 6 printing 178 trueDGS 170 saving 178 setup 179 Thickness 117 Units 103 Threshold (gate) 127 Update 104, 196 Through 122 Upload file 188 Time 102...
- Page 240 11 Index Velocity 110, 116, 118 Zero After 129 calibration 145 Zero Before 129 Velocity Cal Type 135 Zoom Version 104, 196 A-scan 70 gate 71 VNC Client 56 Voltage 119 Wall thickness 117 Wall thickness measurement 26 WEEE directive 216 Welds rating 171 Width (gate) 127 Wi-Fi 202...
- Page 241 11 Index Krautkrämer USM 100 Rev. - (09/2021)
- Page 242 RemoteService@bakerhughes.com waygate-tech.com © 2021 Baker Hughes All rights reserved. Specifications subject to change without notice. bakerhughes.com...
Need help?
Do you have a question about the Krautkramer USM 10 and is the answer not in the manual?
Questions and answers