Knauer Azura CT 2.1 Service Instructions Manual
Column thermostat
Hide thumbs
Also See for Azura CT 2.1:
- Instructions manual (47 pages) ,
- Instructions manual (48 pages)
Table of Contents
Advertisement
Quick Links
Advertisement
Table of Contents

Related Manuals for Knauer Azura CT 2.1


Summary of Contents for Knauer Azura CT 2.1
- Page 1 Column Thermostat CT 2.1 Service Instructions HPLC HPLC Document no. VSM-020...
- Page 2 For latest version of the instructions, check our website: www.knauer.net/service-instructions Legal information: This document contains confidential information and may not be reproduced without written consent of KNAUER Wissenschaftliche Geräte GmbH. © KNAUER Wissenschaftliche Geräte GmbH 2020 All rights reserved. AZURA® is a registered trademark of...
-
Page 3: Table Of Contents
Table of contents Table of contents 1. General ..............4 About these service instructions . - Page 4 Table of contents 8. Replacing the leak sensor ........... 33 8.1 Removing the leak sensor.
-
Page 5: General
Observe the RoHS conformity for mainboards! Never perform mainte- on the mainboard nance on the mainboards independently. Always replace the mainboards and return the defective boards to KNAUER technical support, otherwise he warranty will lapse. Signal words Possible dangers related to the device are distinguished in personal and material damages. -
Page 6: Additional Typographical Conventions
The warranty seal is a security label which indicates if any opening on instrument has occurred. Most KNAUER products are sold with the blue seal on the rear side to confirm that KNAUER was the last who took care of the instrument. -
Page 7: Safety Instructions And Authorization For Service Technicians
These service instructions are intended for the following professional groups: repairs? Task Authorized Maintenance KNAUER service technicians ƒ Service technicians authorized by KNAUER ƒ who have completed a service training Level 2 Repair KNAUER service technicians ƒ Service technicians authorized by KNAUER ƒ... -
Page 8: Service Request Form And Decontamination Report
Service request form and decontamination report We advise you not to repair devices which are not accompanied by the completed document “Service request form and decontamination report” (www.knauer.net/decontamination-report). AZURA® CT 2.1 Service Instructions VSM-020... -
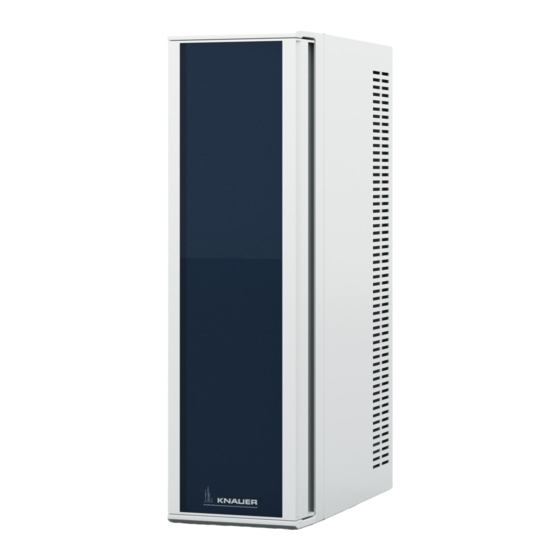
Page 9: Device View
Device view 3. Device view Cartridge for eluent pre-tempering (optio- nal) Door Housing Column holder Temperature sensor Column (not included with the delivery) Leak sensor Fig. 1: Front view AZURA® CT 2.1 Service Instructions VSM-020... -
Page 10: Calibrating Ct 2.1 Manually
Calibrating CT 2.1 manually 4. Calibrating CT 2.1 manually Tool Hand-held digital thermometer like SIKA MH 3750 ƒ KNAUER Service tool ƒ Temperature measurement Procedure Figure 1. Open the front door. 2. Insert the thermometer probe right next to the... -
Page 11: Calibrating Ct 2.1 Manually Via Service Tool
Not all three temperatures have to be entered if only one or two require correction. Tool KNAUER Service tool ƒ Procedure Figure 1. Open KNAUER Service tool finder, select the oven and establish connection to the instrument. Fig. 4 Open Service tool finder 2. Enter service mode by enter- ing service password. - Page 12 Calibrating CT 2.1 manually Procedure Figure 3. Enter the average values of the temperature measure- ments acquired as described in chapter 4.1 and press “recalculate” button. Note: If the heat/cool element has been changed as described in chapter 7, please press “Set Defaults”...
- Page 13 Calibrating CT 2.1 manually Procedure Figure 5. Send values by pressing the red arrow on left hand side of the window and click “Write information for current view into the device”. Fig. 8 Sending values Result Calibration has been completed. AZURA®...
-
Page 14: Door
Door 5. Door Door of CT 2.1 5.1.1 Removing the door Prerequisites The device has been switched off. ƒ The power plug has been removed. ƒ Tool Phillips-head screwdriver 2.5 mm ƒ Process Figure Procedure 1. Loosen and remove both screws the upper retaining plate of the door. - Page 15 Door 4. Use a screwdriver and push in the hinge 5. Remove the door 6. Be careful and fix the retaining plate of the door so it cannot fall down. Fig. 11: Remove door 7. Safely store the 2 white washers (one at the top and one at the bottom side of the door)
-
Page 16: Installing The Door
Door 5.1.2 Installing the door Prerequisites The device has been switched off. ƒ The power plug has been removed. ƒ The door has been removed. ƒ Tool Phillips-head screwdriver 2.5 mm ƒ Process Figure Procedure 1. Reinstall the upper retaining plate the door by tight- ening both screws 2. -
Page 17: Exchanging The Door Trim
Door 5.1.3 Exchanging the door trim Prerequisite The device has been switched off. ƒ The power plug has been removed. ƒ The door has been removed. ƒ Tool Cross-head screwdriver 1.5 mm ƒ Flat screwdriver ƒ Process Figure Procedure 1. Loosen the five cross-head screws at the door trim. -
Page 18: Exchanging The Door Seals
Door Exchanging the door seals Prerequisite The device has been switched off. ƒ The power plug has been removed. ƒ The door has been removed. ƒ Tool Scissors ƒ Process Figure Procedure 1. Remove the three parts of the door seal manually. -
Page 19: Removing The Fan Plate
Removing the fan plate 6. Removing the fan plate Hot surface Danger of burns from 185 °F ( 85 °C) hot surfaces in the column com- partment. ÎWear protective gloves. Prerequisite The device has been switched off. ƒ The power plug has been pulled. ƒ... -
Page 20: Changing The Heat/Cool Element
Changing the heat/cool element 7. Changing the heat/cool element Electronic defect Performing maintenance tasks on a switched on device can cause da- mage to the device. ÎSwitch off the device ÎPull the power plug. Electronic defect Electrostatic discharge can destroy the electronics. ÎWear a protective bracelet against electrostatic discharge and ground. - Page 21 Changing the heat/cool element Process Figure 2. Remove the plug-in connector for the tempe- rature sensor , the fan and the leak sensor 3. Loosen the black and the red cable at the lower part of the mainboard. 4. Loosen the blue and the red cable on the left side of the Fig.
-
Page 22: Removing Side Panels Of The Device
Changing the heat/cool element Removing side panels of the device Note: The components might be sharp-edged. Always wear gloves in order to prevent injuries. Tools Slot screwdriver ƒ Torx T20 screwdriver ƒ Process Figure 1. Lift the cover plate at the top of the device with the slot screwdriver to remove it. - Page 23 Changing the heat/cool element Process Figure 6. After loosening the screws lift the overlapping sides of the side panels slightly with the slot screwdriver. Fig. 28 Lift the overlapping sides 7. Remove the side panels on both sides of the device carefully.
-
Page 24: Disassembling The Heat/Cool Element
Changing the heat/cool element Disassembling the heat/cool element Note: The components might be sharp-edged. Always wear gloves in order to prevent injuries. Tools Torx screwdriver T20 (length 150 mm or longer) ƒ Hexagon screwdriver, 8 mm ƒ Process Figure 1. Open the door of the de- vice and remove the tem- perature sensor from the... - Page 25 Changing the heat/cool element Process Figure 4. Lay the device with the door facing down on a soft and clean surface, for example a blanket. 5. Loosen 2 hexagon screws on the top of the device. These two screws hold the mounting rails of the heat/ cool element.
-
Page 26: Installing The New Heat/Cool Element
Changing the heat/cool element Installing the new heat/cool element Note: Pay attention to the direction of the installation of the heat/cool element. Ensure that the cooling fins on the left side have a wider spacing than the fins on the right side. Use the the mounting rails to check the spacing. - Page 27 Changing the heat/cool element Process Figure 6. Ensure that the black bar which is visible behind the fan blades is located in the upper left corner before mounting it . Fig. 36: Black bar behind the fan blades 7. The cable of the temperature sensor must be placed between the cooling fins right side from the middle.
- Page 28 Changing the heat/cool element Process Figure 11. Clip the temperature sensor back into the column fixture. Ensure a space of approx. 8 to 10 mm between the top of the sensor and the top edge of the fan plate. Fig. 39: Installed temperature sensor Result...
-
Page 29: Remounting The Side Panels Of The Device
Changing the heat/cool element Remounting the side panels of the device Note: Reconnect the grounding cables to the side panels of the device. Process Figure 1. Lay the overlapping ends of the side panel over the base plate and fasten the 2 screws. 2. - Page 30 Changing the heat/cool element Process Figure 5. Press onto the middle of the cover plate in order to click it in place completely. 6. Repeat step four and five with the bottom cover plate. Fig. 42: Click the cover plate into place Result The side panels have been remounted.
-
Page 31: Remounting The Rear Plate Of The Device
Changing the heat/cool element Remounting the rear plate of the device The device has been switched off. ƒ Prerequisite The power plug has been removed. ƒ Tools Torx screwdriver T10 ƒ Process Figure 7. Reconnect the plug-in connectors for the tempe- rature sensor , the fan and the leak sensor... - Page 32 Changing the heat/cool element Process Figure 1. Fasten the 6 Torx screws and remount the rear plate of the device. Fig. 46 Fasten the screws with a Torx screwdriver Result The rear plate has been remounted. Next step Recalibrate the device. AZURA®...
-
Page 33: Replacing The Leak Sensor
Replacing the leak sensor 8. Replacing the leak sensor Electronic defect Performing maintenance tasks on a switched on device can cause da- mage to the device. ÎSwitch off the device ÎPull the power plug. Electronic defect Electrostatic discharge can destroy the electronics. ÎWear a protective bracelet against electrostatic discharge and ground. - Page 34 Replacing the leak sensor Process Figure 1. Loosen the 6 Torx screws and remove the rear panel of the device. Fig. 48 Loosen the screws 2. Remove the plug-in connector for the leak sensor Fig. 49: Remove the plug-in connector of the sensor 3.
-
Page 35: Installing The New Leak Sensor
Replacing the leak sensor Installing the new leak sensor Prerequisite The old leak sensor has been removed. ƒ Tools Torx screwdriver T10 ƒ Process Figure 1. From the rear side of the device gently push the new leak sensor through the hole in the insulation foam. -
Page 36: Adjusting The Leak Sensor
Adjusting the leak sensor 9. Adjusting the leak sensor The functionality of the leak sensor should be checked once a year. Perform the following test: Prerequisites The device is switched on. ƒ The device is standing vertically with the door closed. ƒ... -
Page 37: Firmware Updates
Firmware updates 10. Firmware updates Prerequisites The device‘s current firmware is functional. Firmware update Via the KNAUER Service tool software (LAN). process AZURA® CT 2.1 Service Instructions, VSM-020... -
Page 38: Spare Parts
Spare parts 11. Spare parts Component Order number for Order number for Order number for CT 2.1 with serial CT 2.1 with serial CT 2.1 with serial number lower than number number FCC... FCA183800001 FCA183800001 or higher Door sealing 8 mm M2771 M2771 M2771... - Page 39 Latest KNAUER instructions online: www.knauer.net/service-instructions KNAUER Phone: +49 30 809727-0 Wissenschaftliche Geräte GmbH Fax: +49 30 8015010 Hegauer Weg 38 E-Mail: info@knauer.net 14163 Berlin Internet: www.knauer.net © KNAUER 2020...
Need help?
Do you have a question about the Azura CT 2.1 and is the answer not in the manual?
Questions and answers