Table of Contents
Advertisement
Quick Links
WARNING: FOR YOUR SAFETY READ AND UNDERSTAND THIS MANUAL
PRIOR TO USING THE SAW. REVIEW ALL SAFETY RULES AND OPERATING
INSTRUCTIONS FREQUENTLY.
This manual is provided for your convenience in the use
and care of your machine. These instructions include
operation, precautions, preventative maintenance and
other pertinent data to assist you in assuring long life and
dependable service from your machine.
Molder Model: 206.208/230.1 v2.0
For Serial numbers 20210492060001 forward
April 2021
MODEL 206 MOLDER
OPERATOR'S MANUAL
206.208/230.3 v2.0
customerservice@williamsnhussey.com
www.williamsnhussey.com
1 (800) 258-1380
(641) 843-3240
Customer Service is available Monday
-Friday, 8:00 AM- 4:30 PM CST
Williams & Hussey
465 Third Ave SE
Bri , IA 50423
800/258.1380 641/843.3240
www.williamsnhussey.com
fax (641) 843-3869
Advertisement
Table of Contents

Related Manuals for W&H 206


Summary of Contents for W&H 206
- Page 1 Williams & Hussey 465 Third Ave SE Bri , IA 50423 800/258.1380 641/843.3240 customerservice@williamsnhussey.com www.williamsnhussey.com MODEL 206 MOLDER OPERATOR’S MANUAL WARNING: FOR YOUR SAFETY READ AND UNDERSTAND THIS MANUAL PRIOR TO USING THE SAW. REVIEW ALL SAFETY RULES AND OPERATING INSTRUCTIONS FREQUENTLY.
-
Page 2: Specifications
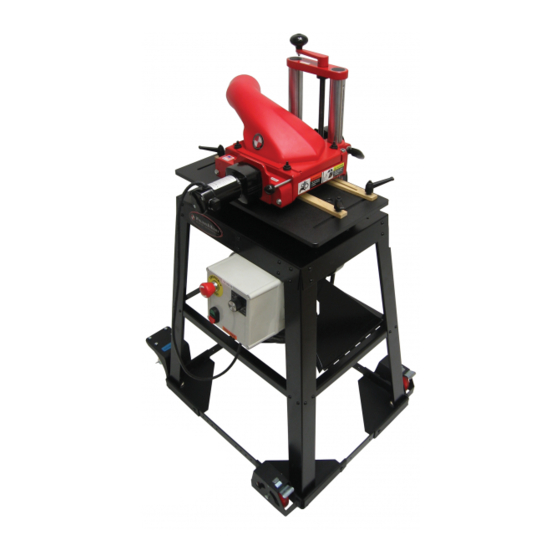
SPECIFICATIONS ACCESSORIES MOTOR 2HP ELLIPTICAL JIG EJ‐92 RPM 6900 FEED RATE 0‐19FPM CRANK EXTENSION 54‐306 MAX PROFILE DEPTH ¾” MAX PROFILE WIDTH 6 ¾” PLANING WIDTH 7” MIN STOCK LENGTH ... -
Page 3: Safety Checklist
SAFETY CHECK LIST DON’T TAKE UNNECESSARY RISKS! Failure to read and apply manual instruc ons will cause poor performance, unnecessary repairs and injury. Wear safety glasses, hearing protec on and respiratory protec on. Disconnect the power before servicing or changing knives. Wear footwear that does not slip. This will help you keep proper foo ng and balance. Always stand beside the machine, never in the way of the in‐feed and out‐feed areas. Keep knives sharp and clean. Make sure the machine has proper grounding. Make sure all guards are secured and in working order. Remove all adjus ng keys and wrenches before star ng. Check the stock for loose knots, nails, and foreign ma er. Keep the machine in a dry, clean, and well‐lit area. PREPARING TO USE THE MACHINE 1. ... -
Page 4: Unpacking Instructions
UNPACKING INSTRUCTIONS Remove clear packaging. Inspect the machine for any shipping damage. Remove the side covers. Cut the zip-tie around the motor. Remove the motor shipping boards. Remove the lag bolts holding the machine to the pallet. Lift the machine off of the pallet. Re-install the sides. - Page 5 Please note that the Grey #12‐4 wire that is used on the singly phase machines are preprinted with lead numbers on them below is the wiring instruc ons for wiring in your plug or directly into your power box. Please call with any ques ons. Wiring your 154/ 206 220Volt Molder Wire # 1 is a hot wire Wire # 2 is the neutral Wire # 3 is a hot wire Cau on: If you have 3 phase do not split Green/ yellow stripe is ground the wild leg off for 1 phase Wiring for your 220V molder. Wiring your 154/ 206 3phase molder Connect power to the Black, Red, and orange colored wires. Note: Orange is for a wild leg if you have one. Failure to do so will damage the control panel. If you facility does not have a wild leg connect as per diagram If your machine is rota ng the incorrect way switch only the black and red wires green is ground white is neutral ...
- Page 6 Electrical controls: Photo at right shows the standard electrical control box that houses the contactor to control the cu er head motor and the DC drive board to con‐ trol the feed wheels. The image below shows the start/sta on controls from the front of the machine and their purpose. E‐Stop—will shut down both cu er head and feed rollers. Start/stop sta on ‐ will start and stop the cu er head Speed Dial—will control the speed of the feed rollers 0 is stop 10 is fastest Magne c Starter DC Drive Board assembly E‐Stop Double pole fuse holder and Line fuses Speed Dial Start / Stop Adding plug to cord: simply add the plug from your local hardware store that matches your facility. We do not ship with the plug in due to the fact that there are so many different versions. Drive Motor: the drive motor is plugged into the electoral box through the special plug that is wired into the control box and the motor. As shown below. ...
- Page 7 VARI‐FEED OPERATIONAL TIPS The main control start bu on starts the knife motor and the Vari Feed motor. The speed control knob controls the speed of the feed rollers. The stock feed rate is approximately from 0 to 19 fpm (feet per minute), depending on where the knob is set. Higher rates of feed are only recommended for lighter depths of cuts. Turn the knob clockwise to increase the feed rate. When the dial is in the 9 o’clock posi on the feed speed is approximately 4 fpm. At the 12 o’clock posi on = approximately 6 fpm At the 3 o’clock posi on = approximately 14 fpm At the full to the right posi on = approximately 19 fpm Always remember to set your stock rate prior to entering the stock into the machine. The feed rate may be changed during the cut. The vari‐feed op on allows for high feed rates on relief cuts on the backside of casings. The vari‐feed mul ‐pass combina on pro‐ vides the versa lity of slow feed rates on deep hardwood profiles making possible two or three passes to finish. On deep and wide profiles you can now raise the knife for a par al profile cut and enter the stock very slowly, while engaging the bu into the knife gently, le ng stock move under the out‐feed roller before engaging a higher feed rate. This reduces the inci‐ dence of a large chip out, a cha er mark or snipe on the first few inches of your stock. You have the same advantages exi ng the cut. As the grain structure changes throughout the cut you can vary the stock feed rate to reduce the possibility of chip outs and spoil‐ age of your piece of stock. Before star ng the machine first familiarize yourself with the rest of this “Owners Manual”. It is very important to safely operate ...
- Page 8 CHANGING KNIVES DISCONNECT POWER BEFORE CHANGING KNIVES! PLANER KNIVES CAUTION; when planing always back off all four pressure screws to a posi on ¼” higher than the fully seated posi on. You will cre‐ ate too much roller pressure and feeder problems if you don’t. Remove the chip extractor by pulling out the pin and li ing the infeed end up first and pulling it back to clear the lips hold. Clean off knives and machine arbor. Set one knife at a me in place against the lip of the arbor. Place the “bevel” of the knife as shown in the illustra on below. Tighten the eight bolts securely using a 7/32” allen wrench. A er ghtening, double check to see that the knives are snug against the lip. MOLDING KNIVES ROTATION Clean off knives and machine arbor. Set one knife at a me in place with the bevel edge posi oned as shown in the illustra on below. Push the knife firmly down against KNIFE INFEED SIDE OUT-FEED SIDE the arbor lip and sideways against the bolts in the direc on of the tube side of the ARBOR machine. Hold secure while ghtening the bolts. KNIFE BEVEL VIEW FROM PULLEY SIDE OF MACHINE ...
- Page 9 The “0” on your head se ng scale references the top of the ½” sub‐plate supplied with your machine. For example, if you were milling a ¾” piece of stock you would set the machine head at the ¾” se ng. Adjus ng your machine head to this scale se ng will give you a full pass cut and a completely finished profile. This is a mul ‐pass machine and with mul ‐pass you can add 3/16”, in this example, to the 3/4” dimension for a first pass se ng of 15/16”. In this example you may set the machine head to any scale se ng between 3/4” and 15/16” for a first pass. These se ngs allow you to achieve proper roller tension for holding the stock and provid‐ ing a safe opera on. Be sure to check for sufficient feed roller contact before proceeding to use this setup and be sure to rotate your molding knives to check for knife rota on clearance with the chip extractor installed and the power off before star ng the machine. Turn the knife arbor by turning the motor pulley at the inner guard opening. Other molding ps Stock height should be within 3/16” of finished molding size. If making one pass only it should be within 1/32”. ...
- Page 10 GUIDES Guiding your stock Your machine comes with the GS‐2 guide system, which includes a flex guide and a solid guide to guide, your stock. To set these guides, first a ach your knives to the knife arbor in the posi on you have chosen, o en a place where you can get the most out of your roller surfaces. Panel knives would go to the far right. Smaller knives to the post side half of the moun ng area and larger knives to the central posi ons. Roll one knife down poin ng to the machine bed and place a sample piece of stock you are going to mold on the bed. Align the stock to the knife profile and carefully lower the machine head un l the roller puts pressure on your stock to hold it securely. A ach your flex guide to the side of the profile that will cut the least deep into your stock. This will give the longest possible life to your flex guide. The beveled por on of the guide should be facing the stock. Put about a 1/32” amount of pressure on the flex part of the guide. This will keep you stock from wandering within the glide path. Pull the handles up and away from the stock path. A ach your solid guide on the other side of the stock. Push it up firmly against the stock and ghten the handles angling them away from the stock path. ...
- Page 11 Always check your knife clearance to the guide. Clear away any interfering por on of the guide by gently lowering your knife down into the guides to just below your running posi on. MOLDING PICTURE FRAMES Decide whether the rabbet or profile cut should be done first. If you are going to make the rabbet on the W&H Molder, do the rab‐ bet first. In order to u lize the W&H Molder for rabbets, a rabbet knife with a depth of cut equivalent to the depth you need should be ordered. If we do not have a standard knife with the depth you seek, we can make a special knife to suit your needs. ROUND TOP CASINGS CONSTANT RADIUS SIZE ARCS We manufacture knives with the profile cu ng the deepest por on of the cut on the open side of the ma‐ chine. No fy us when you order a knife if you want the deep side of the cut on the ver cal tube side of the machine. The set up and opera on of the W&H machine for a round top molding job is very similar to the straight molding set up. One main difference is the molding stock will ride piggybacked on a template to enable the knife to clear the jig guiding hardware. Our EJ92 Ellip cal Jig is not needed for a fixed, constant radius. Stock prepara on can be done in many ways. The following is one example. First determine the angle needed to cut the wood sec ons in order to stay within the selected radius. Lay out the wood sec ons by marking the angles while being careful to select cuts for grain structure and color. Cut the sec ons and biscuit join them together with glue. We made a fixture to band saw the inside and outside radii consis ng of a pivot bar and bracket. We mounted the pivot bar to the stock on the scrap por on of the inside radius. The pivot bar is drilled with numerous holes to accommodate any radius sizes. You may also want to design a fine adjuster to allow you to make any radius in between your adjus ng holes. Make sure the outside radius is cut first. ...
- Page 12 RAISED PANELS All of our panel knives are designed to produce a ¼” tongue. Be sure to select a panel knife based on the fin‐ ished panel thickness. A panel must be 9” or more in the direc on you are molding in order to not have the panel come off of one roller before it engages the second roller. When you use mul ple passes you must have at least 9” of panel remaining in the direc on of the cut in order to have a least one roller on the panel at all mes. If you desire a different tongue size or have a panel thickness other than ¾” or 5/8,” a special knife can be ordered and shipped quickly by W&H. THE RAISED PANEL SET UP 1. Disconnect the power supply. 2. Install your knives over toward the tube side of the machine allowing enough room to install your guide. 3. ...
- Page 13 THICKNESS TYPE OF WOOD DEPTH OF CUT 1” Poplar ¼” 1” Red Oak 3/16” 3” White Pine 3/16” 3” White Oak 1/8”...
- Page 14 CHATTER Solu ons The most common cause of poor stock finish quality is a rough running belt. Replace the Defini on belt. Cha er marks are irregulari es in the finish quality of the surface of the wood. They can be evenly spaced or ran‐ domly distributed. Simply put, they may be described as Make sure you are cu ng with the head set “hills and valleys” in the wood surface. at the appropriate height. Cause Keep your knives sharp. Dull knives cause intermi ent feeding. These marks are caused by either loosely held stock or by an imbalance in the machine’s mechanical quali es Check the pulleys for damage or imbalance. ...
-
Page 15: Feeding Problems
FEEDING PROBLEMS Make sure that power is disconnected before inspec ng machine. SYMPTOM SOLUTION The stock stops but the feed‐rollers This is a trac on or fric on problem. Make sure your stock is not binding in the guides. con nue to turn. Make sure the stock is of consistent width. Saw ripping is inadequate. Make sure stock is the proper width for the knife profile. Make sure the head is set at the correct height. Check the rollers to see if they have a glossier than normal build‐up. Clean the gloss or pitch build up off the rollers. Make sure adequate spring pressure is being ap‐ plied to the rollers. Check the base or bed for rust or scars. Replace worn rollers. One roller stops while the other con nues to oper‐ Check for a loose set screw on one of the two ate. chain sprockets involved with the roller that won’t operate. Both rollers will not turn Check for a blown fuse in the Vari‐Feed control. The armature fuse is a 2 amp fuse, and the line fuse is a 5 amp fuse. Both fuses are ¼”x1 ¼” The motor electrical plug may not be fully engaged ... - Page 16 INSTRUCTIONS FOR REMOVAL OF FEED ROLLER Unplug machine, take off chip deflector, raise head, and remove pressure screws over swing arm. Remove two 54‐15 pivot screws and remove swing arm, leaving chain connected to ma ng sprocket. Reinstall each pivot screw with a drop of medium strength thread locker. Take the sprocket off the swing arm axle by pu ng the feed roller in a vise. Use a couple of small adjustable wrenches a ached to the flat on the long axle to loosen it. Put a good square shank flat bladed screwdriver into the slot on the short axle. Push in as hard as you can while using a wrench on the square shank of the screwdriver to loosen the short axle. Some mes this axle will not come out. Hack saw it off if it won’t. If you need to save the roller, pull the roller out of the swing arm by li ing it up and pulling it out with the short axle s ll in the roller. Reset the roller in a vise and use a small pipe wrench to remove it from the roller. REASSEMBLY The rollers are constructed with a shallow hole in one end and a deeper hole in the other.
-
Page 17: Machine Explodedview
MACHINE EXPLODEDVIEW When reinstalling the vari‐feed unit a er a repair check the chains for proper tension. The short in feed chain should have a small amount of slack in it and the long out feed chain should have plenty of slack. This is the correct se ng. To obtain the correct se ng, in most cases, you would push the unit toward the in‐feed end of the machine as you ghten it using up the a aching bolt hole clearance for adjustment. This should give you the op mum chain tension and slack. ... - Page 18 VARI-FEED VIEW VF‐100 assembly Does not include roller sprockets and chains VF-1 Vari-Feed motor VF-2 REV A Aluminum motor mount VF-3 Roller sprockets,14 tooth VF-4 Short chain, 36 pitch VF-5 Long chain, 54 pitch VF-9 REV A Chain guard VF-12 REV A Motor sprockets, 17 tooth Vari-Feed Removal Loosen the set screw on the in-feed roller chain sprocket.
- Page 19 ARBOR REMOVAL VIEW ...
- Page 20 Stand exploded diagram ...
-
Page 21: Contact Information
CONTACT INFORMATION Williams & Hussey Machine and Tool Co. customerservice@williamsnhussey.com (e‐mail) 465 3 Ave SE. Bri , IA 50423 williamsnhussey.com (website) 641‐843‐3240 (local) Business Hours: Monday – Friday 800‐258‐1380 (toll free) 8:30 am – 4:30 pm 641‐843‐3869 (fax) WARRANTY INFORMATION Molder – 1 Year Limited Williams & Hussey Machine Co., Inc. warrants its molders for a period of one year from the original date of purchase. ... - Page 22 Notes & Maintenance Records ...
- Page 23 IMPORTANT IMPORTANT IMPORTANT To assure product reliability, repairs, maintenance and adjustments should be performed by Authorized Service Centers, always using genuine replacement parts. For parts please call customer service or log onto our website. 465 Third Ave SE Britt, IA 50423 PH 800/258-1380 641-843-3240 E-mail customerservice@williamsnhussey.com...
Need help?
Do you have a question about the 206 and is the answer not in the manual?
Questions and answers