Table of Contents
Advertisement
Quick Links
Download this manual
See also:
Owner's Manual
Advertisement
Table of Contents

Subscribe to Our Youtube Channel
Related Manuals for W&H 206


Summary of Contents for W&H 206
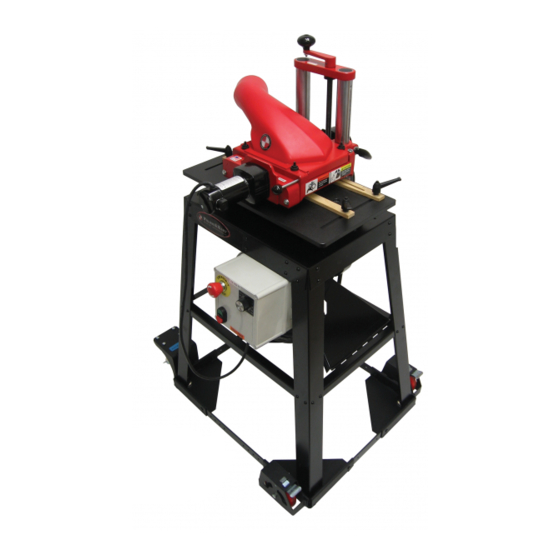
- Page 1 WILLIAMS & HUSSEY MACHINE CO INC MODEL 206 MOLDER OPERATOR’S MANUAL MANUAL NUMBER OM-99 ADDRESS; 70 Powers St, Milford NH 03055 info@williamsnhussey.com www.williamsnhussey.com 1800 258 1380 603 732 0219 fax 603 732 4048 Customer Service is available Monday-Friday, 8:30 AM- 4:30 PM EST...
-
Page 2: Specifications
SPECIFICATIONS ACCESSORIES MOTOR ELLIPTICAL JIG EJ-92 6900 FEED RATE 0-19FPM CRANK EXTENSION 54-306 MAX PROFILE DEPTH ¾” MAX PROFILE WIDTH 6 ¾” PLANING WIDTH 7” MIN STOCK LENGTH 9” MIN STOCK THICKNESS ¼” MAX STOCK THICKNESS 8” WORKING HEIGHT 35” OVERALL HEIGHT 50”... -
Page 3: Safety Checklist
SAFETY CHECK LIST DON’T TAKE UNNECESSARY RISKS! Failure to read and apply manual instructions will cause poor performance, unnecessary repairs and injury. Wear safety glasses and use respiratory protection. Disconnect the power before servicing or changing knives. Wear footwear that does not slip. This will help you keep proper footing and balance. Always stand beside the machine, never in the way of the in-feed and out-feed areas. -
Page 4: Vari-Feed Operational Tips
VARI-FEED OPERATIONAL TIPS The main control start button starts the knife motor and the Vari Feed motor. The speed control knob controls the speed of the feed rollers. The stock feed rate is approximately from 0 to 19 fpm (feet per minute), depending on where the knob is set. Higher rates of feed are only recommended for lighter depths of cuts. -
Page 5: Knife Sharpening
CHANGING KNIVES DISCONNECT POWER BEFORE CHANGING KNIVES! PLANER KNIVES CAUTION; when planing always back off all four pressure screws to a position ¼” higher than the fully seated position.You will create too much roller pressure and feeder problems if you don’t. Remove the chip extractor by pulling out the pin and lifting the infeed end up first and pulling it back to clear the lips hold. - Page 6 The “0” on your head setting scale references the top of the ½” sub-plate supplied with your machine. For example if you were milling a ¾” piece of stock you would set the machine head at the ¾” setting. Adjusting your machine head to this scale setting will give you a full pass cut and a completely finished profile.
- Page 7 GUIDES Guiding your stock Your machine comes with the GS-2 guide system, which includes a flex guide and a solid guide to guide, your stock. To set these guides, first attach your knives to the knife arbor in the position you have chosen, often a place where you can get the most out of your roller surfaces.
- Page 8 Always check your knife clearance to the guide. Clear away any interfering portion of the guide by gently lowering your knife down into the guides to just below your running position. MOLDING PICTURE FRAMES Decide whether the rabbet or profile cut should be done first. If you are going to make the rabbet on the W&H Molder, do the rabbet first.
- Page 9 RAISED PANELS All of our panel knives are designed to produce a ¼” tongue. Be sure to select a panel knife based on the finished panel thickness. A panel must be 9” or more in the direction you are moulding in order to not have the panel come off of one roller before it engages the second roller.
-
Page 10: Depth Of Cut
GENERAL GUIDELINES FOR DEPTH OF CUT THICKNESS TYPE OF WOOD DEPTH OF 1” Poplar ¼” 1” Red Oak 3/16” 3” White Pine 3/16” 3” White Oak 1/8” 6” Poplar 1/8” 6” Red Oak 1/16” See the table of contents section for knife changing and installation. Loosen the planing head locking knob (54-21). - Page 11 CHATTER Solutions The most common cause of poor Definition stock finish quality is a rough running Chatter marks are irregularities in the finish belt. Replace the belt. quality of the surface of the wood. They can be evenly spaced or randomly distributed. Simply Make sure you are cutting with the put, they may be described as “hills and valleys”...
-
Page 12: Feeding Problems
FEEDING PROBLEMS Make sure that power is disconnected before inspecting machine. SYMPTOM SOLUTION The stock stops but the feed-rollers This is a traction or friction problem. 1) Make sure your stock is not binding in continue to turn. the guides. 2) Make sure the stock is of consistent width. - Page 13 Unplug machine, Take off chip deflector, raise head, and remove pressure screws over swing arm. Remove two 54-15 pivot screws and remove swing arm, leaving chain connected to mating sprocket. Reinstall each pivot screw with a drop of medium strength thread locker. Take the sprocket off the swing arm axle by putting the feed roller in a vise.
-
Page 14: Machine Explodedview
MACHINE EXPLODEDVIEW When reinstalling the vari feed unit after a repair check the chains for proper tension. The short in feed chain should have a small amount of slack in it and the long out feed chain should have plenty of slack. - Page 15 VARI-FEED VIEW VF-100 assembly Does not include roller sprockets and chains VF-1 Vari-Feed motor VF-2 REV A Aluminum motor mount VF-3 Roller sprockets,14 tooth VF-4 Short chain, 36 pitch VF-5 Long chain, 54 pitch VF-9 REV A Chain guard VF-12 REV A Motor sprockets, 17 tooth Vari-Feed Removal Loosen the set screw on the in-feed roller chain sprocket.
- Page 16 ARBOR REMOVAL VIEW...
-
Page 17: Contact Information
CONTACT INFORMATION Williams & Hussey Machine Co., Inc. customerservice@williamsnhussey.com (e-mail) 70 Powers Street Milford NH 03055 williamsnhussey.com (website) 603-732-0219 (local) Business Hours: Monday – Friday 800-258-1380 (toll free) 8:30 am – 4:30 pm 603-732-4048 (fax) WARRANTY INFORMATION Molder – 7 Year Limited Williams &...
Need help?
Do you have a question about the 206 and is the answer not in the manual?
Questions and answers