Advertisement
Available languages
Available languages
Quick Links
Οδηγίες Χρήσης / Instructions Manual
ΓΙΑ ΠΕΡΙΣΣΟΤΕΡΕΣ ΠΛΗΡΟΦΟΡΙΕΣ:
FOR FURTHER INFORMATION:
Χ. ΜΠΕΝΡΟΥΜΠΗ & ΥΙΟΣ Α.Ε.
H. BENRUBI & FILS S.A.
Ελληνικά (GR) – English (EN)
Αγ. Θωμά 27, 15124, Μαρούσι-Αθήνα
27 Aghiou Thoma str. GR 15124, Maroussi-Athens
Τηλ. 210 6156400, Fax: 210 6199316
Tel: 00302106156400, Fax: 00302106199316
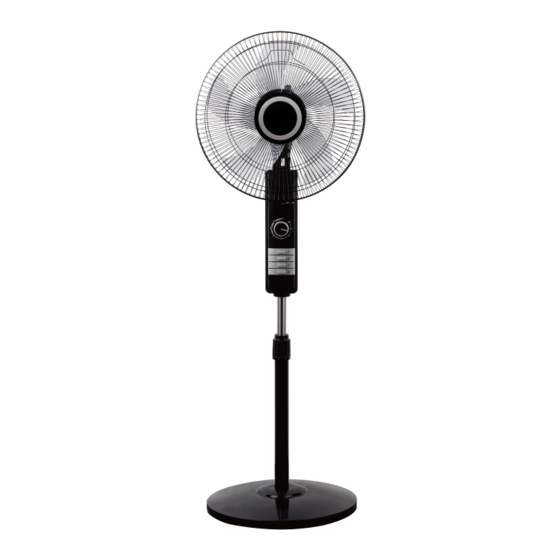
Ανεμιστήρας Δαπέδου – Stand Fan FS 40-302
e-mail: benrubi-sda@benrubi.gr
e-mail: benrubi-sda@benrubi.gr
Advertisement

Related Manuals for BENRUBI izzy FS 40-302


Summary of Contents for BENRUBI izzy FS 40-302
- Page 1 Οδηγίες Χρήσης / Instructions Manual ΓΙΑ ΠΕΡΙΣΣΟΤΕΡΕΣ ΠΛΗΡΟΦΟΡΙΕΣ: FOR FURTHER INFORMATION: Χ. ΜΠΕΝΡΟΥΜΠΗ & ΥΙΟΣ Α.Ε. H. BENRUBI & FILS S.A. Ελληνικά (GR) – English (EN) Αγ. Θωμά 27, 15124, Μαρούσι-Αθήνα 27 Aghiou Thoma str. GR 15124, Maroussi-Athens Τηλ. 210 6156400, Fax: 210 6199316 Tel: 00302106156400, Fax: 00302106199316 Ανεμιστήρας...
- Page 2 Περιεχόμενα / Contents GR........Σελίδες 2-11 EN.........Pages 12-21...
- Page 3 Ευχαριστούμε που επιλέξατε μια συσκευή της γκάμας IZZY. Συμβουλές Aσφαλείας Διαβάστε προσεκτικά τις οδηγίες χρήσης και κρατήστε τις σε ασφαλές σημείο για μελλοντική αναφορά, μαζί με την απόδειξη αγοράς, η οποία λειτουργεί ως εγγύηση (βλ. παρακάτω «Εγγύηση και Εξυπηρέτηση Πελατών». Οι...
- Page 4 • Ποτέ μην αφήνετε τη συσκευή εκτός της επίβλεψής σας κατά τη διάρκεια της λειτουργίας. • Μην βυθίζετε ποτέ τη συσκευή σε νερό ή σε οποιοδήποτε άλλο υγρό. • Μην τοποθετείτε και μην χρησιμοποιείτε ποτέ τη συσκευή σε μέρη όπου μπορεί να βραχεί ή να έρθει σε επαφή με νερό. Ποτέ μην συνδέετε...
- Page 5 • Πάντα γυρίζετε τον περιστρεφόμενο διακόπτη ταχύτητας στη θέση “0” (Off) ώστε να απενεργοποιηθεί η συσκευή, πριν την συνδέσετε ή την αποσυνδέσετε από την πρίζα. • Πάντα αποσυνδέετε τη συσκευή από την πρίζα όταν δεν την χρησιμοποιείτε. • Ποτέ μην χρησιμοποιείτε τη συσκευή μετά από πτώση ή αν παρουσιάζει...
- Page 6 βρίσκεται σε λειτουργία. Ποτέ μην ακουμπάτε τα μέρη της συσκευής που βρίσκονται σε κίνηση. • Διατηρείτε τη συσκευή πάντα καθαρή. Πριν τον καθαρισμό της, πάντα αποσυνδέετε τη συσκευή από το ρεύμα. • Τοποθετείτε και λειτουργείτε τη συσκευή μόνο επάνω σε επίπεδη, σταθερή...
- Page 7 Τα Μέρη της Συσκευής 1. Πτερύγια ανεμιστήρα 2. Μπροστινό προστατευτικό κάλυμμα 3. Καπάκι ασφάλισης πτερυγίων 4. Δακτύλιος ασφαλείας προστατευτικού καλύμματος 5. Κλιπ 6. Πλήκτρα χειρισμού 7. Ρυθμιστής ύψους 8. Άξονας 9. Βάση 10. Επεκτεινόμενος άνω σωλήνας 11. Ρυθμιστής κλίσης 12. Ρυθμιστής περιστροφικής κίνησης 13.
- Page 8 Οδηγίες Συναρμολόγησης Συναρμολόγηση βάσης και άξονα Αφαιρέστε τη βίδα στη βάση του άξονα, κατόπιν εισάγετε τον άξονα επάνω στη βάση και στερεώστε βιδώνοντας τη βίδα δεξιόστροφα. Ξεβιδώστε τον ρυθμιστή ύψους. Τραβήξτε τον επεκτεινόμενο άνω σωλήνα έξω από τον άξονα. Βιδώστε τον προσαρμογέα ύψους για να τον στερεώσετε. Τοποθετήστε...
- Page 9 2. Αφαιρέστε το πλαστικό περίβλημα του άξονα. Εισάγετε τα πτερύγια στον άξονα. Βιδώστε το καπάκι στα πτερύγια όπως η παρακάτω εικόνα. 3. Αφού τοποθετήσετε το κεντρικό τμήμα του μπροστινού προστατευτικού καλύμματος προς τα επάνω, περάστε τον δακτύλιο του μπροστινού προστατευτικού καλύμματος στην άλλη τρύπα του...
- Page 10 και η συσκευή θα περιστρέφεται. Για να κατευθύνετε τον αέρα προς την κατεύθυνση που επιθυμείτε πιέστε τον ρυθμιστή άλλη μία φορά. Τραβήξτε τον ρυθμιστή προς τα επάνω για να σταματήσει η περιστροφή. Ρύθμιση κλίσης Ξεβιδώστε τον ρυθμιστή κίνησης, ρυθμίστε την κεφαλή του ανεμιστήρα στην επιθυμητή γωνία κρατώντας...
- Page 11 Προσοχή: Για την αποφυγή κινδύνου ηλεκτροπληξίας, ποτέ μην βυθίζετε τη συσκευή σε νερό ή οποιοδήποτε άλλο υγρό. • Μην τοποθετείτε και μην χρησιμοποιείτε ποτέ τη συσκευή σε μέρη όπου μπορεί να βραχεί ή να έρθει σε επαφή με νερό. Ποτέ μην συνδέετε το καλώδιο του ρεύματος στην πρίζα σε περίπτωση...
- Page 12 απόδειξης αγοράς. Εάν το προϊόν που έχετε αγοράσει, παρουσιάσει ελάττωμα κατασκευής ή υλικών, απευθυνθείτε στο κατάστημα αγοράς ή σε εξουσιοδοτημένο Κέντρο Service ΜΠΕΝΡΟΥΜΠΗ. Για την ενημέρωσή σας σχετικά με το πλησιέστερο εξουσιοδοτημένο Κέντρο Service ΜΠΕΝΡΟΥΜΠΗ, επισκεφθείτε τη ιστοσελίδα μας www. benrubi . gr. Είναι στην αποκλειστική κρίση...
-
Page 13: Safety Interlocks
If this is not the case, do not use the appliance and contact one of the authorized BENRUBI Service Centers. • Always connect your appliance by means of an earthed plug. Non- compliance with this obligation can cause an electric shock and may lead to serious injury. - Page 14 • If the supply cord or the plug is damaged, do not operate the appliance in order to avoid a possible hazard and contact an authorized BENRUBI Service Centre. • Do not leave the power cord hanging over the edge of the table or counter where it can be reached by children or touching hot surfaces.
- Page 15 • Do not use the appliance if it has been dropped or damaged in any way and contact an authorized BENRUBI Service Center. • If the appliance is not operating properly, disconnect it from the power supply and contact an authorized BENRUBI Service Center.
- Page 16 • In case that you notice some strange noise, smell, smoke or anything unusual, do not use the appliance, Disconnect it from electricity and contact an authorized BENRUBI Service Center. • For your safety, this appliance conforms to the applicable standards, regulations and directives (Low Voltage, Electromagnetic Compatibility, Environmental etc.
- Page 17 Parts Description 1. Blades 2. Front grille 3. Safety closure of the blades 4. Plastic rim 5. Clip 6. Round key 7. Height adjuster 8. Column 9. Base 10. Steel tube 11. Tighten knob 12. Oscillation knob 13. Motor shaft 14.
- Page 18 Assembly Base and pillar assembly 1. Take out the base and pillar part from the carton. 2. Revolve the height adjustor anti-clock wiselout, draw the steel tube out of the pillar. Then revolve the height adjustor clock-wise to fasten it. 3.
- Page 19 • Before you connect the appliance on the supply mains, check that the voltage indicated on the data plate of the appliance corresponds to that of the voltage mains in your home. If this is not the case, do not use the appliance and contact one of the authorized BENRUBI Service Center.
- Page 20 Oscillation control To make the fan oscillating, press the oscillation knob located on the top of the motor housing. To get the directional airflow, press the oscillating knob, once more. To stop the oscillation pull up the knob. Oscillation control Tilting control Unscrew the tilting knob, adjust the fan head to the desirable angle by holding the fan head, then tighten the knob.
- Page 21 CAUTION: To prevent the risk of possible injury, do not attempt to open or repair the fan yourself. • Any repairs made by a non-authorized BENRUBI Service Center CANCEL THE GUARANTEE. • Do not allow water to drip on, or enter into the fan housing.
- Page 22 If your product malfunctions or you find any defects, please revert to the retail location you have purchased it from or contact an authorized BENRUBI Service Centre. To find the nearest authorized BENRUBI Service Centre, visit our website www.benrubi.gr. It is in the discretion of BENRUBI Company to replace or repair the defective product.
Need help?
Do you have a question about the izzy FS 40-302 and is the answer not in the manual?
Questions and answers