Advertisement
Available languages
Available languages
Quick Links
Οδηγίες Χρήσης / Instructions Manual
ΓΙΑ ΠΕΡΙΣΣΟΤΕΡΕΣ ΠΛΗΡΟΦΟΡΙΕΣ:
FOR FURTHER INFORMATION:
(ΝΕΑ) Χ. ΜΠΕΝΡΟΥΜΠΗ & ΥΙΟΣ Α.Ε.
(NEW) H. BENRUBI & FILS S.A.
Ελληνικά (GR) – English (EN)
Αγ. Θωμά 27, 15124, Μαρούσι-Αθήνα
27 Aghiou Thoma str. GR 15124, Maroussi-Athens
Τηλ. 210 6156400, Fax: 210 6199316
Tel: 00302106156400, Fax: 00302106199316
Ανεμιστήρας 3σε1 ΙΖ9007- Stand Fan 3in1 ΙΖ9007
e-mail: benrubi-sda@benrubi.gr
e-mail: benrubi-sda@benrubi.gr
Advertisement

Related Manuals for BENRUBI Fan 3 in 1 IZ9007


Summary of Contents for BENRUBI Fan 3 in 1 IZ9007
- Page 1 Οδηγίες Χρήσης / Instructions Manual ΓΙΑ ΠΕΡΙΣΣΟΤΕΡΕΣ ΠΛΗΡΟΦΟΡΙΕΣ: FOR FURTHER INFORMATION: (ΝΕΑ) Χ. ΜΠΕΝΡΟΥΜΠΗ & ΥΙΟΣ Α.Ε. (NEW) H. BENRUBI & FILS S.A. Ελληνικά (GR) – English (EN) Αγ. Θωμά 27, 15124, Μαρούσι-Αθήνα 27 Aghiou Thoma str. GR 15124, Maroussi-Athens Τηλ.
- Page 2 Περιεχόμενα / Contents GR........Σελίδες 2-12 EN.........Pages 13-23...
- Page 3 Ευχαριστούμε που επιλέξατε μια συσκευή της γκάμας IZZY. Συμβουλές Aσφαλείας Διαβάστε προσεκτικά τις οδηγίες χρήσης και κρατήστε τις σε α- σφαλές σημείο για μελλοντική αναφορά, μαζί με την απόδειξη α- γοράς, η οποία λειτουργεί ως εγγύηση (βλ. παρακάτω «Εγγύηση και Εξυπηρέτηση Πελατών»). Η IZZY δε φέρει καμία ευθύνη σε πε- ρίπτωση...
- Page 4 • Η συσκευή αυτή προορίζεται για χρήση σε εσωτερικό χώρο. Μη χρησιμοποιείτε τη συσκευή σε υπαίθριο χώρο. • Η συσκευή αυτή προορίζεται μόνο για οικιακή χρήση. Κάθε άλλη χρήση ακυρώνει την εγγύηση. • Χρησιμοποιείτε πάντα τη συσκευή επάνω σε ασφαλή, στεγνή καθαρή και...
- Page 5 κινούμενα μέρη της συσκευής. • Μη χρησιμοποιείτε τη συσκευή μετά από πτώση ή αν παρουσιάζει οποιαδήποτε βλάβη και απευθυνθείτε σε ένα από τα εξουσιοδοτημένα κέντρα επισκευών ΜΠΕΝΡΟΥΜΠΗ. • Μη χρησιμοποιείτε τη συσκευή σε περίπτωση που παρατηρήσετε κάποιο περίεργο θόρυβο, μυρωδιά ή καπνό. Βγάλτε αμέσως της συσκευή...
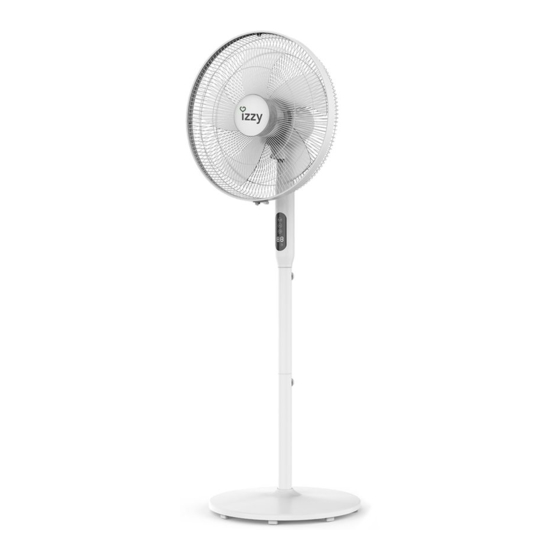
- Page 6 Μέρη της Συσκευής 1. Μπροστινό προστατευτικό κάλυμμα 2. Βίδα στήριξης κλιπ 3. Κλιπ στήριξης προστατευτικών 11. Πίνακας ελέγχου καλυμμάτων 12. Βίδα στήριξης σωλήνα 4. Παξιμάδι στήριξης πτερύγιων 13. Καλώδιο ρεύματος 5. Πτερύγια ανεμιστήρα 14. Σωλήνας επέκτασης 6. Παξιμάδι στήριξης πίσω καλύμματος 15.
- Page 7 Πίνακας ελέγχου 20. Κουμπί περιστροφής 21. Κουμπί ρύθμισης ταχύτητας 22. Κουμπί λειτουργίας 23. Οθόνη ενδείξεων 24. Ένδειξη χρονοδιακόπτη Χειριστήριο 25. Κουμπί ρύθμισης ταχύτητας 26. Κουμπί λειτουργίας 27. Κουμπί χρονοδιακόπτη 28. Κουμπί περιστροφής Συναρμολόγηση Ανεμιστήρα Αφαιρέστε τη συσκευασία. Συναρμολόγηση μοτέρ ανεμιστήρα 1.
- Page 8 Συναρμολόγηση επιδαπέδιου ανεμιστήρα (με μονό σωλήνα επέκτασης) 1. Τοποθετήστε το σωλήνα επέκτασης (16) στην υποδοχή στη βάση (17) του ανεμιστήρα. 2. Τοποθετήστε τη ροδέλα βάσης (18) και βιδώστε καλά τη βίδα βάσης “L” (19). 3. Τοποθετήστε το σωλήνα στήριξης (10) στην υποδοχή του σωλήνα επέκτασης (16). 4.
- Page 9 Συναρμολόγηση επιδαπέδιου ανεμιστήρα (με διπλό σωλήνα επέκτασης)
- Page 10 1. Τοποθετήστε το σωλήνα επέκτασης (16) στην υποδοχή στη βάση (17) του ανεμιστήρα. 2. Τοποθετήστε τη ροδέλα βάσης (18) και βιδώστε καλά τη βίδα βάσης “L” (19). 3. Τοποθετήστε το σωλήνα επέκτασης (14) στην υποδοχή του σωλήνα επέκτασης (16). 4. Βιδώστε καλά τη βίδα στήριξης σωλήνα (15). 5.
- Page 11 Χρήση του Ανεμιστήρα ΠΡΟΣΟΧΗ: • Πριν τη χρήση, βεβαιωθείτε ότι έχετε συναρμολογήσει σωστά όλα τα μέρη της συσκευής και ότι δεν υπάρχουν μέρη τα οποία έχουν υποστεί οποιαδήποτε βλάβη. • Πάντα τοποθετείτε τη συσκευή σε επίπεδη, στεγνή και σταθερή επιφάνεια. Υπάρχει κίνδυνος...
- Page 12 Φροντίδα και Καθαρισμός • Απενεργοποιήστε και αποσυνδέστε τη συσκευή από το ρεύμα πριν από τον καθαρισμό. • Μην αποσυναρμολογείτε τον ανεμιστήρα για να τον καθαρίσετε. • Κατά τακτά χρονικά διαστήματα, καθαρίζετε το κυρίως σώμα της συσκευής με ένα μαλακό πανί και...
- Page 13 υλικών, απευθυνθείτε στο κατάστημα αγοράς ή σε εξουσιοδοτημένο Κέντρο Service ΜΠΕΝΡΟΥΜΠΗ. Για την ενημέρωσή σας σχετικά με το πλησιέστερο εξουσιοδοτημένο Κέντρο Service ΜΠΕΝΡΟΥΜΠΗ, επισκεφθείτε τη ιστοσελίδα μας www.benrubi.gr. Είναι στην αποκλειστική κρίση της ΜΠΕΝΡΟΥΜΠΗ η αντικατάσταση αντί επιδιόρθωσης του ελαττωματικού...
- Page 14 We thank you for having chosen an appliance from the IZZY range. Safety Interlocks Please read these instructions carefully before using the appliance and save them for future reference. Please keep the sales receipt for guarantee purposes (please see below “Guarantee and Customer Service”).
- Page 15 • Do not use the appliance if it has been dropped or damaged in any way and contact an authorized BENRUBI Service Center. • In case that you notice some strange noise, smell, smoke or anything unusual, do not use the appliance.
- Page 16 • Check the power cord periodically for possible damages. • If the power cord or the plug of the appliance has been damaged, do not use the appliance and contact an authorized BENRUBI Service Center. • In case of a possible damage, do not attempt to repair the appliance by yourself.
- Page 17 Parts of the Appliance 1. Front fan grill 11. Control panel 2. Clip screw 12. Tube mounting screw 3. Clip 13. Power cord 4. Blades support nut 14. Extension tube 5. Blades 15. Tube mounting screw 6. Rear grille support nut 16.
- Page 18 Control panel 20. Oscillating button 21. Speed control button 22. Power button 23. Display screen 24. Timer indication Remote control 25. Speed control button 26. Power button 27. Timer button 28. Oscillation button Fan Assembly Remove the packaging. Motor assembly 1.
- Page 19 Standing fan assembly (single extension tube) 1. Insert the extension tube (16) into the reception on the base (17). 2. Insert the base gasket (18) and tighten the base screw "L" (19). 3. Insert the support tube (10) into the extension tube socket (16). 4.
- Page 20 Standing fan assembly (double extension tube)
- Page 21 1. Insert the extension tube (16) into the reception on the base (17). 2. Insert the base gasket (18) and tighten the base screw "L" (19). 3. Insert the extension tube (14) into the reception of the extension tube (16). 4.
- Page 22 1. Plug in the appliance. 2. Press the power button (22) on the control panel or the power button (26) on the remote control. 3. Press consecutively the speed control button (21) on the control panel or the speed control button (25) on the remote control.
- Page 23 If your product malfunctions or you find any defects, please revert to the retail location you have purchased it from or contact an authorized BENRUBI Service Centre. To find the nearest authorized BENRUBI Service Centre, visit our website www.benrubi.gr. It is in the discretion of BENRUBI Company to replace or repair the defective product.
- Page 24 FOR MORE INFORMATION CONTACT: (NEW) H. BENRUBI & FILS SA 27 Aghiou Thoma str, GR15124, Maroussi – Athens Tel.: 210 6156400, Fax: 210 6199316, e-mail: benrubi-sda@benrubi.gr...
Need help?
Do you have a question about the Fan 3 in 1 IZ9007 and is the answer not in the manual?
Questions and answers