Table of Contents
Advertisement
Advertisement
Table of Contents

Subscribe to Our Youtube Channel
Related Manuals for Sizewise SW Shuttle


Summary of Contents for Sizewise SW Shuttle
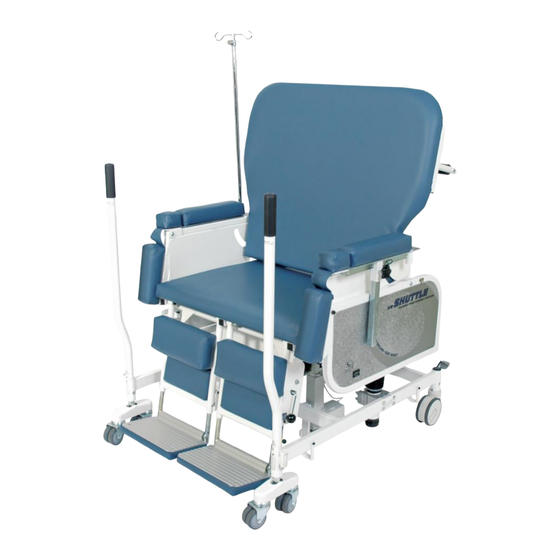
- Page 1 User Manual SW Shuttle™ Rev. 7.0 #8025 SIZEWISE 09.20.2013 User Manual...
-
Page 2: Table Of Contents
Table of Contents Definition of Symbols ........................3 Manual Definitions ........................3 Warnings and Cautions ....................... 3 Important Safety Instructions ...................... 5 Device Information ......................... 9 Specifications ..........................10 Model/Options Comparison Chart .................... 11 Unpacking and Set-Up Instructions ....................12 Shuttle Assembly ........................ - Page 3 Transport ........................... 40 Cleaning Instructions ........................41 Maintenance ..........................44 Fasteners ........................... 45 Storage and Disposal......................... 45 Troubleshooting ..........................46 Warranty Information ........................47 Sizewise Rentals™, LLC (Sizewise) Limited Warranty ............47 Manufacturer Disclaimer ......................48 User Assistance Information ......................49...
-
Page 4: Definition Of Symbols
Definition of Symbols Manual Definitions Throughout this manual different type fonts and icons are used to aid user readability and understanding of the content. Below are some examples. Standard Text Used for regular information. Bold Face Text Emphasizes a word or phrase. NOTE SETS APART SPECIAL INFORMATION OR IMPORTANT INSTRUCTION CLARIFICATION. - Page 5 For user and patient safety, read and follow all warnings and instructions that apply to use of the SW Shuttle ™. Before using this Shuttle, the user must know what to do to ensure safety. Put the patient at ease. The care provider should communicate with the patient by telling them what they are planning to do.
-
Page 6: Important Safety Instructions
Important Safety Instructions The Shuttle is to be used in accordance with each facility’s policies and procedures. Specifications Exceeding the weight capacity and/or working load listed in the specifications could result in patient or user injury as well as damage to equipment or other property. Operating Instructions ... - Page 7 Never sit on head section or leg supports when in the stretcher position. DO NOT confuse head section and leg support areas of the Shuttle when transferring patient in stretcher position. Proper Use of the Shuttle Reaching or leaning affects the patient’s center of balance. Follow the instructions for patients reaching or leaning from the Shuttle to avoid a fall or injury to the patient and/or care provider.
- Page 8 Possible fire hazard when the Shuttle is used with oxygen administering equipment. Be sure to secure the patient with the seatbelt/harness before operating the Shuttle. Avoid feet in the path of the Shuttle when using the power drive. ...
- Page 9 Many of the screws and bolts used in the Shuttle are special high-strength fasteners. Contact an authorized Sizewise technician to assist if finding the correct fasteners. If improper fasteners are used, they could result in patient and/or user injury as well as damage to equipment or other property.
-
Page 10: Device Information
With select models, the device can also be adjusted in height. The SW Shuttle series of chairs are intended to be used by all patient populations with a safe working load up to 650 pounds for the A Series and 1000 pounds for the B Series. -
Page 11: Specifications
Specifications Quality Assurance Standards ................UL 60601-1 ISO 13485:2003 EN/IEC 60601-1-2 CAN/CSA C22.2 No. 601.1-M9 Degree of Protection Against Electric Shock ............Type B Degree of Protection Against Ingress of Water ............IPX4 Electrical Rating............115VAC 60Hz, 7.6 amps (US model) 230VAC 50/60Hz, 7.6 amps (non-US models) Duty Cycle ............ -
Page 12: Model/Options Comparison Chart
Shuttle Weight Capacity: A Series ................650 lbs. / 294 kg B Series ................1,000 lbs. /453 kg IV Pole Weight Capacity ................50 lbs. / 22 kg (Exceeding these limits will void the warranty) WARNING: Exceeding the weight capacity and/or working load listed in the specifications could result in patient or user injury as well as damage to equipment or other property. -
Page 13: Unpacking And Set-Up Instructions
Unpacking and Set-Up Instructions Shuttle Assembly Shuttle is assembled complete when shipped. Inspect for any signs of freight damage. If obvious damage is detected, contact the freight company and file a damage complaint. It may be necessary to take pictures of the damage. After visual inspection make sure all of the proper components have been received. -
Page 14: Operating Instructions
Operating Instructions WARNING: Failure to heed the warnings pertaining to the operation of the Shuttle could result in patient and/or user injury as well as damage to equipment or other property. Never work under the Shuttle while it is in operation. If wheel locks (brakes) are not engaged, the casters may move/roll when the Shuttle is articulating into various positions. -
Page 15: Chair Position
Never work on the Shuttle while it is plugged into an electrical outlet. DO NOT use the Shuttle if the power cord is cut, frayed or loosely connected to the Shuttle. The Shuttle is an electrically powered mechanism. Electrical hazard may occur if the Shuttle is plugged into inadequate power supply. - Page 16 Height Adjustment (if equipped): WARNING: Be sure to secure the patient with the seatbelt/harness before operating the Shuttle. Ensure all persons and objects are clear of the Shuttle when changing its positions. DO NOT use the footrest as a step when the user sits on or gets off the Shuttle.
- Page 17 Seat Assist (if equipped): WARNING: The wheel locks should be in the brake position before operating the Shuttle. Ensure all persons and objects are clear of the Shuttle when changing its positions. DO NOT use the footrest as a step when the user sits on or gets off the Shuttle.
-
Page 18: Stretcher (Table) Position
Stretcher (Table) Position WARNING: The wheel locks should be in the brake position before operating the Shuttle. For the patient’s safety, be sure the armrests are in the up position. Be sure to secure the patient with the seatbelt/harness before operating the Shuttle. Never sit on head section or leg supports when in the stretcher position. - Page 19 To adjust the height for the stretcher, the Shuttle must be in stretcher position. Using the controller press the up or down arrows on the elevate key to adjust the height on the stretcher. Stretcher (Table) Elevate Up or Down Trendelenburg/Reverse Trendelenburg (if equipped): WARNING: The wheel locks should be in the brake position before operating the Shuttle.
-
Page 20: Proper Use Of The Shuttle
Proper Use of the Shuttle Reaching or Leaning WARNING: Reaching or leaning affects the patient’s center of balance. Follow the instructions for patients reaching or leaning from the Shuttle to avoid a fall or injury to the patient and/or care provider. Have the patient avoid reaching or leaning over the side of the Shuttle. -
Page 21: Features
Features Accessory Bars Accessory bars are located on each side of the device under the armrests. Armrests The armrests are detachable. They are not designed to bear the full weight of the patient. WARNING: Never try to move the Shuttle by its armrest. The armrest(s) may come loose or break. -
Page 22: Connection Of Electrical Components
Connection of Electrical Components Should it become necessary to remove any of the cables from the control box, the diagram below will assist in finding the appropriate cables. The diagram also indicates the fuse placement. Use 4 amp time delay fuses if they need to be replaced. -
Page 23: Iv Pole
IV Pole There is a storage space to store the IV pole and multiple positions the pole can be placed. When attaching an IV bag or pump to the IV pole, ensure the bag or pump is always positioning facing outward. The weight capacity of the IV pole is rated at 50 lbs. -
Page 24: Leg Supports
Leg Supports The leg supports are not designed to bear the full weight of the patient. WARNING: Never try to move the device by the leg supports. They may come loose or break. Never sit on leg supports when in the stretcher position. DO NOT confuse head section and leg support areas of the Shuttle when transferring patient in stretcher position. - Page 25 This Shuttle is equipped with two 5 amp 12V sealed lead-acid (gel) batteries (total 24V). New batteries, or batteries stored for a long time, may take more time to charge. Keep the battery near room temperature when charging. Battery Specifications: Nominal Voltage Rated Capacity (20 Hour Rate) 12.00Ah...
- Page 26 Battery Power To use the battery power, flip the battery power switch to Shuttle Power on. (Unit Power switch must also be turned on). This ON/OFF Switch switch is located at the back of the Shuttle on the fuse box. The battery power switch is to be turned OFF for transporting the shuttle or times when all functions need to be turned OFF.
-
Page 27: Push Bar
WARNING: Be sure to secure the patient with the seatbelt/harness before operating the Shuttle. Serial Number Location The Shuttle has a manufacturer serial number, and a Sizewise Rentals LLC serial number. The serial numbers are located at the rear of the Shuttle. -
Page 28: Stand Assist Poles
Stand Assist Poles WARNING: Be certain the stand assist poles are correctly installed and they are locked securely in place before using. To store the stand assist poles, place the holes in the space indicated below the main frame between the casters. To use the stand assist poles, place the holes in the space indicated at the front of Push... -
Page 29: Options
Options Oxygen Tank Holder CAUTION: Be sure O2 bottle and its fittings will not interfere with the Shuttle operation. Check O2 lines to be sure they are not pinched or kinked. WARNING: Possible fire hazard when the Shuttle is used with oxygen administering equipment. - Page 30 The purpose of the Shuttle power drive is to assist the clinical staff in the ergonomic and safe transport of bariatric patients. Through the Shuttle power drive equipped chair, patient transport can safely and effectively be accomplished without strain or injury to the operator as opposed to pushing or pulling a non-motorized chair.
- Page 31 Power Drive Operating Instructions Prior to operating the power drive, read this section and heed any caution statements or warnings. CAUTION: DO NOT attempt to use the caster locks to stop the Shuttle while in motion. The locks are not designed to be braking devices. 1.
- Page 32 NOTE: If the attendant is squeezing the throttle when turning ON the system the device will go to a default (Flash) mode. If this happens, turn the system OFF (ON/OFF switch on the controls) and restart the power drive. To steer the Shuttle, turn handle opposite direction the care provider desires to go. If in forward position, reverse would be to turn the handle in the same direction the care provider is going.
- Page 33 Power Drive Battery Flash Codes The battery flash codes indicate the following: The battery needs charging or there is a bad connection to the battery. If the connections are good try charging the battery. There is a bad connection to the motor. Check all connections between the motor and the controller.
-
Page 34: Storage Basket
15” clearance from the bottom of the basket to the top of the frame. There is a basket to store miscellaneous items at the rear of the device. The storage basket is available only on the SW Shuttle B Advanced. Basket ........9.5”W x 11.5”L x 7”D Basket Clearance in Stretcher Position .... -
Page 35: Safety Tips
All pins of connectors have passed ESD testing. List of Cables and Accessories Replacement parts, such as cables and accessories, must be purchased through Sizewise to ensure proper compliance requirements. WARNING: Using other manufacturer’s cables and accessories may affect EMC performance. - Page 36 Cables and Accessories Specifications and Requirements Hand Control Length: 11.16 feet (3.4 meters) 105°C (221°F) 24 AWG Strand PVC Insulated Standards: UL AWM Style 2464, NEC Type CMG/cUL CEC Type CMG FT4, CSA AWM I A, EU CE Power Cord Hospital Grade Power Reel Length: 10 feet (3.04 meters) SJT 16/3C 60°C (140°F)
-
Page 37: Electromagnetic Interference (Emi) From Radio Wave Sources
Electromagnetic Interference (EMI) from Radio Wave Sources The Shuttle has been tested and is intended for safe use with other components compliant to IEC 601 standards for medical devices. The Shuttle may be susceptible to electromagnetic interference (EMI), which is energy that is reflected or emitted from sources such as radio stations, TV stations, amateur radio (HAM) transmitters, two-way radios and cellular phones in the form of electrical and magnetic waves that travel through space. - Page 38 Table 202 Guidance and Manufacturer’s Declaration – Immunity All Equipment and Systems The Shuttle is intended for use in the electromagnetic environment specified below. The customer, or user, of the Shuttle should ensure that it is used in such an environment. Immunity Test IEC 60601 Compliance...
- Page 39 Table 204 Guidance and Manufacturer’s Declaration – Immunity Equipment and Systems that are NOT Life-Supporting The Shuttle is intended for use in the electromagnetic environment specified below. The customer, or user, of the Shuttle should ensure that it is used in such an environment. Immunity Test IEC 60601 Compliance...
-
Page 40: General Safety
Table 206 Recommended Separation Distances between portable and mobile RG Communications equipment and the Shuttle. Equipment and Systems that are NOT Life-Supporting Recommended Separations Distances for the Shuttle: The Shuttle is intended for use in the electromagnetic environment in which radiated disturbances are controlled. The customer, or user, of the Shuttle can help prevent electromagnetic interference by maintaining a minimum distance between portable and mobile RF Communications Equipment and the Shuttle, as recommended below, according to the maximum output power of the communications... -
Page 41: Pinch Point
Pinch Point Watch for pinch points on the Shuttle, which are indicated by the pinch point label. HAZARD: Pay close attention to pinch points on the Shuttle to avoid injury to the patient and/or care provider. Pinch points have minimal clearances between two moving parts that fail to maintain a clearance of ≤... -
Page 42: Cleaning Instructions
Cleaning Instructions WARNING: Before cleaning the Shuttle, be sure to disconnect it from the wall outlet (power source). Failure to do so could result in electrical shock and could result in patient and/or user injury as well as damage to equipment or other property. - Page 43 General Patient Room Cleaning/Disinfecting Personal Protective Equipment should always be used as directed by the Material Safety Data Sheet for the disinfectant. Prepare the disinfectant according to the manufacturer’s recommendations. Prepare a separate bucket of warm, fresh water to be used for rinsing the equipment after cleaning/disinfecting procedures are completed as instructed.
- Page 44 Allow the electrical components and hand control to remain wet with disinfectant solution for the manufacturer’s recommended contact time. Rinse all electrical components with a clean, dry cloth to remove any moisture or residue. Cleaning Blood and Other Excretions: Blood and other excretions should be wiped up while wet, if possible. These substances are more difficult to remove once they have dried to surfaces.
-
Page 45: Maintenance
Check the items on this chart at the indicated intervals. If any of the items are loose, worn, bent or distorted, immediately have them checked and/or repaired by an authorized Sizewise Technician. Frequent maintenance and servicing will improve performance between each use and extend the Shuttle life. -
Page 46: Fasteners
If improper fasteners are used, they could result in patient and/or user injury as well as damage to equipment or other property. Improper fasteners may fail. Use only screws and bolts provided by an authorized Sizewise representative. -
Page 47: Troubleshooting
Verify the hand control and power cords are properly connected and secure. Plug the Shuttle into an AC power source and let charge for 2-4 hours, then try again. NOTE: If the troubleshooting process does not solve the problem please contact a Sizewise representative for service. -
Page 48: Warranty Information
2. If a product or part should be returned to Sizewise, a return authorization number (RA#) will be issued. The RA# will be valid for 21 days from the date it is issued. -
Page 49: Manufacturer Disclaimer
Manufacturer Disclaimer General Information All specifications, equipment and prices are subject to change without notice. Sizewise reserves the right to make improvements from time to time. Photos and drawings are representative of the products and may vary slightly from actual production models. Some items photographed in this user’s manual may include optional equipment. -
Page 50: User Assistance Information
User Assistance Information For questions or assistance with this product, contact Sizewise at: Sizewise 1600 Genessee Suite 950 Kansas City, Missouri 64102 Phone: 1-800-814-9389... - Page 51 Kansas City, Missouri 64102 Phone: 1-800-814-9389 sizewise.net Sizewise and Sizewise Rentals are trademarks of Sizewise Rentals, L.L.C. All specifications, equipment and prices are subject to change without notice. Photos and drawings are representative of the products and may vary slightly from actual production models.
Need help?
Do you have a question about the SW Shuttle and is the answer not in the manual?
Questions and answers