Table of Contents
Advertisement
Quick Links
Advertisement
Table of Contents

Related Manuals for Galanz SpeedWave GSWWA16BKSA10


Summary of Contents for Galanz SpeedWave GSWWA16BKSA10
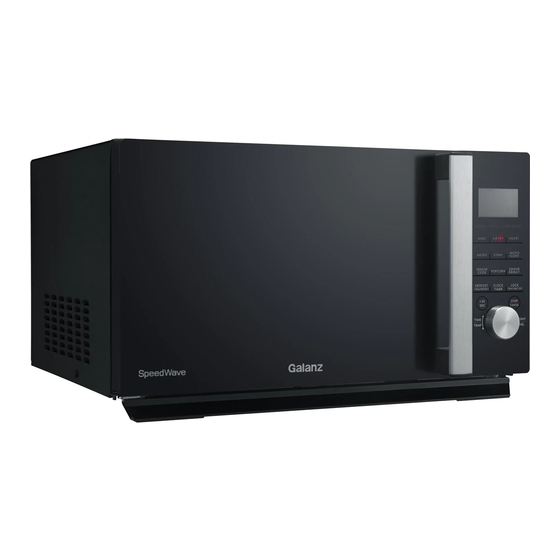
- Page 1 Model# GSWWA16BKSA10 SpeedWave User Manual Thank you for purchasing a Galanz product. Please read this manual carefully for correct usage and safety, and keep for future reference. For service, support and warranty information, call 1-800-562-0738. @2019 Galanz Americas Limited Company...
-
Page 2: Table Of Contents
CONTENTS Important Safety Instructions ....................1 Precautions to Avoid Possible Exposure to Excessive Microwave Technology....1 California Proposition 65 Warning ..................1 Warning ..........................1 Grounding Instructions ......................3 Installation Guide ........................4 Cooking Utensils Guide ......................5 Product Diagram ........................6 Control Panel .......................... -
Page 3: Important Safety Instructions
IMPORTANT SAFETY INSTRUCTIONS PRECAUTIONS TO AVOID POSSIBLE EXPOSURE WARNING TO EXCESSIVE MICROWAVE TECHNOLOGY To reduce the risk of burns, electric shock, fire, injury to persons or exposure to excessive microwave technology: Do not attempt to operate this oven with the door open since ... - Page 4 IMPORTANT SAFETY INSTRUCTIONS emergency services. detergents applied with a sponge or soft cloth. Do not use the cavity for storage purposes. Do not leave paper Oversized food or oversized metal utensils should not be products, cooking utensils or food in the cavity when not in use. inserted in a microwave/toaster oven as they may create a ...
-
Page 5: Grounding Instructions
IMPORTANT SAFETY INSTRUCTIONS GROUNDING INSTRUCTIONS installation. If this equipment does cause harmful interference to radio or television reception, which can be determined by turning the equipment off and on, the user is encouraged to This appliance must be grounded. In the event of an electrical short try to correct the interference by one or more of the following circuit, grounding reduces risk of electric shock by providing an measures:... -
Page 6: Installation Guide
IMPORTANT SAFETY INSTRUCTIONS INSTALLATION GUIDE Electrical Requirements The electrical requirements are a 120 volt 60 Hz, AC only, 20 amp. It is recommended that a separate circuit serving only the oven be Make sure that all the packing materials are removed from the provided. -
Page 7: Cooking Utensils Guide
IMPORTANT SAFETY INSTRUCTIONS COOKING UTENSILS GUIDE LIMITED USE This section lists which utensils can be used in this Aluminum foil — Use narrow strips of foil to prevent overcooking of microwave, which have limited use for short periods, exposed areas. Using too much foil can damage your oven, so be and which should not be used in this microwave. -
Page 8: Product Diagram
PRODUCT DIAGRAM 1. Control Panel 2. Display Screen 3. Menu / Time / Weight / Temperature / Level Selector Knob 4. Oven Window 5. Top Heating Element 5 6 7 6. Convection Fan & Back Wall Heating Element 7. Glass Turntable 8. -
Page 9: Control Panel
CONTROL PANEL BAKE TIME / WEIGHT DEFORST Use to bake food (See Page 14). Press to set defrost program based on time (See Page 13). AIR FRY Press to set defrost program based on weight (See Use to air fry food (See Page 16). Page 12). -
Page 10: First Time Use
FIRST TIME USE If you are using your SpeedWave for the first time, please be sure to: Clean the glass turntable, baking and roasting pan, air fry kit with hot water, a small amount of dishwashing liquid and a nonabrasive cleaning pad. ... -
Page 11: Operation Instructions
OPERATION INSTRUCTIONS Setting the Clock Turn the dial until the correct minute is displayed. You can set the clock in 12-hour or 24-hour by pressing CLOCK/TIMER in standby mode. Example: How to set a 12-hour clock at 11:58. Press the dial or CLOCK/TIMER to In standby mode, press and hold confirm the minute and finish setting. -
Page 12: Timer
OPERATION INSTRUCTIONS Timer Quick Start Microwave You can use the timer feature to count down a specific amount of Accessory Guide: Glass Turntable time whether it’s for cooking or for anything else. Example: How to set the timer for 3 minutes and 50 seconds. -
Page 13: Microwave Cooking
OPERATION INSTRUCTIONS Microwave Cooking Press the dial once to confirm the power level. Accessory Guide: Glass Turntable Turn the dial again to enter cooking time. This feature allows you to choose the power level and cooking time of microwave function. The longest cooking time is 95 minutes. -
Page 14: Weight Defrost
OPERATION INSTRUCTIONS Weight Defrost Turn the dial to select the food weight. Accessory Guide: Glass Turntable The defrosting time and power level are automatically set once Press the dial to confirm and start the food category and the weight are selected. defrosting. -
Page 15: Time Defrost
OPERATION INSTRUCTIONS Weight must be in pounds and ounces. If label gives weight in Example: How to defrost food for 3 minutes and 50 pounds only, change the fraction of a pound to ounces using the seconds. following chart. In standby mode, press the TIME/WEIGHT DEFROST once. -
Page 16: Bake
OPERATION INSTRUCTIONS Bake When preheating finishes, ‘PREH’ will stop blinking and the oven will show ‘Add Food 350F’ and sound periodically Accessory Guide: Glass Turntable Baking and Roasting Pan to remind user to put the food inside. For Bake, you can select the type of food you want to cook from Open the oven door, the display will the programs listed on the cooking label located on the interior show the cooking time, and then place... - Page 17 OPERATION INSTRUCTIONS Custom Program: How to set Bake by choosing time and Press the dial once to confirm and start temperature (400°F for 25 minutes). preheating. In standby mode, press the BAKE once to use custom setting (Default is 350 °F). When preheating finishes, ‘PREH’...
-
Page 18: Air Fry
OPERATION INSTRUCTIONS Air Fry Press the dial once to confirm food code. Accessory Guide: Glass Turntable Air Fry Kit Turn the dial to select food weight. For Air Fry cooking, you can select the type of food you want to cook from the programs listed on the cooking label located on the interior panel of the appliance. - Page 19 OPERATION INSTRUCTIONS Air Fry Food Chart (Auto Program): Custom Program: How to set AirFry by choosing time and temperature (400°F for 30 minutes). Code Food Weight Cooking Time In standby mode, press the AIR FRY AF-1 Onion Rings 23:00 once to use custom setting (Default is 36:00 425°F).
-
Page 20: Roast
OPERATION INSTRUCTIONS Roast Turn the dial to select food weight. Accessory Guide: Glass Turntable Baking and Roasting Pan Press the dial once to confirm and start For Roast cooking, you can select the type of food you want to cooking. cook from the programs listed on the cooking label located on the interior panel of the appliance. - Page 21 OPERATION INSTRUCTIONS Custom Program: How to set Roast by choosing time and Press the dial once to confirm and start temperature (400°F for 25 minutes). cooking. In standby mode, press the ROAST once to use custom setting (Default is 350 °F). NOTE: ...
-
Page 22: Convection
OPERATION INSTRUCTIONS Press the dial once to confirm the Convection cooking time and start preheating. Accessory Guide: Glass Turntable Baking and Roasting Pan This feature allows you cook with powerful convection. During convection cooking, hot air is circulated throughout the When preheating finishes, ‘PREH’... -
Page 23: Microwave+Convection
OPERATION INSTRUCTIONS Microwave+Convection Press the dial once to confirm the temperature. Accessory Guide: Glass Turntable Baking and Roasting Pan This oven has six pre-programmed temperatures settings that Turn the dial to select cooking time. make it easy to cook with both convection heat and microwave automatically. -
Page 24: Sensor Cook
OPERATION INSTRUCTIONS Sensor Cook The appliance with automatically suggest a cooking time and start countdown. Accessory Guide: Glass Turntable Sensor Cook Food Chart (Auto Program): For sensor cook function, you can select the type of food you want to cook from the programs listed on the cooking label Code Food Weight Range... -
Page 25: Sensor Reheat
OPERATION INSTRUCTIONS Sensor Reheat The appliance with automatically suggest a cooking time and start countdown. Accessory Guide: : Glass Turntable Sensor Reheat Food Chart (Auto Program): For sensor reheat function, you can select the type of food you Code Food Weight Range want to cook from the programs listed on the cooking label SH-1... -
Page 26: Popcorn
OPERATION INSTRUCTIONS Popcorn +30 Sec Function Accessory Guide: Glass Turntable During cooking, you can add cooking time by touching +30 SEC pad repeatedly. The longest cooking time is 95 minutes. Example: During microwave cooking, add the cooking time Example: How to cook popcorn for 3 minutes and 30 by 2 minutes by utilizing the +30 SEC button. -
Page 27: Turntable On / Off
OPERATION INSTRUCTIONS Turntable ON / OFF Child lock The turntable is set to default as always turning. You can turn it on The child proof lock prevents unsupervised operation by children. or off by pressing LOCK/TURNTABLE OFF during setting the Microwave program or during cooking in the Microwave program. -
Page 28: Troubleshooting
OPERATION INSTRUCTIONS TROUBLESHOOTING Automatic Protection Mechanism OVERHEATING PROTECTION - The display may show Er10 which means the appliance has entered into high temperature overheat mode which will protect the appliance from further damage. Audible alert will be heard until STOP/CANCEL is pressed or the appliance is unplugged. -
Page 29: Cleaning And Care
CLEANING AND CARE Turn off the oven and unplug the power cord from the wall when cleaning. If steam accumulates inside or around the outside of the oven door, wipe with a soft cloth. This may occur when the microwave oven is operated under high humidity condition. -
Page 30: Product Warranty
PRODUCT WARRANTY This warranty applies to products sold by Galanz Americas in the Any subsequent damages caused by the above listed exclusions U.S. This warranty is in lieu of any other warranty and expressly will not be covered and any claims determined to meet the above applies to the individual product only. -
Page 31: Warranty Registration
WARRANTY REGISTRATION Please mail this warranty card to the address below within 30 days of purchase. Galanz Americas, 55 Challenger Road, Suite 503, Ridgefield Park, NJ 07660. PLEASE PRINT CLEARLY. Name Address City State Phone Email Model Number Serial Number Purchase Location You must attach a copy of your purchase receipt to validate your registration. - Page 32 ©2019 Galanz Americas Limited Company...
Need help?
Do you have a question about the SpeedWave GSWWA16BKSA10 and is the answer not in the manual?
Questions and answers