
Related Manuals for Beko WY940P44EB


Summary of Contents for Beko WY940P44EB
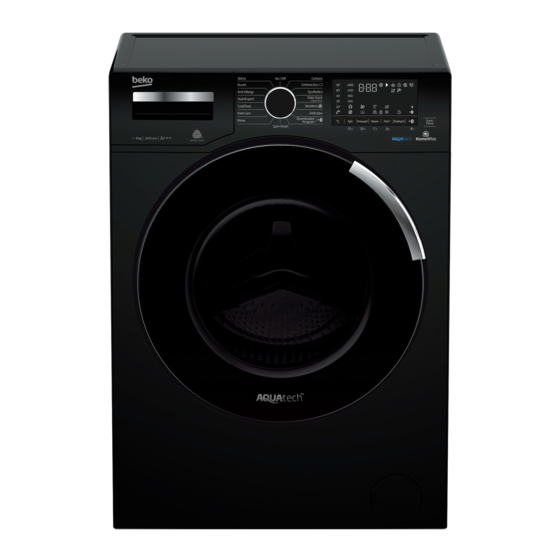
- Page 1 Washing Machine User’s Manual WY940P44EB Document Number= 2820527465_EN/ 21-05-19.(16:19)
- Page 2 Please read these instructions first before using your appliance Dear Customer, Thank you for choosing a Beko appliance. Please take some time to read this user manual before using your appliance, to ensure you know how to safely operate the controls and functions.
-
Page 3: General Safety Instructions
General safety instructions This section contains safety instructions that will help protect from risk of personal injury or property damage. Failure to follow these instructions shall void any warranty. 1.1 Life and property safety Never place the product on a carpet-covered floor. Otherwise, lack of airflow beneath the machine will cause electrical parts to overheat. -
Page 4: Electrical Safety
Electrical products are dangerous for the children. Keep children away from the product when it is in use. Do not allow them to play with the product. Use child lock to prevent children from intervening with the product. Do not forget to close the loading door when leaving the room where the product is located. -
Page 5: Important Instructions For Environment
Important instructions for environment 2.1 Compliance with WEEE Directive This product complies with EU WEEE Directive (2012/19/EU). This product bears a classification symbol for waste electrical and electronic equipment (WEEE). This product has been manufactured with high quality parts and materials which can be reused and are suitable for recycling. -
Page 6: Technical Specifications
2200 Main model code 1314 Complying Commission Delegated Regulation (EU) No 1061/2010 Supplier name or trademark Beko WY940P44EB Model name 7164241300 Rated capacity (kg) Energy efficiency class / Scale from A+++ (Highest Efficiency) to D (Lowest Efficiency) A+++ Annual Energy Consumption (kWh) Energy consumption of the standard 60°C cotton programme at full load (kWh) -
Page 7: Appropriate Installation Location
4.1 Installation • Preparation of the location and electrical, tap water and waste water installations at the place of installation is the customer's responsibility. • Make sure that the water inlet and discharge hoses as well as the power cable are not folded, pinched or crushed while pushing the product into its place after installation or cleaning procedures. • The manufacturer shall not be held liable for damages that may arise from procedures carried out by unauthorised persons. • Prior to installation, visually check if the product has any defects on it. If so, do not have it installed. Damaged products cause risks for your safety. 4.1.1 Appropriate installation location • Place the product on a hard and level floor. Do not put it onto a carpet with high pile or other similar surfaces. -
Page 8: Connecting The Water Supply
4.1.4 Connecting the water supply The water supply pressure required to run the product is between 1 to 10 bars (0.1 – 1 MPa). It is necessary to have 10 – 80 litres of water flowing from the fully open tap in one minute to have your machine run smoothly. Attach a pressure reducing valve if the water pressure is higher. CAUTION: Models with a single water inlet should not be connected to the hot water tap. In such a case the laundry will get damaged or the product will switch to protection mode and will not operate. CAUTION: Do not use old or used water inlet hoses on the new product. -
Page 9: Adjusting The Feet
4.1.6 Adjusting the feet CAUTION: In order to ensure that the product operates more silently and vibration-free, it must stand level and balanced on its feet. Balance the machine by adjusting the feet. Otherwise, the product may move from its place and cause crushing and vibration problems. -
Page 10: Important Fitting A Different Plug
Important Fitting a different plug As the colours of the wires in the mains lead of this appliance may not correspond with the coloured markings identifying the terminals on your plug, proceed as follows: Connect the green - yellow or green (earth) wire to the terminal in the plug marked ‘E’... -
Page 11: Preparing Laundry For Washing
4.2 Preparation 4.2.1 Sorting the laundry • Sort laundry according to type of fabric, color, and degree of soiling and allowable water temperature. • Always observe the instructions given on the garment care labels. 4.2.2 Preparing laundry for washing • Laundry items with metal attachments such as, underwiring, belt buckles or metal buttons will damage the machine. Remove the metal pieces or wash such clothes by putting them in a laundry bag or pillow case. • Take out all substances in the pockets such as coins, pens and paper clips, and turn pockets inside out and brush. Such objects may damage the product or cause noise problem. • Put small size clothes such as infant's socks and nylon stockings in a laundry bag or pillow case. -
Page 12: Using Detergent And Softener
4.2.6 Using detergent and softener When using detergent, softener, starch, fabric dye, bleach and descaling agents; read the manufacturer's instructions written on the package and follow the dosages specified. Use measuring cup if available. The detergent drawer is composed of three compartments: – (1) for prewash – (2) for main wash – (3) for softener... - Page 13 If the product is equipped with a liquid detergent part: • When you want to use liquid detergent, press on the point shown to rotate the apparatus. The part that falls off will function as a barrier for the liquid detergent. If required, clean the apparatus with water when it is in place or by removing it.
-
Page 14: Tips For Efficient Washing
4.2.7 Tips for efficient washing Clothes Light Colours and Black/Dark Delicates/ Colours Whites Colours Woolens/Silks (Recommended (Recommended (Recommended temperature (Recommended temperature temperature range temperature range range based on soiling level: range based on soiling level: based on soiling level: based on soiling level: 40-90°C) cold -40°C) cold -40°C) -
Page 15: Operating The Product
4.3 Operating the product 4.3.1 Control panel WY940P44EB Duvet 1400 90˚ 60˚ 1200 40˚ 30˚ CoolClean 20˚ Start/ Spin Prewash Steam Fast+ Ending In Pause 1 - Programme Selection knob 7 - End Time Setting button 2 - Temperature level lights... -
Page 16: Programme And Consumption Table
4.3.3 Programme and consumption table Auxiliary functions Selectable Programme temperature range °C Cold-90 2,65 1400 • • • • • Cottons Cold-90 1,90 1400 • • • • • 1,10 1400 • • • • • Cold-90 Cold-60 60** 0,815 1400 Cottons Eco Cold-60 60** 4,5... -
Page 17: Programme Selection
The auxiliary functions in the table may vary according to the model of your machine. Water and power consumption may vary subject to the changes in water pressure, water hardness and temperature, ambient temperature, type and amount of laundry, selection of auxiliary functions and spin speed, and changes in electric voltage. You can see the washing duration on the display of your machine while selecting a programme. - Page 18 • Cottons You can wash your durable cotton laundry (sheets, bedlinen, towels, bathrobes, underwear etc.) in this programme. When the quick wash function button is pressed, programme duration becomes notably shorter but effective washing performance is ensured with intense washing movements. If the quick wash function is not selected, superior washing and rinsing performance is ensured for your heavily soiled laundry.
- Page 19 • Curtain You can use this programme to wash your tulles and curtains. As their meshed texture causes excessive foaming, put little amount of detergent into the main wash compartment. Thanks to the special spin profile of the programme, tulles and curtains crease lesser. Do not load your curtains above the specified capacity in order not to damage them.
-
Page 20: Temperature Selection
You can find stain groups based on quick function below: When quick function is selected: Blood Red Wine Chocolate Coffee Curry Pudding Fruit juice Ketchup Coal When quick function is not selected: Butter Sweat Salad Dressing Grass Collar Soil Make-up Food Machine Oil Coke... -
Page 21: Spin Speed Selection
4.3.7 Spin speed selection Whenever a new programme is selected, the recommended spin speed of the selected programme is displayed on the Spin Speed indicator. It is possible that the recommended spin speed value is not the maximum spin speed that can be selected for the current programme. -
Page 22: Auxiliary Functions
Also the frames of the auxiliary function selected for the current programme after the washing has started remains illuminated. Some functions cannot be selected together. If a second auxiliary function conflicting with the first one is selected before starting the machine, the function selected first will be canceled and the second auxiliary function selection will remain active. -
Page 23: Functions/Programmes Selected By Pressing The Function Keys For 3 Seconds
4.3.8.2 Functions/Programmes Selected by Pressing the Function Keys for 3 Seconds • Drum Clean+ Press and hold the auxiliary function button 1 for 3 seconds to select the programme. Use regularly (once in every 1-2 months) to clean the drum and provide the required hygiene. Steam is applied before the programme to soften the residues in the drum. -
Page 24: Time Display
To deactivate bluetooth connection: Press and hold Remote Control function button for 3 seconds. Countdown “3-2-1” will be displayed, and then “Off” icon will appear on the display. First setup of the HomeWhiz application must be complete for the bluetooth connection to be activated. After setup, pressing the remote control function button while the knob is at Download Program/Remote Control position will automatically activate the bluetooth connection. -
Page 25: Loading Door Lock
3 Loading door is locked. The door lock symbol appears on the display after the loading door is locked. 4 Programme follow-up indicator lights on the display will show the current programme step. 4.3.11 Loading door lock There is a locking system on the loading door of the machine that prevents opening of the loading door in cases when the water level is unsuitable. -
Page 26: Switching The Machine To Pause Mode
4.3.12 Changing the selections after programme has started Adding laundry after the programme has started If the water level in the machine is suitable when you press Start/Pause button, the door lock will be deactivated and the door will open, allowing you to add garments. The door lock icon on the display goes off when the door lock is deactivated. -
Page 27: End Of Programme
4.3.14 End of programme End symbol appears on the display when the programme is completed. If you do not press any button for 10 minutes, the machine will switch to OFF mode. Display and all indicators are turned off. Completed programme steps will be displayed if you press On/Off button. 4.3.15 HomeWhiz Feature and Remote Control Function HomeWhiz allows you to use your smart device to check your washing machine and get information about its status. - Page 28 • If your washing machine successfully paires with your device, your display will automatically turn on in the normal mode and the bluetooth icon will remain on as you hear a setup successful melody from the appliance. • Return to the HomeWhiz application and wait until the setup is complete. When setup is complete, give your washing machine a name. Now, you can tap and see the product you have added in the HomeWhiz Aplication. If you cannot successfully perform the setup within 5 minutes, your washing machine will turn off automatically.
-
Page 29: Drum Illumination
When you want to control your washing machine remotely, you need to activate the Remote Control function by pressing the Remote Control button while the programme knob is in the Download Program/Remote Control position button on the control panel of your washing machine. When your product is accessed, you will see a screen similar to the below. -
Page 30: Maintenance And Cleaning
4.4 Maintenance and cleaning Service life of product extends and frequently experienced problems will be reduced if it is cleaned at regular intervals. 4.4.1 Cleaning the detergent drawer Clean the detergent drawer at regular intervals (every 4-5 washing cycles) as shown below in order to prevent accumulation of powder detergent in time. -
Page 31: Draining Remaining Water And Cleaning The Pump Filter
4.4.5 Draining remaining water and cleaning the pump filter The filter system in your machine prevents solid items such as buttons, coins and fabric fibers clogging the pump impeller during discharge of washing water. Thus, the water will be discharged without any problem and the service life of the pump will extend. -
Page 32: Troubleshooting
Troubleshooting Problem Cause Solution Programs do not start after the Start / Pause / Cancel button is not pressed. • Press Start / Pause / Cancel button. loading door is closed. It may be difficult to close the loading door in case of • Reduce the amount of laundry and make sure excessive loading. - Page 33 Problem Cause Solution Washing takes longer than Water pressure is low. • Product waits until taking in adequate amount specified in the user manual.(*) of water to prevent poor washing quality due to the decreased amount of water. Therefore, the washing time extends. Voltage is low.
- Page 34 Problem Cause Solution Washing performance is poor: Insufficient amount of detergent is used. • Use the recommended amount of detergent Stains persist or the laundry is not appropriate for water hardness and the laundry. whitened. (**) Excessive laundry is loaded in. • Do not load the product in excess.
- Page 35 Problem Cause Solution Detergent residue in the detergent Detergent was put in wet drawer. • Dry the detergent drawer before putting in drawer. (**) detergent. Detergent has gotten damp. • Keep detergents closed in an environment free of humidity and do not expose them to excessive temperatures.
-
Page 36: Important Notes
If you have purchased an American style Fridge freezer, the standard guarantee starts from the date of original purchase of the product, and lasts for a period of twenty four (24) months unless Beko plc (the “Manufacturer”) agrees to extend the guarantee for the product in writing. - Page 37 If you are resident in the Republic of Ireland, this guarantee will be governed by Irish law and the Irish courts will have jurisdiction. This guarantee is provided by Beko plc. Beko House, 1 Greenhill Crescent, Watford, Hertfordshire. WD18 8QU. Beko plc is registered in England and Wales with company registration number 02415578.
- Page 38 Beko Free standing appliances come with a 12 month parts and labour guarantee as standard, Beko Built-in appliances come with a 12 month parts and labour guarantee as standard. This is extended to 24 months, free of charge, upon registration of the appliance. When you register your appliance for additional guarantee, you will automatically activate the ProSmart Motor 10 year guarantee.
- Page 39 Send us a secure message through our online contact us form. Please visit our website, click Contact Us and choose a product support topic from the list of options. Complete the required details and click send message. Product registrations For UK registrations please visit beko.co.uk/register and for the Republic of Ireland visit beko.ie/register.
- Page 40 www.beko.com...
Need help?
Do you have a question about the WY940P44EB and is the answer not in the manual?
Questions and answers