Chapters
Table of Contents

Subscribe to Our Youtube Channel
Related Manuals for Global Air NPC1-14C


Summary of Contents for Global Air NPC1-14C
- Page 1 Portable Air Conditioner User’s Manual It is important that you read these instructions before using your new purchase and we strongly recommend that you keep them in a safe place for future reference.
-
Page 2: Table Of Contents
Table of Contents Safety Information ……………………………………………………………………………………………………………………. 3 Specifications ………………………………………………………… ……………………………………………………….4 Parts List ……………………………………………………………………………………………….………………………5 Cont rol Panel………………………………………………………………………………………………………… ………..6 Remote Control& Safety Protections..………………………………………………………………………………………8 Installation Instructions …….……………………………………………………………………………………………….10 Drainage …………………………………………………………….……………………………………………… ………..12 Maintenance……………………………………………………………………………………………………………….…12 Troubleshooting ……………………………………………………………………………………………………………..14... -
Page 3: Information
Safety Information Please read and understand this entire manual before attempting to assemble, operate, or install the product. This unit is intended for residential use only. IMPORTANT SAFE TY INS TRUCTIONS WARNING: POTENTIAL ELE CTRICAL HA ZARD IF NOT FOLLOWED. When using electrical appliances, basic precautions should always be followed to reduce the risk of fire, electric shock, and injury to persons, including the following: ... -
Page 4: Specifications
If this is occurs, try inserting the plug into a different outlet. Contact a qualified electrician to inspect the original outlet for damage. Specifications Model Number NPC1-14C BTU/hour: 14000 B TU/ h-COOLING Voltage Rating:... -
Page 5: Parts List
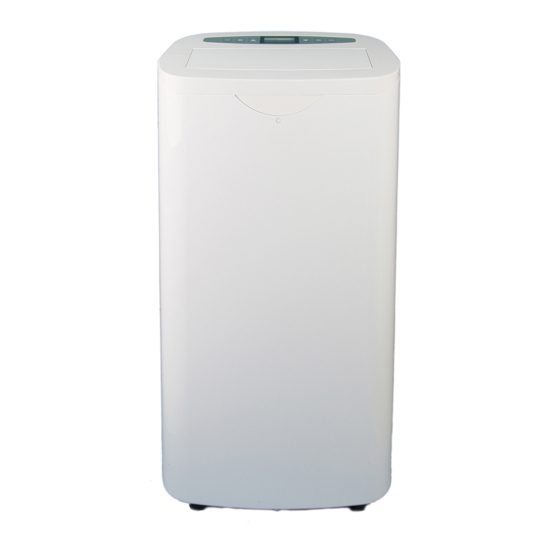
Parts List Front Side Back Side 1. Top Panel 7. Handle 2. Control Panel 8. Back Panel 3. Air Outlet 9. Power Cord 4. Remot e control receiving window 10. Upper Filter 5. Front Panel 11. Exhaust Connector 6. Casters 12. -
Page 6: Control Panel
Control Panel Cont rol Panel as below: Mode Button Fan Speed Button Timer Button Up Button Down Button Power Button Power When Power is pressed, the unit goes directly into Cool Mode (Default set temperature at 72° F (22℃) and Fan runs on medium speed). - Page 7 Press FAN button to select a desired fan speed, fan running speed c an be adjust by below order, Low Speed Medium Speed High Speed Timer Pressing the Timer button can get timer function and set the unit to auto on and off. Auto-On setting: ...
-
Page 8: Remote Control& Safety Protections
Remote Control The air conditioner responds to all signals that are sent by the remote control, remot e control requires 2 pcs of AAA battery to operat e. LCD display window Up and down button Power button Fan speed button Mode button Timer button Auto-swing button... - Page 9 Be sure to note proper polarity of batteries Notes: Use alkaline batteries only. Do not use rechargeable batteries. When replacing batteries, always replace both batteries with new batteries, do not mix old and new batteries. If the air conditioner will not be used for an extended period of time, remove the batteries from the remote control.
-
Page 10: Installation Instructions
temperature that will no longer result in frost. This is not a malfunction, but rather a protection for your unit. After the defrosting process has finished, the operation will recover aut omatically. Turn on your machine and wait for three minutes. 3. - Page 11 Installation Instructions Assemble the Outdoor Adaptor Align the two halves of the outer adaptor and gently snap together Note: To prevent damage, do not use excessive pressure. Install the Outward Adaptor and window slide Bar 1. Measure and verify if your window kit fits the dimensions of your sliding window.
-
Page 12: Drainage
Drainage 1. Manual drain: This unit is designed with high efficient self-evaporative system, all condens ate will recycle in the unit, however under extreme humidity the unit may need to be drained manually. This Portable Air Conditioner has an inner water reservoir, inside the reservoir is a safety micro switch. - Page 13 To maximize the efficiency of the air conditioners, please clean regularly. Cleaning the housing To clean the surface of the unit use a gentle detergent and damp cloth, and then wipe it dry with a soft clean cloth. Never use strong chemicals, oil-based products, detergents, chemically treated cloths or other cleaning solutions; this could possibly damage the housing.
-
Page 14: Troubleshooting
Troubleshooting Problem Possible Causes Corrective Action The unit does not start Water full indicat ors blinks and water Drain the water from the water tank. when pressing on/off tank is full. button Room temperature is higher than the set Reset the temperature temperature. - Page 15 Aire Acondicionado Portátil Manual del Usuario Es importante que usted lea estas instrucciones antes de usar su nueva compra y le recomendamos que usted la guarde en un lugar seguro para consultas futuras...
- Page 16 Tabla de Contedidos Instrucciones de Seguridad ………………………………………………………………………………………………..17 Especificaciones …………………………………………………………………………………………………………….18 Lista de Partes ……...………………………………………………………………………….…………………………… 19 Panel de Control……………………………………………..………………………………………………………………20 Cont rol Remoto &Protecciones de seguridad..……….…………………………………………………………………..22 Instrucciones de Instalación …….……………………………………………………………………………….…………24 Drenaje…………………………………………………………….………………………………………………………….26 Mantenimiento…………………………………………………………………………………………..…………………… 27 Solució n de Problemas ……………………………………………………………………………….……..…….………..28...
-
Page 17: Instrucciones De Seguridad
Información de Seguridad Lea y comprenda todo el manual antes de intentar ensamblar, operar o instalar el producto. Esta unidad está diseñ ada só lo para uso residencial. INS TRUCCIONES DE SEGURIDA D IMPORTA NTES ADVERTENCIA : POTE NCIAL PELIGRO ELÉCTRICO S I NO CUMP LE. Cuando se utilizan aparatos elé ctricos, las precauciones bá... -
Page 18: Especificaciones
Si esto ocurre, trate de introducir el enchufe en una toma diferente. Pó ngase en contacto con un electricista calificado para que inspeccione la salida original por daños. Especificaciones Numro de Modelo NPC1-14C BTU/hora: 14000 B TU/ h-Enfriamiento Clasificació n de Voltaje: 115V/60Hz Consumo de Energí... -
Page 19: Lista De Partes
Si el enchufe continú a dispará ndose ( Q ue es una caracterí stica está ndar de seguridad nacional EE .UU. ) y la luz verde se apaga , el cable puede dañ arse le impide reiniciar la unidad . Para su seguridad, llame a un electricista con licencia. -
Page 20: Panel De Control
Despué s de desembalar la unidad, compruebe si se incluyen todos los accesorios mencionados anteriormente , y comprobar sus propó sitos en la instalación de este manual. Panel de Control Panel de Control de la Siguiente Manera: Botón de Modo Botón de Velocidad del Ventilador botón del temporizador Abajo... - Page 21 Atenció n: Cuando se utiliza en funcion de FRESCO y en DESHUMIDIFICA CION, deje que la unidad funcione durante al menos 3 minutos antes de apagarlo o cambio entre las funciones . Ventilador Pulse el botón FAN para seleccionar la velocidad des eada del ventilador, velocidad de circulació n puede ser ajustado por el orden siguiente, Baja Velocidad Velocidad Media...
-
Page 22: Cont Rol Remoto &Protecciones De Seguridad
Conversación de Energí a Oprima el botón "MODE" para obtener Conversación de Energí a, bajo consumo de energí a en este modo. Limpieza -Automá tica: Oprima el botón "MODE" para obtener autolimpieza, mant enga tres minutos antes de apagae bajo fresco, modos de deshumidificación Control Remoto El acondicionador de aire responde a todas las señ... - Page 23 Temporiz ador: oprima este bot ó n para ajustar la hora de Encendido Automá tico y Apagado A utomá tico. Antes de utilizar el control remoto, instale las baterí as AAA en el cont rol remoto. 1). Oprima y deslizarse la cubierta de la baterí a en la parte pos terior del control remoto, entonces usted puede quit ar la tapa.
-
Page 24: Instrucciones De Instalación
1. Función de protección de anti-congelado Bajo el modo COOL, cuando el compresor funciona de forma continua durante 10 minutos, si la temperatura del tubo es ≦ 2 ℃ / 36 ℉ durante 20 segundos, la función de protección anti-congelado se encenderá, E4 se mostrará... - Page 25 La manguera flexible de escape se puede extender desde 10-63 "a 59" para el montaje. recomendamos mantenga la manguera lo má s corto posible para minimizar la posible pérdida de vuelta en la habitació n. Esta longitude diseñ ado especialmente acuerdo especificaciones del acondicionador de aire.
-
Page 26: Drenaje
Inserte el conector barra deslizamiento barra deslizante ajustable. Amplí e su longitud a la anchura de la ventana (vertical u horizontal), y luego apretar el tornillo para mantener la longitud de la barra de desplazamiento. 6. Asegú rese de que la barra de deslizamiento ajustable se adapta a su ventana y se queda en su lugar. -
Page 27: Mantenimiento
Cuando la unidad se haya drenado complet ament e, vuelva a colocar el tapón y encienda la unidad de nuevo. 2. Drenaje continuo Desenroscar el desagü e de la cubierta y desconecte el tapó n de agua. Conecte orificio de drenaje con tubo de desagüe φ12mm, tan profundo como sea posible para evitar fugas Tire de la manguera de desagü... -
Page 28: Solución De Problemas
e. Almacenar en un lugar seco y no accesible para niños o las mascotas . Para devolver esta unidad por garantí a o reparación Es importante que empaquetar correctamente. Por favor, reutilizar todo la espuma de poliestireno y cartó n que la unidad fue entregada. Reempaque se hace a lo contrario a la forma en que se abrió... - Page 29 La unidad tiene ruido / El suelo no está nivelado o no lo Coloque la unidad sobre una base fuerte suficientemente plana. nivelada y plana si es posible. El sonido viene del fluir del refrigerant e Es normal. interior del aire acondicionado. El compresor no La protecció...
- Page 30 Compressor: 3 Years from the Date of Purchase. GLOBAL AIR SERVICE CENTER 1941 S.Vineyard Ave.Ste.6 Ontario.CA 91761 Tel: 909-974-2859 Fax: 909-974-2865 Hours: 8:30AM-5:00PM PST TO OBTAIN WARRANTY SERVICE Contact Global air Technical Support Email:TechSupport@globalair-usa.com Phone: 888.470.7342 From 8:30AM to 5:00PM Monday through Friday Pacific Time.
Need help?
Do you have a question about the NPC1-14C and is the answer not in the manual?
Questions and answers
Can't get my AC to eork
If the Global Air NPC1-14C AC unit is not working, follow these troubleshooting steps:
1. Check the Power Supply:
- Ensure the unit is plugged into a grounded 115V/60Hz outlet.
- If there is no green light on the LCDI plug, press the reset button. The green light should turn on.
- If the green light goes off repeatedly, the cord may be faulty.
2. Remote Control Issues:
- Make sure the remote is aimed directly at the control panel.
- Ensure the distance is not too great.
- Replace the batteries if they are drained.
3. Error Codes:
- CH01: Room temperature sensor failure – check the sensor and related circuits.
- CH02: Tube temperature sensor failure – check the sensor and related circuits.
- E4: Anti-freeze protection active – the unit will restore functions automatically once protection ends.
4. Water Tank Full:
- If the water-level switch is triggered, the unit will stop. Drain the condensate from the water tank and restart the unit.
5. Installation Checks:
- Ensure the AC is upright on a level surface.
- Keep at least 50 cm (19.7 inches) clearance from walls or objects for airflow.
- Use the exhaust hose at the recommended length (10.63” to 59”) and keep it as short as possible.
6. If Unresolved:
- Turn off and unplug the unit.
- Contact a professional electrician or customer service for assistance.
This answer is automatically generated