Table of Contents
Advertisement
ZH
EN
Instructions for use / assembly instructions
2
28
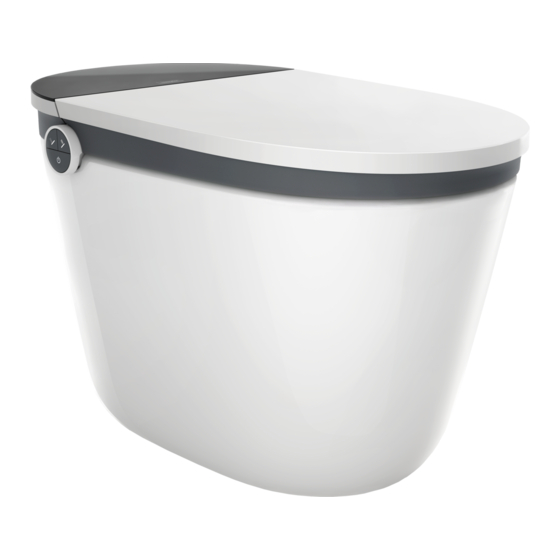
纯境智能一体坐便器, Uno舒适版 305
LavaPura Smart Toilet, Uno B305
22400007
纯境智能一体坐便器, Uno舒适版 400
LavaPura Smart Toilet, Uno B400
22401007
纯境智能一体坐便器, Uno豪华版 305
LavaPura Smart Toilet, Uno E305
22402007
纯境智能一体坐便器, Uno豪华版 400
LavaPura Smart Toilet, Uno E400
22403007
Advertisement
Table of Contents

Subscribe to Our Youtube Channel
Related Manuals for Hans Grohe LavaPura Uno B305 22400007

Summary of Contents for Hans Grohe LavaPura Uno B305 22400007
- Page 1 Instructions for use / assembly instructions 纯境智能一体坐便器, Uno舒适版 305 LavaPura Smart Toilet, Uno B305 22400007 纯境智能一体坐便器, Uno舒适版 400 LavaPura Smart Toilet, Uno B400 22401007 纯境智能一体坐便器, Uno豪华版 305 LavaPura Smart Toilet, Uno E305 22402007 纯境智能一体坐便器, Uno豪华版 400 LavaPura Smart Toilet, Uno E400 22403007...
- Page 2 目录 目录 安全注意事项 所需工具及材料 尺寸图 技术规格 安 装 整体简图 产品清单 安装坐便器 安装遥控器 使 使用前准备 用 自动翻盖 说 本体功能按键 明 遥控器使用方法 本体的保养 日 喷嘴的保养 常 硅藻纯更换 保 停电停水时 养 长时间不使用时 常见故障诊断和排除 其 产品保修卡 他 电子电气有害物质限制指示表 水效等级要求...
- Page 3 安全注意事项 安装前请务必仔细阅读此说明书, 并严格按照说明书规定进行安装, 阅读后, 请将此说明书放在 醒目的地方妥善保存。 为了避免使用者和他人受到伤害和财产损失, 请严格遵守安全警告和注意事项。 标志及其含义 表示如果不遵守此警告中的规定而误操作时, 有可能造成人员重伤 警告 或伤亡。 表示如果不遵守此注意中的规定而误操作时, 有可能造成人身伤害 注意 或财产损失。 下列标志是为了表示使用产品时重要安全注意事项而使用的。 标志 说明 此图表示不可行, 【 禁止】 之意。 此图表示必须 【强制】 实行的内容。 警告 1.点燃的香烟及其它燃烧物不能投入坐便盖内, 否则可能会引起火灾。 2.严禁自行拆解、 修理或改造产品, 否则可能会引起火灾或触电。 3.严禁将水或洗涤剂浇于机身或电源插头上, 否则可能会引起火灾或触电。 4.严禁用湿手触摸电源插头, 否则可能会引起触电。 5.严禁在同一插座上使用其他电器。 6.严禁使用电源延长线或松脱不稳的电源插座, 否则可能会引起火灾或 触电。...
- Page 4 警告 2.本产品必须连接到220V/50Hz、 负载电流至少为10A的专用标准 插座及配线, 且插座必须配备接地故障断路器或接地漏电保护器 或类似的高敏感、 快速型漏电开关 (额定敏感电流10mA以下) 。 3.插座位置需安装在不易被水淋到的地方, 建议使用防水型插座。 4.安装应使用随器具附带的新软管组件及其它附带或指定的零部件, 旧软管组件不能重复利用, 否则可能引起漏水、 火灾或触电。 5.当产品由寒冷或潮湿的地方搬至室内时, 先放置2小时, 使机内凝 水充分挥发, 再开机使用, 以免造成产品短路。 注意 1.打雷时, 拔出电源插头。 2.请勿将产品放置在可能掉入或被拉入浴缸或水槽的位置。 3.请勿将产品放置在水或其他液体中。 4.请勿触及已经掉入水中或浸水的产品, 并立刻拔掉电源插头。 5.请勿站在坐便器上, 不要用重力撞击陶瓷, 以防止破损漏水。 6.禁止坐便器底座埋入胶凝材料 (水泥砂浆) , 否则可能因膨胀而撑裂陶瓷。 7.禁止施加强力或冲击, 不要站在座圈、 便盖或本体上, 不要放置重物。 8.禁止使用香蕉水、 汽油、 药水及洗涤剂、 杀虫剂、 厕所清洁剂和硬毛刷清洁 本产品。...
- Page 5 所需工具及材料 (不随货供应) 活络扳手×2 卷尺 生料带 美工刀 冲击钻 各种螺丝刀 玻璃胶枪 玻璃胶 记号笔 水平仪 尺寸图 448mm 462mm 俯视图 324mm 完工墙面 742mm 完工地面 305/400mm 接排污口 备注: 1.本说明书产品外形图仅供参考, 我们保留对产品外形修改的权利。 2.产品外观如有改动, 以实物为准。...
- Page 6 技术规格 22400007 22401007 22402007 22403007 区分 舒适版 豪华版 坑距 305mm坑距 400mm坑距 305mm坑距 400mm坑距 额定电源 交流220V 50Hz 额定功率 1030W 进水软管长度 约680mm 电源线长度 约1.5m 防水保护等级 IPX4 平均用水量 4.8L(全排6.0L/半排4.2L) 进水方式 直接连接自来水 坐便器 洗净方式 喷射虹吸式 80-95mm 排污口外径 排水方式 下排水 加热方式 即热式 温水温度 温度调节范围: 关/约32-39℃ 加热功率...
- Page 7 整体简图 遥控器 盖板 遥控器挂架 妇洗 臀洗 座圈 落座感应区 喷嘴 开关 手动冲水按键 除臭窗 角阀 进水软管...
- Page 8 产品清单 主机 遥控器 密封法兰 对孔纸板 产品保修卡 产品型号 客户姓名 销售单位 购买日期 发票号码 客户电话 Instructions for use / assembly instructions 经销商盖章 经销商电话 感谢您购买本公司产品! 为确保产品信誉及维护您的消费权益, 自购买日起 (以购买单据日期 为准) , 本公司将为您提供免费的保修服务: 电子部分一年,陶瓷部分五年,管方服务平台注册 成功后,电子部分延保一年,如产品用于商业用途整机保修一年, 敬请放心使用。 按照说明书和使用注意事项正常使用后发生故障时, 在保修期内免费维修。 保修期内因 故障要求维修时, 可凭保修卡和原始发票与本公司联系, 进行免费维修或更换 (如果没有同 样的型号则以类似型号代替, 本公司保留此权利) 。 如果超过保修期或遗失保修卡,...
- Page 9 安装坐便器 安装前注意事项: 最低动态工作水压: 0.08MPa以上 (17L/min流动以上) , 未能满足此压力可能影响冲水效果。 温馨提示: 若无水压测试装置, 可参照下述方式。 配套进水管 配套角阀 蓄水桶 打开角阀, 通水10s, 水量达到2.85L以上, 则可确保产品最低水压。 1.安装配套专用角阀 在地面标出排水口的中心线, 按坐便器的尺寸, 在墙面的合适位置安装进水角阀。 2.对孔纸板安装说明 用地平仪测量地面, 确保安装面积地面平整; 将对孔纸板对齐排污口中心线, 根据对孔纸板描绘出相应的轮廓线后移除纸板。 单位: mm 墙上的电/水源位置可以互换 带接地故障断路器 防水、 防溅的16A插座 对孔纸板 ⏀100 3.安装坐便器 将密封法兰套入坐便器排污口; 根据描绘出的轮廓线将坐便器装入相应位置。...
- Page 10 陶瓷排污口 (陶瓷底部两侧标贴上的 箭头与排污口中心线对准) 密封法兰 地面排水口 温馨提示: 由于一体机比较重, 需翻开座圈, 由两人配合抬起。 4.安装进水软管 用新进水软管将坐便器的三通接头和角阀连接起来。 臀洗/妇洗水管 三通接头 角阀 进水软管 坐便器冲 水水管...
- Page 11 5.涂玻璃胶 在坐便器下边缘周围涂上优质防霉玻璃胶。 玻璃胶 温馨提示: 请将排污口的垃圾和其他污物清理干净; 安装坐便器时, 请确保坐便器排污口与地 面排水口安装到位。...
- Page 12 安装遥控器 请勿在潮湿的环境下安装使用产品,禁止置于易被水淋到的地方。 1.安装遥控器挂架 ① 将遥控器挂架竖直贴紧在墙上的预安装区域,用记号笔在墙上标识出两个安装孔的位置, 用⏀6mm的钻头在墙上已标识的位置钻孔,深度35mm。 (确定安装位置时,需注意当人坐在座圈上,手可以很容易的拿到遥控器) ② 将膨胀管装入墙孔内, 挂架贴紧墙壁, 挂架上孔对准膨胀管,放入螺钉锁紧,再盖上硅胶垫。 ③ 往上推电池盖,打开电池盖及电池密封盖,按 “ 、 ”极标识将新电池装入遥控器,盖上电 池密封盖、电池盖(舒适版)。 ④ 将遥控器放入挂架中(挂架有磁式吸附功能)。 往上推电池盖 2.无线充电遥控器的充电方法(豪华版): 将遥控器从挂架上取下放置在盖板上(如下图所示区域),该区域有磁式吸附定位,即可进行无线充电。 充电时遥控器3档状态显示灯 循环点亮,充满后常亮。...
- Page 13 使用前准备 1.打开角阀 查看管路连接处密封性, 确定不漏水, 逆时针旋开角阀, 开口调至最大。 进水角阀 2.接通电源 电源线漏电保护插头插入电源插座, 按下复位键, 电源指示灯亮, 表示通电。 复位键 电源指示灯亮 电源指示灯 试验按键 温馨提示: 使用前先按下漏电试验按键, 复位键弹起, 表示漏电保护功能正常。 3.安全自检 ① 上电后, 夜灯闪烁, 开始自检; ② 主机蜂鸣器响一声 “嘀” , 自检完毕, 夜光停止闪烁; ③ 功能模式开启, 正常使用。...
- Page 14 自动翻盖功能 (豪华版) 如果你购买的是带自动翻盖功能的电子坐便器, 本产品能实现自动开/关便 盖功能。(自动翻盖功能默认出厂设置为关闭, 首次使用需按遥控器自动开关 盖“ ”键打开,操作方法详见第19页。) 1. 靠近坐便器时 当人体靠近坐便器, 主机检测到人体的活动后, 便盖自动打开。 2. 使用坐便器时 当人体离开坐便器约90秒后, 便盖自动关闭。 3. 男士站立小便时 利用遥控器或手动打开座圈。 使用完毕离开坐便器后, 便盖和座圈约在90秒后自动关闭。...
- Page 15 本体功能按键 妇洗 臀洗 指示灯 开关 按键操作说明: 1、 落座时, 短按妇洗/臀洗键, 开启妇洗/臀洗功能。 2、 妇洗/臀洗功能开启时, 短按开/关键, 关闭功能。 3、 离座时, 短按臀洗键, 执行手动清洁喷嘴功能, 短按开/关按键, 关闭功能。 4、 同时按住臀洗和妇洗按键3秒以上, 开启/关闭自动节能功能。 5、 开启自动节能, 连续离座48小时以上, 座圈加热关闭; 落座时, 恢复上次所 使用的温度档位。 6、 开机状态下, 离座时, 长按开关键, 进入待机状态, 本机上白灯熄灭, 橙灯 亮起。 7、 待机状态下, 长按开关键, 退出待机状态, 本机上的白灯亮起, 橙灯熄灭。 8、...
- Page 16 遥控器使用方法 豪华版 妇洗 臀洗 一 一 级 级 开关座圈 菜 菜 停止 设置 单 单 (按键放置于产品侧面) 冲水 暖风 低电量 “打开/关闭” 状态显示 二 二 调整喷嘴位置 级 级 3档状态显示灯 菜 菜 调整水压强度 冷热清洗 单 单 按摩清洗 移动清洗 座温 风温 三 水温 三 级...
- Page 17 臀/妇洗 初始位置 落座状态下: 第二级按键从开始喷水时出现, 可操作: 按压调整喷嘴位置/水 妇洗/臀洗启动, -移动清洗/冷热清洗/按摩清洗 压按键时, 状态3档指 喷头伸出, 开始喷水。 -清洗位置/水量大小调节 示灯亮起显示当前状 态, 10S内无操作指示 *喷水结束前 (120秒内) , 用户任何时候 灯熄灭。 按妇/臀洗按键或停止按键, 停止程序。 *喷水结束前 (120秒内) , 用户触摸到二 第1档 第2档 第3档 级按键屏幕区域可以唤醒屏幕10秒, 对 指示灯显示与档位对应图 二级按键进行操作。 *第二级按键亮起, 10秒内无操作, 慢慢 熄灭。...
- Page 18 初始位置 暖风 落座状态下: 暖风功能启动, 开始出风。 第二级按键不出现 暖风结束前 (300秒内) , 用户任何 时候按暖风按键或停止键, 停止暖 风。 冲水 打开/关闭座圈 低电量 冲水功能; 打开/关闭座圈功能; 低电量指示灯 (红色) 于 第二级按键不出现; 第二级按键不出现。 电量低时自动出现。 短按冲水键: 大冲; 长按冲水键: 小冲。 *仅限豪华版 *仅操作遥控器时...
- Page 19 设置 按设置按键, 第三级按键出现, 按到座温/水温/风温 按到夜灯/落座除臭/ 进入设置模式。 可操作: 按键时, 状态栏3档指 自动开盖/自动冲水 -调整座温/水温/风温 示灯亮起并指示当前 按键时, 状态栏中的 -打开/关闭: 智能夜灯/ 状态; ON或OFF指示灯循 落座除臭/自动开盖/ 环亮起或熄灭, 表示 自动冲水 重复按键操作循环 该功能打开或关闭。 档位: *10秒内无操作则三级 off-1-2-3-off... *10秒内无操作则指 按键背光熄灭。 示灯熄灭。 *10秒内无操作则指示 灯熄灭。...
- Page 20 设置 按设置按键, 第三级按键出现, 长按用户模式1或2: 离座状态下, 进入设置模式。 可操作: 屏幕背光闪三下,将 短按清洁喷 当前的水温,喷嘴位 嘴键, 执行清 -用户设置1和2 置,水压强度,风温 洁喷嘴功能。 (仅限豪华版) 档位保存到对应模式 下; -清洁喷嘴功能 短按用户模式1或2: 屏幕背光闪一下,调 出之前保存在对应模 式下的档位参数。 *仅限豪华版...
- Page 21 本体的保养 1.切断电源: 本体保养时请先切断电源。 2.柔软抹布擦拭: 请用拧干水分的柔软抹布擦拭脏污部位。 3.安全自检: 擦拭完成后请重新接上电源。 4.使用过程中若发现坐便器有移动或晃动, 请检查硅胶是否老化松动, 如果松动需要铲除重新 涂抹。 喷嘴的保养 1.喷嘴伸出: 人体无着座, 短按本机臀洗按键启动喷嘴手动清洗功能 , 喷嘴会自动伸出。 2.喷嘴拆卸: 喷嘴自动伸出以后, 请用柔软抹布或软毛刷擦拭 (中性清洁) ; 请勿将喷杆外拉或内推, 以免破坏喷杆或电机。 3.收回喷嘴: 将喷嘴头部装回喷杆前端, 短按本机开关功能按键, 喷嘴自动收回。...
- Page 22 硅藻纯更换 1.如图示, 按压除臭组, 会弹出除臭盒; 2.取出除臭盒, 用手拆开除臭盒, 更换硅藻纯; 除臭盖 除臭组 硅藻纯 除臭盒 3.更换完毕后, 将除臭盒合起来, 放置盖板原位置后再次按压除臭盒, 则更换硅藻纯完毕。...
- Page 23 停电停水时 1.停电时冲洗坐便器的方法: 按下手动冲水按键, 进行冲洗。 手动冲 水按键 2.停水时冲洗坐便器的方法: 将水放入较大的水桶 (约8L) 内, 以坐便器槽面为中心进行冲洗。 此时, 注意防止水从坐便器溢出。 长时间不使用时 尤其是冬季, 长期不在家时, 请务必将水箱及管路中的水放掉, 防止冻结。 放水的方法 1.将坐便器水箱中的水排空: 启动一次冲水, 同时立即关闭进水角阀。 2.将管路中的水排空: 将软管从角阀上旋开, 排空管路的水后重新装回。 3.拔出电源插头, 切断电源 4.处理坐便器内积水: 为了安全起见, 建议将防冻液放入便器内的积水中。 温馨提示: 在放水前, 必须切断电源! 再次使用坐便器时, 请务必再次通水、 通电。...
- Page 24 常见故障诊断和排除 现象 原因 处理 进水管弯折造成堵塞 排除进水软管弯折 打开进水阀 进水阀关闭 不喷水 自来水断水 等待来水 过滤器堵塞 更换过滤器 进水管弯折造成部分堵塞 排除进水软管弯折 完全打开进水阀 进水阀未完全打开 喷水强度弱 过滤器阻塞 更换过滤器 水温设定常温档 水温不热 重新设定水温档位 重新设定座温档位 座温设定常温档 座温不热 处于待机或节电模式 切换到功能模式3分钟后使用 风温不热 风温设定常温档 重新设定风温档位 切换到功能模式使用暖风功能 不出风 处于待机模式 断电 将喷杆轻轻推回, 等待来电 喷杆不缩回 被异物卡住 清除异物 断电...
- Page 25 产品保修卡 客户姓名 产品型号 购买日期 销售单位 发票号码 客户电话 经销商盖章 经销商电话 感谢您购买本公司产品! 为确保产品信誉及维护您的消费权益, 自购买日起 (以购买单据日 期为准) , 本公司将为您提供免费的保修服务: 电子部分一年,陶瓷部分五年,官方服务平台注册 成功后,电子部分延保一年,如产品用于商业用途整机保修一年,敬请放心使用。 按照说明书和使用注意事项正常使用后发生故障时, 在保修期内免费维修。 保修期内因故障 要求维修时, 可凭保修卡和原始发票与本公司联系, 进行免费维修或更换 (如果没有同样的型号则 以类似型号代替, 本公司保留此权利) 。 如果超过保修期或遗失保修卡, 本公司也提供维修服务并收取成本费用。 该有限责任仅适用于中国大陆 (不包括香港、 澳门、 台湾) 。 本公司产品的有限责任承担适合购买的本公司产品, 保修期内以下情况下进行收费维修: 1.因使用不当, 误操作或者不正当的修理改造而造成的损坏。 2.移动安装位置所造成的损坏。 3.由火灾、...
- Page 26 电子电气有害物质限制指示表 有害物质 部件名称 六价铬 多溴二苯醚 多溴联苯 铅 (Pb) 汞 (Hg) 镉 (Cd) (Cr)(VI) (PBDE) (PBB) 电源线 电路板 着座传感器 温度传感器 角阀 接地片 电机组件 进水软管 膨胀螺栓 温度保护器 : 表示该有害物质在该部件所有均质材料中的含量均在GB/T 26572规定的限量要求以下。 : 表示该有害物质至少在该部件的某一均质材料中的含量超出GB/T 26572规定的限量要求。 环境保护使用期限 此标志中的年数, 是基于SJ/T 11364-2014 【 电子电气产品有害物质限制使用标识要求】 的环境保 护使用期限。 只要遵守使用说明书上记载的此产品安全与使用方面的注意事项, 从制造日算起的此年限内, 就 不会发生由于使用产品引起有害物质的外泄或突变,...
-
Page 28: Table Of Contents
Contents Contents Safety Instructions Tools and materials required Dimensions stal- Technical Specifications tion Sketch List of Materials Installation of the ceramic toilet Installation of the remote control Preparation before Use struc Automatic lid opening/closing tions Functional Buttons of Main Unit Usage of Remote Control Maintenance and Care of Main Unit Rou-... -
Page 29: Safety Instructions
Safety Instructions Please read this manual carefully before installation, and install this product in strict accordance with the manual. After reading, please keep this manual properly in a safe place. To prevent users and others from injuries and property damages, please strictly observe the safety warnings and precautions. - Page 30 Warning 2. This product must be connected to a 220V/50Hz special standard socket and wiring with the minimum load current of 10A.The socket must be equipped with a ground fault circuit breaker or a ground leakage protector or other similar fast leakage protection switch with high sensitivity(with the rated sensitive current of 10mA or less).
-
Page 31: Tools And Materials Required
Tools and Materials Required (not supplied) Adjustable wrench × 2 Measuring tape Teflon tape Utility knife Drill Sorts of screwdrivers Glass cement gun Glass cement Marking pen Level Dimensions 448mm 462mm 324mm Top view Finished wall 742mm Finished floor 305/400 mm To outlet hole Notes: 1. - Page 32 Items 200W 742 mm (length) × 462 mm (width) × 490 mm (height) 50kg...
-
Page 33: Sketch
Sketch Sketch Remote control Remote control Remote control hanger Remote control hanger Front washing Front washing Rear washing Rear washing Seat Seat Seated sensing area Seated sensing area Spray nozzle Spray nozzle ON/OFF ON/OFF Manual flushing button Manual flushing button Deodorization window Deodorization window Angle valve... -
Page 34: List Of Materials
List of Materials Remote control Main unit Sealing flange Alignment hole cardboard Warranty Card Instructions for use / assembly instructions Customer Model No. Name Purchasing Seller Date Customer Invoice No. Contact No. Distributer Distributer Contact No. Stamp Thank you for purchasing our product! To maintain our product reputation and protect your consumer rights, we will provide you with one-year (for the electric appliance) or five-year (for the ceramic section) free warranty service. -
Page 35: Installation Of The Ceramic Toilet
Installation of the ceramic toilet Precautions before installation: Minimum dynamic operating water pressure: 0.08 MPa or more (flowing at 17 L/min or more). The flushing effect may be affected if failed to meet this pressure. Tips: If no water pressure tester is available, you may refer to the following method. Mating water inlet pipe Mating angle valve Water storage barrel... - Page 36 Ceramic drain outlet (Align the arrows on the labels at both sides of the bottomof the ceramic with the center Sealing flange line of the drain outlet) Floor outfall Tips: It is suggested to lift and open the seat by two persons since the one-piece toilet is heavy. 4.
- Page 37 5. Application of the glass cement Apply high-quality mildew-proof glass cement around the lower edge of the toilet. Glass cement Tips: Clean the garbage and other dirt on drain outlet; and when installing the toilet,make sure the drain outlet of the toilet drain and the floor outfall are installed in place.
-
Page 38: Installation Of The Remote Control
Installation of the remote control Do not install and use this product in a damp environment. Do not place it in a place where it is likely to be damped with water. 1. Installation of remote control hanger ① Press the remote control hanger upright against the pre-installation area on the wall,and mark the positions of the two mounting holes on the wall with the marking pen. -
Page 39: Preparation Before Use
Preparation before Use 1. Turn on the angle valve To check the tightness of the pipe connections and make sure that there is no water leakage, turn the angle valve counterclockwise to adjust the opening to the maximum. Water inlet angle valve 2. -
Page 40: Automatic Lid Opening/Closing
Automatic lid opening/closing function (deluxe version) If you are purchasing an electronic toilet with automatic lid opening/closing function, it has the feature of automatically opening/closing the lid. ( The auto open&close function of lid is set to off by default. For the first use, you need to press the remote control's auto switch"... -
Page 41: Functional Buttons Of Main Unit
Functional Buttons of Main Unit Front washing Rear washing Indicator light ON/OFF Operation instructions of buttons: 1. When sitting on the seat, short press the feminine/rear washing button to activate the feminine/rear washing function. 2. When the feminine/rear washing function is being activated, short press the ON/OFF button to shut down the function. -
Page 42: Use Usage Of Remote Control
Usage of Remote Control Deluxe Version Rear washing Open/close seat Setting Stop (Buttons are provided on the side of the product) Warm Flushing wind Low battery "ON/OFF" status display Adjust nozzle position 3-level status display light Adjust water pressure Cold and hot washing Mobile Massage cleaning washing... - Page 43 Rear/front washing Initial position f ront washing When in a seated status, The level-2 button appears when water Once pressing the nozzle The feminine/rear washing spraying begins, and the following is operable: position/water pressure adjusting starts,and the nozzle stretches -Mobile washing/cold and hot washing/ button,the Level-3 status indicator out, and starts to spray.
- Page 44 Initial position Warm wind When in a seated status, The warm wind function is activated to start blowing. The level-2 button does not appear Before the warm wind ends (within 300 seconds),the user may stop the warm wind by pressing the warm wind button or the stop button to stop the warm wind.
- Page 45 Setting Press the setting The Level-3 button Once pressing the seat Once pressing the night light/ buttonto enter the appears,and the following temperature/water seating deodorization/ Setting mode. is operable: temperature/warm wind automatic lid opening/ - Adjust the seat temperature/ temperature button,the auto flushing button, water temperature/warm Level-3 indicator lightin...
- Page 46 Setting Press the setting The Level-3 button Long press the user When in the off-seat buttonto enter the appears,and the mode 1 or 2: status,short press the Setting mode. following is operable: The screen backlight nozzle cleaning buttonto flashes three times, executethe nozzle - User settings 1 and 2 to save the current water...
-
Page 47: Rou-Maintenance And Care Of Main Unit
Maintenance and Care of Main Unit 1. Cut off the power: Please cut off the power before maintaining the main unit. 2. Wipe with a soft rag: Please wipe the dirty area with a wrung-out soft rag. 3. Safety self-inspection: Please reconnect the power after wiping. 4. -
Page 48: Diatoms Replacement
Diatoms replacement 1. As shown in the figure, press the deodorization set to pop up the deodorization box; 2. Take out the deodorization box, disassemble the deodorization box with your hands, and replace the diatoms; Deodorization cover Deodorization set Diatoms Deodorization box 3. -
Page 49: When The Electricity And Water Supply Is Cut-Off
When the electricity and water supply is cut-off 1. How to flush the toilet during interruption of power supply: Press the manual flushing button to flush it. Manual flushing button 2. How to flush the toilet during interruption of water supply: Pour the water into a large bucket (about 8 L) and flush the toilet around the bowl face of the toilet. - Page 50 Fault Analysis and Solution Problem Cause Solution The water inlet hose buckles to Solve the buckling cause blockage Turn on the fill valve The fill valve is off No flushing Water supply is cut off Wait for water supply restoration Filter blockage Replace the filter The water inlet hose buckles to...
-
Page 51: Er Warranty Card
Warranty Card Customer Model No. Name Purchasing Seller Date Customer Invoice No. Contact No. Distributer Distributer Contact No. Stamp Thank you for purchasing our product! To maintain our product reputation and protect your consumer rights, we will provide you with one-year (for the electric appliance) or five-year (for the ceramic section) free warranty service. -
Page 52: Information On The Use Of Hazardous Substances In Electrical And Electronic Devices
Information on the Use of Hazardous Substances in Electrical and Electronic Devices Hazardous Substance Part Name Cadmium Mercury Polybrominated Polybrominated Hexavalent Lead (Pb) (Cd) (Hg) diphenyl ether (PBDE) biphenyl (PBB) chromium (Cr)(VI) Power cord Circuit board Seating sensor Temperature senor Angle valve Grounding piece Motor assembly...
Need help?
Do you have a question about the LavaPura Uno B305 22400007 and is the answer not in the manual?
Questions and answers