Advertisement
Quick Links
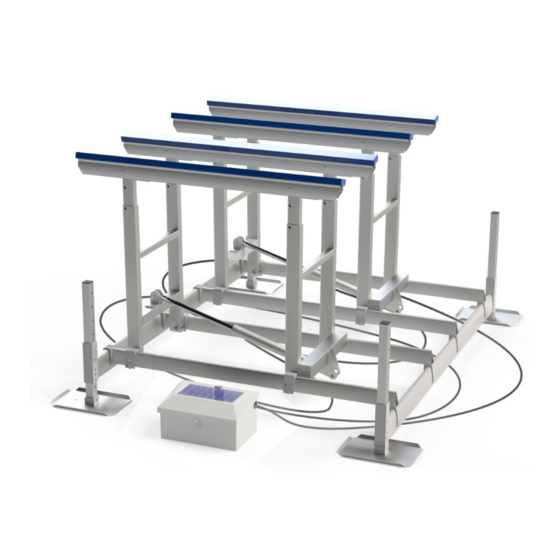
Over-Center
4,000 lbs Capacity (2,000 lbs + 2,000 lbs)
READ complete manual CAREFULLY
BEFORE attempting assembly or operation
866-GO-BASTA
www.gobasta.com
tm
Hydraulic Aluminum Lift
Model 2x2k
ASSEMBLY
INSTALLATION
REPLACEMENT PARTS
©
Copyright 2018 Basta Marine
2x2k
04/21
L392-0097B
Advertisement

Subscribe to Our Youtube Channel
Related Manuals for Basta Boatlifts Over-Center 2x2k

Summary of Contents for Basta Boatlifts Over-Center 2x2k
- Page 1 2x2k Over-Center Hydraulic Aluminum Lift 4,000 lbs Capacity (2,000 lbs + 2,000 lbs) Model 2x2k READ complete manual CAREFULLY ASSEMBLY INSTALLATION BEFORE attempting assembly or operation REPLACEMENT PARTS 866-GO-BASTA www.gobasta.com 04/21 © Copyright 2018 Basta Marine L392-0097B...
- Page 2 INDEX Warning ..………………................Page 2, 3 Parts List and Diagrams ..............Pages 4 - 5, 19 Assembly Instructions .................Pages 6 - 17 First Use / Adjustments ..……………............Page 18 Maintenance ......…................Page 20 Troubleshooting / FAQ .…................Page 21 Warranty ......…................Page 22 Basta Marine Boat Lift Accessories ..…………………....….….….Page 23 WARNING NOTE:...
- Page 3 INSPECT the lift monthly Before Using: for frayed hoses, loose Read this manual fasteners and corrosion completely! lift unattended OIL INJECTED INTO THE SKIN FROM HIGH PRESSURE LEAKS IN HYDRAULIC SYSTEMS CAN CAUSE SEVERE INJURY. MOST DAMAGE OCCURS DURING THE FIRST FEW HOURS.
- Page 4 17&18 17&18 17&18 17&18 17&18 17&18 ONLY ONE LIFT SHOWN 17&18 FOR CLARITY 17&18 OPTIONAL 11&2 11&2 1&2 1&2 7&2 7&2 7&2 7&2 1&2 1&2 7&2 1&2 7&2 1&2 1&2 7&2 7&2...
- Page 5 MECHANISM PARTS LIST SEE PAGES 14-15 FOR ELECTRICAL AND HYDRAULIC PARTS ITEM PART NO. DESCRIPTION QTY. ITEM PART NO. DESCRIPTION QTY. K200-0125 W102-0045 H-frame Arm, Inner W117-0001 Foot Pad A427-0014 Bunk Rail Assembly, Left (8 ) A427-0015 Bunk Rail Assembly, Right W105-0012 Side Rail W111-0019...
- Page 6 ASSEMBLY INSTRUCTIONS NOTE: use a small amount of 'moly' lube on bolt threads NOTE: assemble lift on level ground and adjust legs so that lift base frame is level during lift assembly. NOTE: the 3 different holes shown can be used for pin '15' to allow fine height adjustment after installation 10+2...
- Page 7 10+2 10+2 10+2 Assemble lift on level ground and adjust legs so that lift base frame is level during lift assembly.
- Page 8 ASSEMBLY INSTRUCTIONS NOTE: use a small amount of 'moly' lube on bolt threads NOTE: orient flat faces toward lift center Assemble lift on level ground and adjust legs so that lift base frame is level during lift assembly.
- Page 9 NOTE: forward H-frame BOTH is shown. Aft H-frame H-FRAMES installation is the same are installed with curved side up bend out 18+2 NOTE: no washer on this end Assemble lift on level ground and adjust legs so that lift base frame is level during lift assembly.
- Page 10 ASSEMBLY INSTRUCTIONS NOTE: use a small amount of 'moly' lube on bolt threads Install cylinder with lift in 'down' position 11+21 NOTE: install plastic washers here washers here 11+6 NOTE: install cylinders with hose fittings facing down!
- Page 11 port points down Important note: Install cylinder with hose fittings facing down! Optional extension arms only: 24+25...
- Page 12 ASSEMBLY INSTRUCTIONS NOTE: use a small amount of 'moly' lube on bolt threads Complete Step 11 to raise lift to install screws for pins. See Step 12 for details. LONG SHORT plate plate FORWARD AT AFT bushings are pre-installed...
- Page 13 CONNECT POWER UNIT FEMALE QUICK COUPLER DO NOT SUBMERSE H770-0001 COMPLETE POWER UNIT Keep inside dry H653-0001 Prevent unauthorized use - KEEP BOX LOCKED POSITIVE BATTERY CABLE (RED) R711-1010 up/down remote switches receivers power switch MALE QUICK COUPLER H770-0002 HOSE ASSEMBLIES NO GAP! H123-0001 Ensure each Quick Coupler is...
- Page 14 POWER SYSTEM COMPONENTS SOLAR PANEL R281-0004 Padlock not included ENCLOSURE C243-0004 CONTROL PANEL ASSEMBLY R815-0010 pre-wired with wiring harness POWER UNIT SUB-ASSEMBLY H603-0013 Please order replacement parts by PART NO. and DESCRIPTION Hydraulic Cylinder Assembly #H310-0008 Hydraulic Fluid (quart) Remote Control Receiver with Fobs (Item GG on pg 4) # Y354-0001 # R812-0011...
- Page 15 ASSEMBLY INSTRUCTIONS NOTE: use a small amount of 'moly' lube on bolt threads raise lift to install 1/4 x 1.75” bolts ("24") 24+25 24+25 17+18 24+25...
- Page 16 Lower the lift completely, then raise it slightly. Disconnect the hydraulic hose quick couplers in the Power Unit box to separate it from the lift. Move the lift into its operational position Adjust the legs to provide enough water over the lift so that the boat will not have to be "driven"...
- Page 17 FIRST USE AND ADJUSTMENTS First test lift on dry ground for oil leaks, remote control function and correct operation. IMPORTANT: After installation, the legs MUST be adjusted so that the lift frame is level. Lift must move into Over-Center position when fully raised. H-frame arms should appear to be tilted slightly forward.
- Page 18 We use a special low-toxicity hydraulic fluid that is safe Always leave the boat in the fully raised, Over-Center™ for the environment. This fluid is different than food-grade oil. Only use Basta Boatlifts approved fluid in your position with the power off. hydraulic system.
- Page 19 MAINTENANCE Your Basta Boatlift requires very little maintenance once installed. Occasionally wipe the solar panel with a clean, damp cloth to preserve its charging performance. Every 6 months, we recommend: Inspect the hoses, cylinders and fittings for leaks and wear. Check the wire terminals for snugness and corrosion.
- Page 20 Dealer within 50 miles of the location of the Product. Labor will not be provided for direct purchases from Company or when an active Authorized Dealer is not located on the water. Welcome to the Basta Boatlifts family and Boat Happy! within 50 miles of the location of the Product.
Need help?
Do you have a question about the Over-Center 2x2k and is the answer not in the manual?
Questions and answers