Table of Contents
Advertisement
Advertisement
Table of Contents

Related Manuals for Aristo MAT Series

Summary of Contents for Aristo MAT Series
- Page 1 ARISTOMAT CL 131O / 1317 / 1617 Users Manual...
- Page 2 Copyright ARISTO Graphic Systeme reserves the right to make any alterations or improvements in the hardware, software and the manual at any time and without any notice. All rights reserved. This manual and no part of it may be reproduced or...
-
Page 3: Table Of Contents
Contents Contents DECLARATION OF CONFORMITY 1. Introduction ..................9 2. Safety Instructions ................. 10 3. Danger Area ..................13 4. Installation ..................14 Elektrischer Anschluß .................... 14 Connecting compressed air ..................14 Connecting the computer ..................14 Installing tool heads ....................14 5. - Page 4 Contents Menu Level 1 ......................36 Improving plot quality and plot time ..............36 Angle ......................36 Smoothing ...................... 38 Acceleration ....................40 Speed ......................40 Projection of Plots (Mirroring / Scale / Rotation) ........... 40 Mirroring ......................40 Scale ......................41 Rotation ......................
-
Page 5: Declaration Of Conformity
DECLARATION OF CONFORMITY ARISTO Graphic Systeme GmbH & Co. KG Schnackenburgallee 117, 22525 Hamburg/Germany declare under our sole responsibility that the products ARISTOMAT CL 131O / ARISTOMAT CL 1317 ARISTOMAT CL 1617 Article-No.: 0000 07361 / 0000 07627 / 0000 07061... -
Page 7: Introduction
Everywhere there are special requirements for flexibility and precision. In the meantime ARISTO presents an abundant offer of cutters with var- ious tool heads, material transport systems and accessories. ARISTO offers detailed training courses to get the maximum productivity and readiness of the ARISTOMAT. -
Page 8: Safety Instructions
With malfunctions the plotter shall not be taken in operation. • Covers are part of safety. Do not remove any covers from the ARISTO- MAT, tool heads and accessories. • Unauthorized modification which might impair the safety of the machine are not permitted. - Page 9 Safety Instructions • Always remove tools from tool heads before assembly (disassembly) - danger of injury. • Carry out a blade changeover thoroughly. Handle with care, you might hurt yourself with the sharp knife. Worn down and broken blades can also cause injuries.
- Page 10 Safety Instructions Warning off inadequate use • only use original ARISTO tool heads • only use material which is permitted to the ARISTOMAT • do not run the ARISTOMAT in wet rooms • do not let coolant or lubricant to guides and toothed racks •...
-
Page 11: Danger Area
Danger Area 3. Danger Area 1 Total work area on the table top 2 Moving bridge - Passage between moving bridge and table top 3 Slide 4 Tool carriage 5 Tool head - Area between tool head and table top CAUTION: In case of emergency push the RED EMERGENCY OFF button. -
Page 12: Installation
Installation 4. Installation The plotter will be installed and adjusted by a service technician at an assigned location. Connecting the power supply ARISTOMAT with 1.1 kW pump system: 230 V, 50/60 Hz, 16 A. ARISTOMAT with 3 kW pump system: 3-phase fixed connection with 400 V, 50 Hz, 16 A. -
Page 13: System Start Up
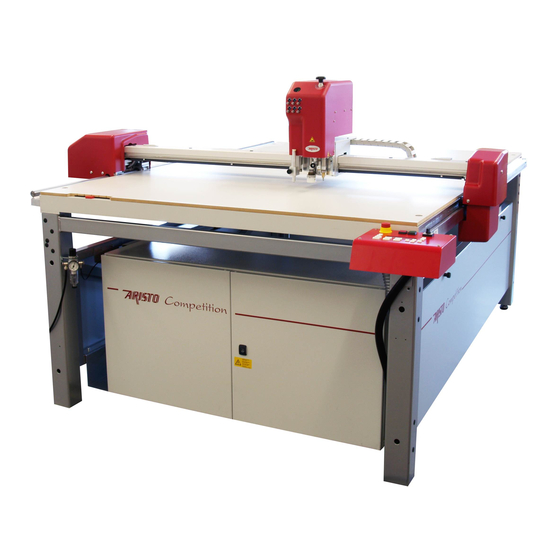
System Start Up 5. System Start Up Elements of operation 1 Connection of compressed air 2 Connection of data cable (25 pins) 3 Tool carriage 4 Console with control panel 5* Vacuum valve slide: CL 1617 6* Vacuum valve slide: CL 131O, CL 1317 7 Maintenance unit compressed air 8 EMERGENCY OFF button 9 Drives OFF switch... -
Page 14: Console With Control Panel
System Start Up Console with Control panel Main switch ON/OFF(11) is switching the machine ON and OFF. EMERGENCY OFF button (8) The drives of the ARISTOMAT are switched off immediately. The plotter remains in its current position. Cutting jobs and unsaved settings are lost. -
Page 15: Control Panel
System Start Up Control panel is equipped with push-buttons and double-spaced display using for ARIS- TOMAT operation Display gives notice about menu functions, fault messages and user information with input required Function keys Beside the display four functions keys (F1 - F4) are used for menu con- trol. - Page 16 System Start Up Direction keys to move the tool head in x- (∧ ∧ ∧ ∧ ∧ and ∨ ∨ ∨ ∨ ∨ ) and y-direction (< and >). and to the input of numerical values (e.g. adjusting the speed). •...
- Page 17 System Start Up Press F3 for reset. Customer configuration is loaded. Display: KEEP ORIGIN DEL: ORIGIN • press F3 to confirm the origin once set. • press F4 to delete and set a new origin. After SCAN TOOL (F4) the tool is recognized automatically (blade/marker).
-
Page 18: Switching On The Aristomat
System Start Up Switching on the ARISTOMAT • Set the pressure to 6 bar (87 psi) on the air maintenance unit. • turn on the main power switch to start the ARISTOMAT The ARISTOMAT performs a self test and displays information about the installed software version and plot buffer size on the control panel. - Page 19 System Start Up Afterwards the ARISTOMAT is ready for operation and the MAIN MENU is displayed: PLOT BUFFER ORIGIN VACUUM... SETTINGS CAUTION: For safety reasons the drives must be switched OFF now, before loading material and inserting the tool holder. •...
-
Page 20: Material Down Holding
System Start Up Material down holding Material down holding on the ARISTOMAT is via vacuum. The ARISTO- MATs feature vacuum systems for material hold down. There are small holes in the table top that connect via air channels to the vacuum pump. -
Page 21: Vacuum Zones
System Start Up Vacuum zones ARISTOMAT 131O ARISTOMAT CL... - Page 22 System Start Up ARISTOMAT 1317 ARISTOMAT CL...
- Page 23 System Start Up ARISTOMAT 1617 ARISTOMAT CL...
- Page 24 System Start Up ARISTOMAT CL...
-
Page 25: Menu Tables
Menu Tables 6. Menu Tables All ARISTOMAT settings which are necessary for optimum operation can be reached in four menus. By repeated pressing of the key MENU successively the four levels in the display are represented and by pres- sures of the appropriate function keys one arrives into the appropriate submenus Enclosed menu tables show all parameter with a note, where you can find a detailed description in the User’s Manual. -
Page 26: Main Menu
Menu Tables Main Menu The Main Menu is displayed after switching on the ARISTOMAT and completing Reference Move: ARISTOMAT CL... -
Page 27: Menu Level 1
Menu Tables Menu Level 1 In Main Menu press MENU key to get to Menu Level 1 (press ESC to get back the Main Menu): ARISTOMAT CL... -
Page 28: Menu Level 2
Menu Tables Menu Level 2 From the Main Menu by repeated pressing of the key MENU to the Menu Level 2 branch out (press ESC to get back the Main Menu): ARISTOMAT CL... -
Page 29: Menu Level 3
Menu Tables Menu Level 3 From the Main Menu by repeated pressing of the key MENU to the Menu Level 3 branch out (press ESC to get back the Main Menu): ARISTOMAT CL... - Page 30 Menu Tables ARISTOMAT CL...
-
Page 31: Menu Settings
Menu Settings: Main Menu 7. Menu Settings Main Menu Repeating plot jobs and test plots The plot data which is stored in the buffer can be used again. Note: Parameters for scale, mirroring and rotation can be changed be- fore a repetition. •... -
Page 32: Setting Origin And Processing Data
Menu Settings: Main Menu Setting Origin and processing Data After installation and start up the machine, the ARISTOMAT is ready for operation and it can received and processed data from a connected com- puter system. Setting Origin • put on material. •... -
Page 33: Functions Of The Laser Pointer
Menu Settings: Main Menu Functions of the laser pointer Depending on the operation mode the laser pointer takes over different tasks and functions: Setting the origin The laser pointer enables a quick and exact origin setting while using the maximum working area. Pathtrac-Function (Simulation) The laser pointer serves as controlling instrument. -
Page 34: Menu Level 1
Menu Settings: Menu Level 1 Menu Level 1 Improving plot quality and plot time The PARAMETER submenus offer settings which may influence plot quality and plot time. • press F1 PARAMETER for parameter settings • with the function keys (F F4) get to the following submenus: Parameter settings: Example SPEED With the direction keys <... - Page 35 Menu Settings: Menu Level 1 The setting UPPER ANGLE defines the minimum angle before stopping and lifting the tool in front of a turn. The upper angle can be set between 10 and 90 degrees (factory setting 20 degrees). rotate stop lift rotate...
-
Page 36: Smoothing
Menu Settings: Menu Level 1 SMOOTHING The circle resolution can be changed with the settings for CIRCLE RESOLUTION, SMOOTHING and SPEEDBOOSTER CIRCLE RESOLUTION The HPGL circle commands can be set in different values of chordal height: HPGL CHORD TOL. EXCELLENT 0.0050 mm FINE 0.0100 mm... - Page 37 Menu Settings: Menu Level 1 SETTING SMOOTHING LEVEL − level 1 to 6 Choose from: − switch off smoothing − switch on cordal height Before the final vectors are sent, all vectors are internally added until a certain minimum vector length is reached (factory setting level 2). Level 6 generates the highest smoothing.
-
Page 38: Acceleration
Menu Settings: Menu Level 1 ACCELERATION This parameter sets the time up to maximum speed to drive along the vector. The settings can influence the plot time. Settings are possible between 50 and 100 (factory setting 100%). SPEED It adjusts the maximum speed which can be reached when driving along the vector. -
Page 39: Scale
Menu Settings: Menu Level 1 SCALE The scale of the plot can be changed in steps of 0.01 per cent. The value of 100 per cent (setting 10000) are equal to scale 1:1. ROTATION The plot can be rotated anticlockwise to its origin. The value can be re- duced or increased in steps of 90 degrees. -
Page 40: Menu Level 2
Feed correction (-) Material Thin Feed length depending on the plotter type (max. plotter length) Knife 1 Knifeedge Origin Swing Upper angle 20° Parity NONE/1 STOPBIT Plotter type ARISTO Protocol XON/XOFF Lower option Perform lower Speedbooster Spline Language English Overcut ARISTOMAT CL... -
Page 41: Host
PLOTTER TYPE • choose with F3 or F4 type ARISTO, HP 7475 A and HP 7580 B. • press ENTER to set format (material width, origin etc.) depending on the emulation. If the emulation shall be retained, the setting must be saved as a customer configuration. -
Page 42: Interface
HP 7475 A A, B, DIN A4 and DIN A3 HP 7580 A, B, C, D, E, DIN A4, A3, A2, A1, A0 ARISTO A, B, C, D, E, DIN A4, A3, A2, A1, A0 INTERFACE BAUD RATE Parameter for data transmission. -
Page 43: Menu Level 3
Menu Settings: Menu Level 3 Menu Level 3 Setting parameters of machine Factory settings of the ARISTOMAT can be changed and saved as cus- tomer configuration. • with the function keys (F F4) get to the following submenus: MATERIAL WIDTH Settings avoid plotting outside the material. -
Page 44: Rot. Option
Menu Settings: Menu Level 3 ROT. OPTION Normally the knife turns in plotting direction even while moving with pen up in order to protect the knife if there are barriers on the table. If it is sure that there are no barriers on the table it is possible to select OPTIMIZE ROTATION at the menu item ROT. -
Page 45: Regular Interval Of Service
Maintance Service 8. Regular interval of service If working with the ARISTOMAT in 1 shift, ARISTO recommends a main- tenance by ARISTO technician once 1 year. The length of maintenance intervals are reduced by extra shifts. CAUTION: Following cleaning works shall only be done by trained and introduced people. - Page 46 Maintance Service Monthly Machine control inside take off dust with a vacuum cleaner Toothed rack underside the guide rail take off mate rial dirt with a soft plastic brush Twice a year Dust collector placed at the bridge replace by new one Yearly Vacuum system Clean filter in piping system of the...
-
Page 47: Data Interface
Data Interface 9. Data interface The ARISTOMAT is equipped with an interface which conforms to the RS 232-C/CCITT standard interface. Connector and pin assignment The ARISTOMAT is delivered with a interface cable for computer sys- tems (25 pins D-sub). The ARISTOMAT has following pin assignment: I/O* Name / Level Transmit Data (‘0’... - Page 48 Data Interface The connection between ARISTOMAT and an Apple Macintosh is estab- lished via the telephone socket (cable is option of delivery). Pin assignment: D-Sub 25 D-Sub 25 ARISTOMAT 8 pins, round male female male 1 ----------------- 6 6 --------------------------- 4 2 ----------------- 5 5 ------------------------- 20 3 ----------------- 2...
-
Page 49: Specifications
Specifications 10. Specifications ARISTOMAT CL 131O CL 1317 CL 1617 Overall dimensions mm* 1950 / 1620 / 1120 1950 / 2440 / 1120 2250 / 2520 / 1120 (width/length/heigth) Max. activ work area mm 1300 / 950 1300 / 1700 1600 / 1700 (width/length) Suitable for material thickness... - Page 50 Specifications ARISTOMAT CL...
-
Page 51: Technical Hints
Technical Hints 11. Technical Hints Note: If faults occur several times, the operating sequence and the fault message should be written down and the ARISTO service should be informed. Fault Cause Remedy HPGL Fault IGNORED INSTRUCTION 1.Sent data from the compu- 1.These messages are just... - Page 52 Technical Hints Fault Cause Remedy TOOL ERROR HIGH 1.The axis are blocked 1.Switch off drives and POSITION PRESS check tool. Press ESC and ESC TO CONTINUE switch on drives to continue OTHER TOOL ERRORS 2.Defective machine control 2.Choose menu SETTINGS, PRESS ESC MATERIAL Thickness TO CONTINUE...
- Page 53 Technical Hints Fault Cause Remedy Data fault PLOT BUFFER OVERFLOW 1.Interface parameters of 1.Align the interface settings PRESS ESC KEY ARISTOMAT and computer of ARISTOMAT and compu- are not equivalent FRAME ERROR REG. DATA PRESS ESC KEY 2.Used cable with wrong 2.Check the cable assign- interface assignment.
- Page 54 Technical Hints ARISTOMAT CL...
- Page 55 ARISTOMAT CL...
- Page 56 Schnackenburgallee 117 ARISTO GRAPHIC SYSTEME INTEGRAL TECHNOLOGIE SARL D-22525 Hamburg/Germany Ges.m.b.H. 8/10 rue du Bois Sauvage Bât i Tel.: +49-40-547 47- 0 Jakob Prandtauer Str. 1 F-91055 Evry Cedex/France Fax: +49-40-547 47- 111 A-6300 Wörgl/Austria Tel.: 0033- 64 97 81 82 e-mail: sales@aristo.de...
Need help?
Do you have a question about the MAT Series and is the answer not in the manual?
Questions and answers