Table of Contents
Advertisement
Quick Links
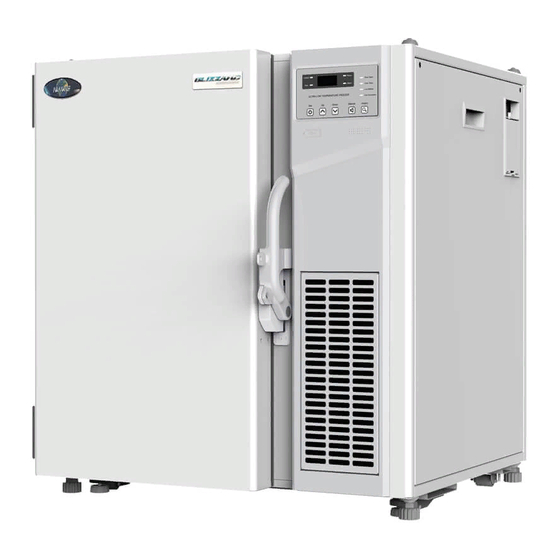
BLIZZARD ULTRA LOW TEMPERATURE
UNDER COUNTER FREEZER
NU-99100JGA / NU-99100JE
O
& M
M
PERATION
AINTENANCE
ANUAL
OM0306
Series A
Revision 1
December 2020
NU-99100JGA: (115 VAC Only)
NU-99100JE: (230 VAC Only)
NuAire, Inc.
2100 Fernbrook Lane
Plymouth, MN 55447
Toll-Free: 1-800-328-3352
Minnesota: (763) 553-1270
Fax: (763) 553-0459
Advertisement
Table of Contents

Related Manuals for NuAire NU-99100J


Summary of Contents for NuAire NU-99100J
- Page 1 UNDER COUNTER FREEZER NU-99100JGA / NU-99100JE & M PERATION AINTENANCE ANUAL OM0306 Series A Revision 1 December 2020 NU-99100JGA: (115 VAC Only) NU-99100JE: (230 VAC Only) NuAire, Inc. 2100 Fernbrook Lane Plymouth, MN 55447 Toll-Free: 1-800-328-3352 Minnesota: (763) 553-1270 Fax: (763) 553-0459...
-
Page 2: Table Of Contents
Table of Contents Packing List ..........................3 Precautions for Safe Operation..................... 3 Safety Labels and Precautions......................3 Precautions for Safe Operation ......................3 Product Features.......................... 6 Usage Precautions ........................7 Product Installation........................8 Installation Environment ........................8 Installation Site ..........................8 Preparation Before Use ........................ -
Page 3: Packing List
User manual/Position Installation Methods Plastic bag Ice scraper Position limiter 2.0 Precautions for Safe Operation Thank you for choosing a Nuaire Laboratory Ultra Low Temperature (ULT) Freezer. Please read this manual for safe operation of this product. Safety Labels and Precautions Combustible Electrical... - Page 4 Only professional technicians or service personnel can install the unit. Failure to do so may cause electric shock or result in a fire hazard. The freezer must be securely installed on a firm surface. Uneven mounting may result in the product tipping over causing injury and/or damage.
- Page 5 The air filter for the condenser should be cleaned regularly. A dirty filter could cause a malfunction or the freezer temperature to rise. During any repair operations, gloves should be worn to prevent getting injured by sharp edges or corners. Do not use bare hands to directly handle any stored products.
-
Page 6: Product Features
NOTE: Not all models have all features mentioned above. For specific features, refer to the specification table of each specific model. Due to the product improvement, the Nuaire ULT Freezer you get may not be completely consistent with the illustration in the manual. The contents of this manual are subject to changes without notice. -
Page 7: Usage Precautions
4.0 Usage Precautions • When the unit operates normally, the unit frame at the front near the door may be slightly warm; This phenomenon is normal because hot tubing is embedded there to prevent condensation from forming on the frame. •... -
Page 8: Product Installation
5.0 Product Installation Installation Environment • Ambient temperature: 50°F to 90°F [10°C to 32°C]. The ideal temperature is 65°F to 77°F [18°C to 25°C]. If necessary, use an air-conditioning system to achieve the requires ambient condition. • Environment humidity: less than 80% RH. At an environment of 90°F [32°C], humidity should be less than 57% •... -
Page 9: Preparation Before Use
Preparation Before Use 1. Remove packing material and straps. 2. Check the supplied accessories • Check the items in the packing box according to the packing list. If anything does not match, contact the manufacturer. 3. Placement • This freezer is for indoor and dry conditions only. •... -
Page 10: Initial Startup
Initial Startup When powering on the unit for the first time, follow the procedures below: While keeping the unit empty, plug in the power cord to dedicated power socket that meets all electrical requirements. Connect the freezer to the power supply, turn on the power switch located on the side of the freezer (as in the illustration on the right), and then turn on the battery switch. -
Page 11: Operation After A Power Outage
Your ULT unit should be cared for by trained personnel. Every 2 to 4 hours, the Unit’s working status should be inspected and recorded daily. Should there be a malfunction in the unit, the freezer temperature rises. If the problems cannot be corrected in a short time, remove the stored samples, move them to another unit that meets the temperature requirements to avoid potential damage to samples. -
Page 12: Refrigerator Components
6.0 Refrigerator Components Control Panel Door Handle W/ Lock Outer Door Condenser Filter Grill Support Feet Control Panel OM0306 /2020 ECEMBER... -
Page 13: Operation
7.0 Operation Unlocking the Freezer 1. Press “Up” to “06” 2. Press and hold “Set” for 5 seconds to make “Locked” light off to enter unlock state and carry out various settings 3. Press “Set” to select “TS” (temperature setting inside the box), “ALH” (high-temperature alarm setting), and “ALL”... -
Page 14: Usb Data Export
4. P6: USB derivative mode, with the default of 12, adjustable from 0 to 12 The data can be exported in different periods, the parameters 0 ~12 can be set, and the default value of 12 means the one year of data can be exported once; setting it to 0 means exporting all the data once, setting it to be 1 - 12 means respectively exporting the data of several months before the current time, such as the data of 2 months, 3 months... -
Page 15: Display And Alarms
8.0 Display and Alarms Connect the power supply for the box and switch the power switch to the “ON” position to enter power-on state and make the display screen to show the temperature inside the box. Working status prompt of the display panel: “Locked”... -
Page 16: Alarm Table
Alarm Table Alarm Code Status Indication Buzzer Displayed temperature ≥ set Alarm light flashes and High Temperature Buzzer alarm, remote alarm temperature for high-temperature overtemperature alarm Alarm output alarm, continuously for 1min light flashes Displayed temperature ≤ set Alarm light flashes and Low Temperature Buzzer alarm, remote alarm temperature for low-temperature... -
Page 17: Automatic Alarm Recovery Time Setting
Automatic Alarm Recovery Time Setting • When the unit is in alarm mode, you may press the “Silence” key to stop the buzzing of the alarm. (The remote alarm cannot be cancelled). If the condition persists, the buzzer alarm will resume automatically after 30 minutes. •... -
Page 18: Cleaning The Condenser Filter
5. If the “hot Condenser” light is on before cleaning, check the light to make sure that it shuts off after cleaning. If it does not shut off, contact service personnel at Nuaire. Defrosting the Interior Wall Frost and ice can form between the door gasket and frame to form an air gap, which can decrease the refrigeration effect of the unit. -
Page 19: Battery Removal
10.0 Battery Removal 10.1 Battery Location The battery is for the power outage alarm. It is located inside the control box on the right side of the unit. There are high voltage components in the control box. To prevent electric shock, only a qualified technician or engineer should open the cover. -
Page 20: Optional Components
11.0 Optional Components 11.1 Storage Shelf and Case If the unit is used to store small samples, storage racks and boxes provide more efficient use of internal space. Storage Rack (A/B, optional) Storage box Model Configuration Quantity Quantity NU-99100J OM0306 /2020 ECEMBER... -
Page 21: Troubleshooting
12.0 Troubleshooting Fault Troubleshooting Check Is the power connection correct and is the power switch in “ON” position? Start failure of Is the power voltage too low? the box Check whether there is an input voltage externally. Is ambient temperature too high? Check whether the inner door is closed tightly. -
Page 22: Refrigeration Principle And Circuit Diagram
13.0 Refrigeration Principle and Circuit Diagram 13.1 Refrigeration Schematic Diagram OM0306 /2020 ECEMBER... -
Page 23: Circuit Diagram
13.2 Circuit Diagram OM0306 /2020 ECEMBER... -
Page 24: Technical Specifications
-40~-86 Effective Input Power External Dimensions Weight Model Volume Power Consumption W x D x H (lb) [kg] (gal) [L] (KW/24Hr) (in) [mm] 26.4 30.32 x 25.98 x 31.89 NU-99100J [100] [238] [770 x 660 x 810] OM0306 /2020 ECEMBER...
Need help?
Do you have a question about the NU-99100J and is the answer not in the manual?
Questions and answers