Table of Contents
Advertisement
Quick Links
Advertisement
Table of Contents

Related Manuals for IRiver Astell&Kern PPM12


Summary of Contents for IRiver Astell&Kern PPM12
- Page 1 PPM12 INSTRUCTION BOOK User Guide...
-
Page 2: Table Of Contents
CONTENTS Getting Started Package Contents PPM12 at a Glance Power Management Charging Connecti ons Firmware Upgr Using the Device Basic Operations Home Screen N otification Bar S tore AK Connect Listenin g to Music Playlist M anagement USB DA C Installation How to Use USB Audio CD Ripping Using Bluetooth... -
Page 3: Getting Started
User Guide Contents may be changed without prior notice to improve the Package performance or quality of the product. Contents PPM12 Protective Film Quick Start Guide & Warranty Card Micro-USB Cable microSD Card Slot Cover Protective Film: Protect the device and its screen. Mic ro-USB Cable: Connect the device to a computer or ch arge the device. -
Page 4: Ppm12 At A Glance
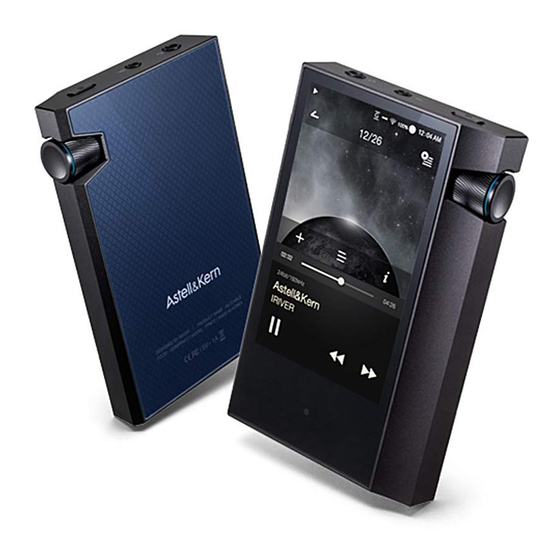
User Guide PPM12 at The appearance of the product as well as the printed and engraved information may vary depending on the model. a Glance Earphone Jack Power Micro-USB Port Balanced Audio Pin Map R- R+ L+ L - Balanced Audio Port Previous/ Rewind... -
Page 5: Power Management
User Guide Next/Fast-Forward: Skip to the next song. Long press: Fast-forward. LCD Touchscreen: Display with touch control. Volume: Control the volume by turning the wheel. - microSD card slot symbol microSD Card Slot: Insert a microSD card and access its files. Home Button: Show the home screen. -
Page 6: Charging Connecti
User Guide Reset Function 1. In cases of unexpected device failure or freeze, press the [ ] button for 12 seconds to force a shutdown. The devic e can be restarted after a shutdown. The device can be restarted after a shutdown. Resetting the device will not affect the stored data or time setting. -
Page 7: Ons Firmware Upgr
User Guide Connec- Earphones/Headphones tions 1. Connect earphones or headphones to the earphones port. Balanced Earphones/Headphones 1. Connect supported earphones or headphones to the balanced port. Balanced Audio Device 1. Connect to an external audio device by using the Earphones port and Balanced port in conjunction. - Page 8 User Guide Connecting to a Computer 1. Turn on the device and your PC. 2. Connect the device to your PC as a standard USB device by using a micro-USB cable. [ - Connect USB] Media Device (USB Drive): Transfer files from a PC to the device.
- Page 9 User Guide Copy Files/Folders to the Device 1. To copy files/folders from your computer, select the desired files/folders and drag & drop them into the USB device. Make sure that the micro-USB cable is securely connected. Note that removing the micro-USB cable or turning off the device or computer during a file transfer may corrupt data on the device.
- Page 10 User Guide Delete Files/Folders on the Device 1. Right-click the desired file/folder, and then select [Delete]. 2. Select [Yes] in the [Confirm File/Folder Deletion] window to delete the selected file/folder. Insert/Remove a microSD Card 1. Refer to the diagram and gently insert a microSD card into the microSD c ard slot.
- Page 11 User Guide Recommended microSD Cards Brand : SanDisk, Transcend Maximum supported microSD card capacity: 128GB Notes on inserting 128GB microSD card. Do not force the microSD card into the slot. Doing so may cause damage to the device and/or microSD card. Do not repeatedly insert/remove the microSD card.
-
Page 12: Ade
User Guide Firmware Wi-Fi Update / OTA (Over-the-Air) Upgrade 1. Connect to a wireless network. 2. When a new firmware version is available, the screen will display a Firmware Update Guide window. 3. Select [Update] and choose the items for update. 4. -
Page 13: Basic Operations
User Guide Basic LCD Touchscreen Operations 1. This device features an LCD touchscreen that allows you to perform operations by touch. Interact with the device by touching the screen to access various features. To prevent damage, do not use a sharp object or use excessive force when touching the screen. - Page 14 User Guide Moving a list in the home screen 1. You can move the list by dragging the home screen [up] / [down]. Navigating Up/Down in a List 1. Scroll through the list by dragging the list screen [up] and [down]. Using the Device...
-
Page 15: Home Screen N
User Guide Home Screen 1 AK CONNECT Launches AK Connect. 2 Current Song Currently playing song information. View the list of songs by different 3 Search Options search options. The search options can be long-pressed and dragged to change the ir locations. - Page 16 User Guide Notification Using the Device...
- Page 17 User Guide Expand or collapse the notifi Notification Bar cation bar by dragging the bar down or up, respectively. Press [ ] to turn Wi-Fi on Wi-Fi or off. Press [ ] to turn Bluetooth Bluetooth on or off. Press [ ] to turn the EQ o n or off.
- Page 18 User Guide PC Connection Select the appropriate mode when connected to a computer. Mode :USB drive mode for tra DISK nsferring media files. :Listen to music located on a PC through the device. Press [ ] to turn the screen lock Screen Lock on or off.
-
Page 19: Tore
User Guide Purchasing Conveniently purchase music from the Store when connected to a wireless network. Music from a Store Purchasing Music 1. Connect to a wireless network. 2. Select [Store] from the home screen. 3. Select the desired store. 4. Check the user guide or help menu within each store for detailed information. -
Page 20: Ak Connect Listenin
User Guide The PPM12 can access and play back music files stored on AK CON a computer on the same network as well as output sound NECT through Astell&Kern speakers. MQS Streaming Server Installation 1. Visit the Astell&Kern website and download the server installer that corresponds to your operating system. - Page 21 User Guide 4. A list of servers on the same network as the PPM12 will be displayed. 5. Scroll the screen left and right to select a server. The selected server will be connected and the server h ome screen will be displayed. 6.
- Page 22 User Guide Streaming and Downloading from the Music Server 1. Select a search option from the server Home Screen to display a list of music. 2. Select a song to begin streaming. 3. Press the [ ] button at the upper-right corner of the music list.
- Page 23 User Guide Selecting Speakers 1. Turn on the speaker(s) to be con nected, and then connect it to th e same network as the PPM12. 2. Turn on [AK Connect] from the device settings. 3. Press [ ] from the notification bar to display a list of speakers available on the same network as the PPM12.
- Page 24 User Guide Example 2 AK500N PPM12 AK T1 LIBRARY REMOTE SPEAKER Example 3 PPM12 AK500N REMOTE & LIBRARY SPEAKER Using the Device...
- Page 25 User Guide Example 4 PPM12 AK500N AK T1 LIBRARY REMOTE SPEAKER Example 5 PPM12 LIBRARY AK Connect APP REMOTE AK T1 SPEAKER AK500N LIBRARY Using the Device...
-
Page 26: G To Music Playlist M
User Guide Listening Selecting Music to Music 1. Select a search option at the bottom of the home screen to display the playlist. 2. Select a song from the list to begin playback. Select [Folder] to search music by folder. Continuous Playback: Approximately 10 hours (Basis: FLAC, 16-bit, 44 kHz, unbalanced output, volume 80, EQ off, LCD off) Supported Formats: PCM [8~192kHz(8/16/24bit)], DSD 64/128... - Page 27 User Guide Drag the progress bar to the desired location during playback. Press the [Home] button on the device to go to the Home Screen. Press the album cover during playback to display an additional screen. : Display the previous screen. : Display the current playlist.
- Page 28 User Guide Playlist Screen Using the Device...
- Page 29 User Guide 1 Current Indicates the current location. Press to return to the previous screen. Locatio 2 Play All Play all songs from the current playlist. 3 Playlist Displays the playlist for the current location. 4 List Sorting Select a method for sorting the playlist.
- Page 30 User Guide Music Player Screen Previous Screen Return to the previous screen. Album Cover Display album covers. Press the album cover to show additional functions. Using the Device...
- Page 31 User Guide Lyrics for the current song. Lyrics Add the current song to a playlist. Add to Playlist Indicates song duration. Song Progress Displays bitrate and sampling Details frequency data. Song title information. Title File name is displayed when ID3Tag is unavailable. Artist name.
- Page 32 User Guide Playlist Creating a Playlist Manage- 1. Press [Playlist - Playlists] from the home screen to display a list of pl ment aylists. 2. Press [+] at the upper-right corner of the screen. 3. Enter a name for the playlist, and then press [Add] to create a new playlist.
- Page 33 User Guide Removing a Song from a Playlist 1. Press [Playlists] to display a list of playlists. 2. Select the desired playlist, and then press [ ] at the top of t he screen. 3. Select the desired song, and then press [ ] to remove the song fro m the selected playlist.
- Page 34 User Guide Renaming a Playlist 1. Press [Playlists] to display a list of playlists, and then press [ at the top of the screen. 2. Select a playlist to be renamed. 3. Press [ ] at the top of the screen t o display a rename window.
- Page 35 User Guide USB DAC The USB DAC functionality allows the PPM12 to be recognized as a sound card on a computer. Music from the Installation computer is played through the device’s earphones port for an enhanced listening experience. USB DAC Specifications Supported OS Windows XP (32/64-bit) / Windows 7 (32/64-bit) / Windows 8 (32/64-bit) / Windows 10(32bit/64bit)
- Page 36 User Guide You can enjoy USB audio by linking with a portable amp and How to Use DAC available in the market. USB Audio How to Link Portable USB DAC 1. Connect the device’s micro USB jack with the portable USB DAC with dedicated cable.
-
Page 37: Otification Bar S
User Guide CD Ripping Connect the AK Ripper (sold separately) to rip CDs. Turning the AK Ripper On/Off 1. You can use the AK ripper once you connect the device w ith the AK ripper and press [ ] after scrolling down the n otification bar. - Page 38 User Guide CD Ripping Results : Indicates that CD ripping is complete, or that although an error occurred, CD ripping was successfully comp leted via error correction. : Indicates that the song currently being ripped can be canceled via user input. : Indicates that CD ripping failed due to a scratch on the CD or other similar reasons.
-
Page 39: Using Bluetooth
User Guide Using Bl Connect a Bluetooth device to listen to music wirelessly. uetooth Turning Bluetooth On/Off A Bluetooth device must be paired with the PPM12 prior to use. Refer to the Bluetooth device's instruction manual for details. 1. Select [ ] from the Notification B ar, or select [On/Off] from [ Bluetooth]. - Page 40 User Guide Removing a Bluetooth Pairing 1. Press [ ] to the right of the p aired device to be redirected to the settings screen. 2. Select [Remove Pairing] to complete the process. Bluetooth Support Specifications Profile: A2DP, aptX Device performance may be affected during Hi-Fi playback. (48 kHz or lower is recommended.) Do not turn off the device while connected to Bluetooth.
-
Page 41: Settings
User Guide Settings Set up the device according to the user's needs. The settings menu may vary depending on the firmware version. Setup 1. Select [ ] from the home screen notification bar. 2. Select the desired item for setup. Wi-Fi Change wireless network settings and turn Wi-Fi on or off. - Page 42 User Guide Equalizer Set the equalizer according to the user's preferences. P ro EQ: EQ Preset recommended by professionals. Use r EQ: Adjust the frequencies according to the user's pre ferences. Supported Formats for EQ: PCM [8 – 192 kHz (8/16/24-bit)] DSD [64/128] Using the equalizer may negatively affect device performance.
- Page 43 User Guide Left-Right Balance Adjust the left-right balance for earphones/headphones. CD Ripping Set the automatic CD ripping function as well as the file format and ripping speed. USB Audio It sets up the output type of DSD coming out through the portable USB DAC.
- Page 44 User Guide Language Select the display language. Supported languages: English, Korean, Japanese, Chin ese (Simplified/Traditional), French, Russian, German Keyboard Select the keyboard language. Supported languages: English, Korean, Japanese, Chinese (Simplified/Traditional), Russian Power Automatic Shutdown: The device will turn off after a defined period if there is no user input.
- Page 45 User Guide Update System Update: Update the system when a new version is found. Application Update: Update the default applications (including the Store) when new versions are found. System Information System Information: View model number, firmware version, and data storage information. The microSD card can be mounted/dismounted, and data can be deleted.
-
Page 46: Connecting To A Wireless Network
User Guide Connecting Connecting to a Network to a Wir 1. Long-press [ ] from the Noti fication Bar or select [ eless N Wi-Fi] to display a list of access etwork points (AP). 2. Select the desired AP to connect to the wireless network. -
Page 47: Equalizer Setup
User Guide Equalizer Equalizer Setup Setup 1. Long-press [EQ] from the Notification Bar, or turn on the feature from [ - Equalizer]. 2. Press [Pro] from the drop-down list and select [Add New]. 3. Enter a name for the custom EQ settings and select [Add]. - Page 48 User Guide 4. Adjust the frequencies according to the user's preferences. Reset Equalizer 1. Select the desired EQ setting and select [Reset] to revert the EQ to its default settings. Using the Device...
- Page 49 User Guide Delete Equalizer 1. Select [Delete] and choose the desired EQ setting for deletion. 2. Press [Confirm] to complete process. Rename Equalizer 1. Select [Rename] and enter a new name for the EQ setting. 2. Press [Rename] to complete the process.
-
Page 50: Miscellaneous
Contact the nea rest iriver Customer Support Center. (Malfunctions due to exposure to liquids will be repaired for a fee regardless of the warranty period and such d amage may not be repairable.) -
Page 51: Ubleshooting Copyrigh
User Guide Using poor quality protective films or adhesive stickers on the screen may cause damage. Do not insert any foreign objects into the earphones port. If playing for extended periods, the device can be very hot, so please keep in mind when using. Other Do not use earphones/headphones or operate the product while operating any type of vehicle. - Page 52 User Guide 2. The device will not charge when connected to a computer via USB cable. Use a USB port on the back of the computer, and check that the USB port is functioning properly. Check that the USB cable is connected correctly. 3.
-
Page 53: Certifications Specifi
Companies, organizations, products, people, and events used in the examples are not based on actual data. iriver has no intention to be associated with any company, i nstitution, product, person, or incident through this instruction manual, and no such inference should be made. - Page 54 User Guide (b) For a Class B digital device or peripheral, the instructions furnished the user shall include the following or similar statement, placed in a prominent location in the text of the manual: NOTE: This equipment h as been tested and found to comply with the limits for a Class B digit al device, pursuant to part 15 of the FCC Rules.
-
Page 55: Demarks Disclaimers
User Guide Specifi General Specifications Model PPM12 - catio Body Color Misty Mint Body Material Aluminum Display 3.3-inch WVGA (480x800) Touch Screen Supported Audio WAV, FLAC, WMA, MP3, OGG, APE (Normal, High, Fast), Formats AAC, ALAC, AIFF, DFF, DSF Sampling Rate FLAC, WAV, ALAC, AIFF : 8kHz ~ 192kHz (8/16/24bits per Sample) DSD : DSD64, Stereo/ DSD128, Stereo... - Page 56 The information in this user manual was written based on current product specifications. The manufacturer, iriver Limited, is adding new complementary features and will continue to apply new technologies in the future.
Need help?
Do you have a question about the Astell&Kern PPM12 and is the answer not in the manual?
Questions and answers