
Related Manuals for Belkin F5D52314


Summary of Contents for Belkin F5D52314
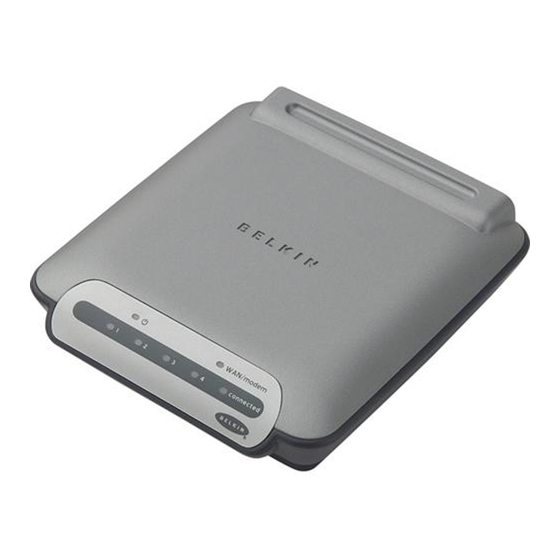
- Page 1 4-Port Router Share your broadband Internet access 802.11g 2.4GHz • Wireless Mbps 802.11g 2.4GHz • Wireless Mbps 802.11b 2.4GHz • Wireless Wired Ethernet Ethernet 10/100 Mbps User Manual F5D5231-4...
-
Page 2: Table Of Contents
Table of Contents 1 Introduction..........1 Benefits of a Home Network . -
Page 3: Introduction
Networking lets you share resources, such as printers and hard drives that, in the past, could be used ONLY by the computer directly connected to them. Belkin home networking lets you easily enjoy these additional advantages: • Share one high-speed Internet connection among all the computers in your home •... -
Page 4: Overview
Overview Overview Product Features In minutes you will be able to share your Internet connection and network your computers. The following is a list of features that make your new Wired Router an ideal solution for your home or small office network. - Page 5 Overview NAT IP Address Sharing Your Router employs Network Address Translation (NAT) to share the single IP address assigned to you by your Internet Service Provider while saving the cost of adding IP addresses to your Internet service account. SPI Firewall Your Router is equipped with a firewall that will protect your network from a wide array of common hacker attacks including IP Spoofing, Land Attack, Ping of Death (PoD), Denial of Service (DoS), IP with...
-
Page 6: Knowing Your Router
Knowing your Router Knowing your Router Package Contents • Belkin 4-Port Router • Quick Installation Guide • Belkin Easy Install Wizard Software CD • Belkin RJ45 Ethernet Networking Cable • Power Supply • User Manual... -
Page 7: System Requirements
Knowing your Router System Requirements • Broadband Internet connection such as a cable or DSL modem with RJ45 (Ethernet) connection • At least one computer with an installed network interface adapter • TCP/IP networking protocol installed on each computer • RJ45 Ethernet networking cable •... - Page 8 Knowing your Router Knowing your Router The Router has been designed to be placed on a desktop vertically. All of the cables exit from the rear of the Router for better organization and utility. The LED indicators are easily visible on the front of the Router to provide you with information about network activity and status.
- Page 9 Knowing your Router (2) LAN Port Status LEDs These LEDs are labeled 1–4 and correspond to the numbered ports on the rear of the Router. When a computer is properly connected to one of the LAN ports on the rear of the Router, the LED will turn ON.
- Page 10 Knowing your Router Rear Panel (5) Reset Button The reset button is used in the rare event that the Router functions improperly. Resetting the Router will restore the Router’s normal operation while maintaining the programmed settings. You can also restore the factory default settings by using the reset button. Use the restore option in instances where you may have forgotten your custom password.
-
Page 11: Connecting And Configuring Your Router
Connecting and Configuring your Router Verify the contents of your box. You should have the following: • Belkin 4-Port Router • Quick Installation Guide • Belkin Easy Install Wizard Software CD • Belkin RJ45 Ethernet Networking Cable • Power Supply • User Manual... - Page 12 Connecting and Configuring your Router Easy Install Wizard Belkin has provided our Easy Install Wizard software to make installing your Router a simple and easy task. You can use it to get your Router up and running in minutes. The Easy Install Wizard...
- Page 13 Connecting and Configuring your Router Welcome Screen After you insert the CD into your CD-ROM drive, the Wizard’s welcome screen will appear. Make sure you have not connected the Router at this point. If you have connected your Router, please reconnect your computer directly to the modem.
- Page 14 Connecting and Configuring your Router Connecting and Configuring your Router Step 2 Connect the Router to your modem and computer The Wizard will walk you through connecting your Router to your computer and modem. Follow the steps on the screen using the pictures as a guide.
- Page 15 Connecting and Configuring your Router Step 3 Check the connection Once you have completed connecting the Router, the Wizard will check the connection to the Router, then go on to determine what type of Internet connection you have. 3.2 User Name and Password Needed If you have a connection type that requires a user name...
- Page 16 Internet by opening your browser and going to your favorite web page. Congratulations! You have finished installing your new Belkin Router. You are ready to set up the other computers in your home. You can also add computers to your Router any time you want. Simply follow the “Alternate Setup Method”...
-
Page 17: Alternate Setup Method
Alternate Setup Method The Advanced User Interface is a web-based tool that you can use to set up the Router if you don’t want to use the Easy Install Wizard. You can also manage advanced functions of the Router. From the Advanced User Interface, you can perform the following tasks: •... - Page 18 Alternate Setup Method Alternate Setup Method Turn your cable or DSL modem on by reconnecting the power supply to the modem. Mac or PC To power adapter computer that was originally connected to the cable or DSL modem Network cable Existing networking cable (to computer) (came with modem)
- Page 19 Alternate Setup Method Alternate Setup Method Configure the Router using the Step 3 Web-Based User Interface Using your Internet browser, you can access the Router’s Web-Based Advanced User Interface. In your browser, type “192.168.2.1” (do not type in anything else such as “http://” or “www”). Then press the “Enter”...
- Page 20 Alternate Setup Method Alternate Setup Method Understanding the Web-Based Advanced User Interface The home page is the first page you will see when you access the Advanced User Interface (UI). The home page shows you a quick view of the Router’s status and settings. All advanced setup pages can be reached from this page.
- Page 21 Alternate Setup Method (5) Help Button The “Help” button gives you access to the Router’s help pages. Help is also available on many pages by clicking “more info” next to certain sections of each page. (6) Login/Logout Button This button enables you to log in and out of the Router with the press of one button.
- Page 22 Alternate Setup Method Alternate Setup Method Alternate Setup Method Set your computer’s network Step 4 settings to work with a DHCP server The “Internet/WAN” tab is where you will set up your Router to connect to your Internet Service Provider (ISP). The Router is capable of connecting to virtually any ISP’s system provided you have correctly configured the Router’s settings for your ISP’s connection type.
-
Page 23: Setting Your Connection Type
Alternate Setup Method Setting your Connection Type From the “Connection Type” page, you can select the type of connection you use. Select the type of connection you use by clicking the radio button next to your connection type and then click “Next”... - Page 24 Alternate Setup Method Alternate Setup Method Setting your ISP Connection Type to Dynamic IP A dynamic connection type is the most common connection type found with cable modems. Setting the connection type to dynamic in many cases is enough to complete the connection to your ISP. Some dynamic connection types may require a host name.
- Page 25 Alternate Setup Method Setting your ISP Connection Type to Static IP A static IP address connection type is less common than other connection types. If your ISP uses static IP addressing, you will need your IP address, subnet mask, and ISP gateway address. This information is available from your ISP or on the paperwork that your ISP left with you.
- Page 26 Alternate Setup Method Alternate Setup Method Setting your ISP Connection Type to (PPPoE) Most DSL providers use PPPoE as the connection type. If you use a DSL modem to connect to the Internet, your ISP may use PPPoE to log you into the service. If you have an Internet connection in your home or small office that doesn’t require a modem, you may also use PPPoE.
- Page 27 Alternate Setup Method (2) Password Type in your password and retype it into the “Retype Password” box to confirm it. (3) Service Name A service name is rarely required by an ISP. If you are not sure if your ISP requires a service name, leave this blank. (4) MTU The MTU setting should never be changed unless your ISP gives you a specific MTU setting.
- Page 28 Alternate Setup Method Alternate Setup Method Setting your ISP Connection Type to Point-to-Point Tunneling Protocol (PPTP) [European Countries Only].This type of connection is most common in European countries. Some ISPs require a connection using PPTP protocol. This sets up a direct connection to the ISP’s system. Type in the information provided by your ISP in the space provided.
- Page 29 Alternate Setup Method (5) My IP Address Provided by your ISP. Enter the IP address here. (6) My Subnet Mask Provided by your ISP. Enter the IP address here. (7) Connection ID Provided by your ISP. If your ISP did not give you a connection ID, leave this blank.
Need help?
Do you have a question about the F5D52314 and is the answer not in the manual?
Questions and answers