
Subscribe to Our Youtube Channel
Related Manuals for Telefunken TE24550B40Q2D


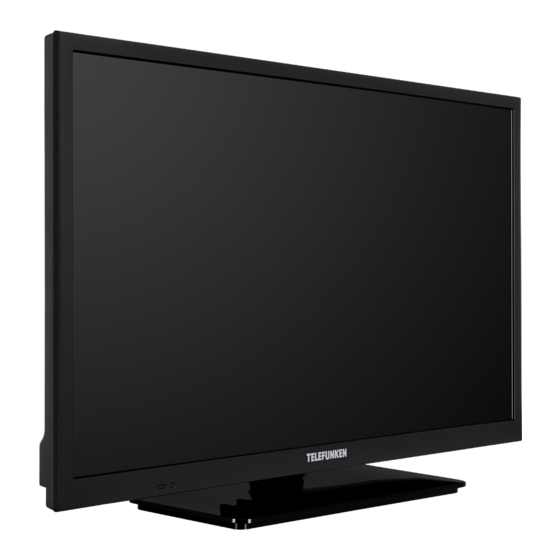
Summary of Contents for Telefunken TE24550B40Q2D
- Page 1 ISTRUZIONI PER L'USO OPERATING INSTRUCTIONS TE24550B40Q2D TELEVISORE A COLORI CON TELECOMANDO COLOUR TELEVISION WITH REMOTE CONTROL...
-
Page 2: Table Of Contents
Usare il Servizio di Rete Condivisione Audio Video 28 Indice App ................ 29 Informazioni sulla sicurezza ........2 Browser Internet ............ 29 Indicazioni sul prodotto ..........2 Smart Center ............30 Informazioni per la tutela dell'ambiente ....3 Sistema HBBTV............. 31 Caratteristiche ............ -
Page 3: Informazioni Sulla Sicurezza
tazze, ecc. sulla TV (ad esempio sui ripiani sopra Informazioni sulla sicurezza all’unità). • Non esporre la TV alla luce solare diretta; non ATTENZIONE collocare fiamme libere, come ad esempio candele RISCHIO DI SCOSSA accese, sopra o vicino alla TV. ELETTRICA • Non mettere fonti di calore, come ad esempio NON APRIRE... -
Page 4: Informazioni Per La Tutela Dell'ambiente
una sorgente laser di Classe 1, che è sicura in AVVERTENZE PER condizioni di funzionamento normali. L’INSTALLAZIONE A PARETE • Leggere le istruzioni prima di montare la TV a AVVERTENZA parete. Non ingerire batterie, pericolo di esplosione chimica. Il prodotto o gli accessori forniti in dotazione col prodotto • Il kit di montaggio a parete è... -
Page 5: Caratteristiche
Quando la TV non viene usata, si prega di spegnerla o non sia impostata su Off e la TV sia stata lasciata scollegarla dalla presa di corrente. In tal modo, anche accesa e non usata durante il tempo impostato, il consumo di energia verrà ridotto. passerà... -
Page 6: Utilizzare Il Menu Principale Del Tv
Per accendere la TV: Premere la parte centrale del selezionare la posizione in cui si desidera spostare la voce e premere OK. pulsante, la TV si accende. Note: 2. TV Spegnendo la TV questo cerchio inizia a nuovamente con 2.1. Guida l’impostazione del volume. -
Page 7: Installazione Delle Batterie Nel Telecomando
5. Fonti Per collegare un dispositivo alla TV, verificare che È possibile gestire i riferimenti della sorgente di sia la TV che il dispositivo vengano spenti prima di ingresso utilizzando le opzioni di questo menu. Per eseguire eventuali collegamenti. Dopo aver realizzato il collegamento sarà... -
Page 8: Notifica Di Licenza
Notifica di licenza Informazioni sullo smaltimento HDMI, HDMI High-Definition Multimedia Interface e [Unione Europea] il logo HDMI logo sono marchi o marchi registrati di Questo simbolo sul prodotto o sulla confezione HDMI Licensing Administrator, Inc. negli Stati Uniti e significa che l’apparecchio elettrico o elettronico in altri Paesi. - Page 9 Specifiche tecniche del trasmettitore LAN Wireless Potenza massima Gamme di frequenza in uscita 2400 - 2483,5 MHz (Canale < 100 mW 1-Canale 13) 5150 - 5250 MHz (Canale 36 - < 200 mW Canale 48) 5250 - 5350 MHz (Canale 52 - <...
-
Page 10: Telecomando
Standby: Accende / Spegne la TV Telecomando Tasti numerici: Alterna il canale, inserisce un numero o una lettera nella casella di testo a video. Lingua: Alterna le varie modalità audio (TV analogica), visualizza e modifica la lingua audio/ sottotitoli e attiva o disattiva i sottotitoli (TV digitale, ove disponibile) Mute: Spegne completamente il volume della TV Volume +/-... -
Page 11: Collegamenti
Collegamenti Raccordo Tipo Cavi Dispositivo Collegamento Consultare le illustrazioni sul lato sinistro. Sarà possibile usare un cavo (retro) da YPbPr a VGA per attivare il segnale YPbPr tramite ingresso VGA. Non è possibile utilizzare VGA e YPbPr Collegamento INGRESSO contemporaneamente. Per attivare audio AUDIO PC/YPbPr... -
Page 12: Accensione/Spegnimento
direzionali Sinistra e Destra per attivare o disattivare. Accensione/Spegnimento Leggere le relative spiegazioni visualizzate a video Per accendere la TV sullo schermo per ciascuna opzione evidenziata Collegare il cavo di alimentazione a una presa di prima di effettuare eventuali modifiche. È possibile corrente, quale ad esempio una presa a parete (220- utilizzare i tasti Programma +/- per scorrere in alto 240V CA, 50 Hz). -
Page 13: Utilizzare L'opzione Della Tabella Di Canali Satellitari
Frequenza di avvio, Frequenza di Stop e tipo Analogico: Se viene attivata l'opzione di ricerca dei di ricerca nella schermata successiva. Al termine, canali Analogici, la TV cercherà i canali analogici evidenziare Successivo e premere OK per continuare. dopo che saranno state completate tutte le altre impostazioni iniziali. -
Page 14: Browser Multimediale
IMPORTANTE: Eseguire il backup dei file sul dispositivo di archiviazione prima di eseguire il Funzionamento modalità Loop/Shuffle collegamento alla TV. Si noti che il produttore non è in alcun modo responsabile di eventuali danni o perdite Tutti i file nell'elenco Avviare la riproduzione e attivare verranno riprodotti di dati. - Page 15 È possibile disattivare la funzionalità CEC i m p o s t a n d o l ’ o p z i o n e r e l a t i v a d a l m e n u Impostazioni>Sistema>Altro.
-
Page 16: Indice Menu Impostazioni
Indice menu Impostazioni Indice del menu Immagine Sarà possibile modificare la modalità immagine per soddisfare le proprie preferenze o Modalità i propri requisiti. Immagine può essere impostata su una di queste opzioni: Cinema, Gioco (opzionale), Sport, Dinamico e Naturale. Contrasto Imposta i valori di contrasto e livello del nero. - Page 17 Indice menu Audio Volume Regola il livello del volume. Seleziona la modalità equalizzatore. Le impostazioni personalizzate possono essere Equalizzatore fatte solo quando ci si trova in modalità Utente. Bilanciamento Regola la provenienza del suono dall'altoparlante sinistro o destro. Imposta il volume della cuffia. Cuffie Accertarsi inoltre, prima di usare le cuffie, che il volume della cuffia sia impostato a livello basso, per evitare danni all'udito.
- Page 18 Nota: Per informazioni dettagliate sulle opzioni di questo menu, fare riferimento alla sezione Connettività. Contenuti del menu installazione Ricerca automatica Visualizza le opzioni di sintonizzazione automatica. Antenna: Ricerca e salva i canali dei canali del digitale terrestre. Cavo: Ricerca e salva le trasmissioni digitali via cavo . Analogico: (Risintonizzazione) Cerca e salva le i canali analogici.
- Page 19 Accessibilità Visualizza le opzioni di accessibilità della TV. Ipoudenti Attiva eventuali funzioni speciali inviate dall'emittente. Una traccia di narrazione verrà riprodotta per i non vedenti o per le persone con problemi Descrizione alla vista. Premere OK per visualizzare tutte le opzioni menu Descrizione Audio. Questa Audio funzione è...
- Page 20 Biss è un sistema di codifica del segnale satellitare usato per alcuni broadcast. Nel caso in cui sia necessario inserire una chiave Biss su una trasmissione, sarà possibile Tasto Biss per inserire le usare questa impostazione. Evidenziare Chiave Biss e premere OK chiavi nel broadcast desiderato.
-
Page 21: Funzionamento Generale Della Tv
mentre se il blocco genitori è disattivato viene Funzionamento Generale della TV disattivato l'accesso alla trasmissione. Utilizzo dell'elenco canali Nota: Se l'opzione paese della Prima installazione è La TV ordina tutte le stazioni salvate nell'Elenco dei impostata su Francia, Italia o Austria, il Blocco Genitori verrà impostato su 18 come valore predefinito. -
Page 22: Servizi Televideo
le opzioni Giorno precedente e Giorno successivo Televideo digitale per visualizzare gli eventi del giorno precedente e del Premere il tasto Text per visualizzare le informazioni giorno successivo. sul televideo digitale. Usarlo coi tasti colorati, coi tasti Evidenziare la scheda Extra e premere OK per cursore e col tasto OK. -
Page 23: Modalità Tipica Monitor - Ingresso Pc
• Controllare di aver inserito la frequenza di canale 1280x1024 75Hz corretta qualora sia stata eseguita la procedura di 1400x1050 60Hz sintonizzazione manuale. 1440x900 60Hz Nessuna immagine 1440x900 75Hz • La TV non riceve nessun segnale. Assicurarsi di aver 1920x1080 60Hz selezionato la fonte di ingresso corretta. -
Page 24: Formati Di File Supportati Per La Modalità Usb
Formati di file supportati per la modalità USB Formati video compatibili Estensione Codec Video Risoluzione massima e Frame Rate e Bit Rate .mpg, .mpeg, .dat, .vob MPEG1/2, H.264, VC1 .ts, .trp, .m2ts .avi MPEG1/2, MPEG4, H.264, MJPEG .mp4, .m4a, .m4v, .mov, .qt, MPEG1/2, H.263, MPEG4, H.264 .3gp, .3g2, .3gpp .mkv... -
Page 25: Formati Audio Compatibili
Formati audio compatibili Formato Estensione .mp3, .mp3, .ac3, .ac3, .aac .AAC .wma .amr .AMR-NB, .AMR-WB .wav . MPEG La, .AAC, .PCM .flac . FLAC Formati sottotitoli compatibili Sottotitoli esterni Estensione Specifiche .ssa SubStation Alpha .ass Advanced SubStation Alpha .srt Subripper .sub Micro DVD / SubViewer .sub + .idx... -
Page 26: Risoluzioni Dvi Supportate
Risoluzioni DVI supportate In fase di collegamento del dispositivo ai connettori della TV usando il cavo convertitore DVI (cavo da DVI a HDMI - non fornito in dotazione), rimandiamo alle seguenti informazioni sulla risoluzione. 56Hz 60Hz 66Hz 70Hz 72Hz 75Hz 640x400 640x480 800x600 832x624 1024x768 1152x864 1152x870 1280x768 1360x768 1280x960 1280x1024 1400x1050 1440x900 1600x1200 1680x1050 1920x1080 Italiano - 25 -... -
Page 27: Connettività
Cablato se si sta eseguendo il collegamento tramite Connettività Ethernet. Connettività cablata Test di velocità internet Collegamento a una rete cablata Evidenziare Internet Speed Test e premere il tasto • Sarà necessario disporre di un modem/router OK. La TV controllerà la presenza di connessione connessi a una connessione a banda larga attiva. -
Page 28: Modalità Standby In Rete
valori massimi teorici per gli standard wireless. Non si Altre informazioni tratta delle velocità effettive di trasmissione dei dati. Lo stato del collegamento verrà visualizzato come • La posizione in cui la trasmissione è migliore varia Connesso o Non connesso e verrà visualizzato a seconda dell'ambiente di utilizzo. l'indirizzo IP attuale, se viene stabilita una connessione. Connessione al dispositivo mobile via WLAN • La funzione Wireless della TV supporta i modem 802.11 del tipo a,b,g & n. Consigliamo di usare • Se il dispositivo mobile è dotato di funzione WLAN , è... -
Page 29: Display Wireless
in Rete con prestazioni migliori verificare che il Connessione lenta dispositivo sia dotato dell’ultima versione di firmware. Consultare il manuale delle istruzioni del mode wireless Qualora si desideri che la TV consumi meno energia per ottenere informazioni sull'area di servizio interna, quando è in standby, sarà possibile disattivare questa la velocità di connessione, la qualità del segnale e funzione impostando l’opzione Modalità... -
Page 30: App
sul PC oppure se il software media server richiesto Note: non è installato sul dispositivo associato. Preparare il I possibili problemi dipendenti dall'applicazione potrebbero PC con un programma server adeguato. essere causati del provider dei servizi. 2. Collegamento a una rete cablata o wireless I servizi internet di terzi potrebbero cambiare, essere interrotti o limitati in qualsiasi momento. -
Page 31: Smart Center
Evidenziare una miniatura Compositore veloce e un elenco canali e sarà possibile scegliere il canale premere il tasto OK per vistare il sito web relativo. desiderato per eseguire la sostituzione. La TV è compatibile coi mouse USB. Collegare il TV: Sarà possibile guardare i contenuti tramite la mouse o l’adattatore del mouse wireless all’ingresso scheda TV. -
Page 32: Sistema Hbbtv
DETTAGLI: Questa scheda fornisce il riassunto e Nota: Questa funzione è disponibile unicamente per i dispositivi basati su android. informazioni relativamente al programma selezionato. Inoltre sono disponibili link alle pagine Facebook e Pagina tastiera Twitter del programma selezionato. La pagina tastiera può essere aperta in due modi; CAST&CREW: Mostra tutte le persone che hanno premendo il widget Keyboard( ) sulla schermata... -
Page 33: Sistema Hbbtv
UI completa dell’applicazione premendo il tasto rosso. personalizzazioni, voti, giochi, social network e altre Si prega di notare che la capacità di switching del applicazioni multimediali. tasto rosso viene fornita dall’applicazione e alcuni Le applicazioni HbbTV sono disponibili sui canali in cui applicazioni si potrebbero comportare in modo diverso. -
Page 34: Alexa Ready
Se si salta la procedura guidata di configurazione del televisore e dell’opzione selezionata per il paese nella prima installazione, questa funzione potrebbe essere disponibile nel dopo la prima installazione è possibile utilizzare menu Impostazioni>Sistema>Impostazioni sulla privacy l’opzione Works With Alexa nel menu Imposta- invece che nel menu Impostazioni>Sistema>Altro zioni>Sistema per eseguire manualmente la con- figurazione in un secondo momento. -
Page 35: Informazioni Sulla Funzionalità Dvb
Informazioni sulla funzionalità DVB Comando Funzione II ricevitore DVB è adatto unicamente per essere usato Alexa, fast forward on Avanzamento veloce del nel paese per il quale è stato progettato. ‘FN’ (Alexa, avanzamento file in riproduzione. veloce su NA) Nonostante questo ricevitore DVB fosse conforme alle ultimissime specifiche DVB al momento della Alexa, rewind on ‘FN’... - Page 36 INFORMAZIONE AGLI UTENTI Il simbolo del cassonetto barrato riportato sull’apparecchiatura indica che il prodotto, alla fine della propria vita utile, deve essere raccolto separatamente dagli altri rifiuti; L’utente finale dovrà conferire l’apparecchiatura giunta a fine vita agli idonei centri di raccolta differenziata dei rifiuti elettronici ed elettrotecnici, oppure riconsegnarla al rivenditore al momento dell’acquisto di una nuova apparecchiatura di tipo equivalente, in ragione di uno a uno;...
- Page 37 Apps ..............26 Contents Internet Browser ............ 26 Safety Information ........... 2 Smart Center ............26 Markings on the Product.......... 2 HBBTV System............28 Environmental Information........3 Alexa Ready ............28 Features ..............3 DVB functionality information ........ 30 Accessories Included..........4 Standby Notifications ..........
-
Page 38: Safety Information
• Do not place any heat sources such as electric Safety Information heaters, radiators, etc. near the TV set. • Do not place the TV on the floor and inclined CAUTION surfaces. • To avoid danger of suffocation, keep plastic bags RISK OF ELECTRIC SHOCK out of the reach of the babies, children and domestic DO NOT OPEN... -
Page 39: Environmental Information
WALL MOUNTING WARNINGS WARNING Do not ingest the battery, Chemical Burn Hazard • Read the instructions before mounting your TV This product or the accessories supplied with the on the wall. product may contain a coin/button cell battery. If the • The wall mount kit is optional. -
Page 40: Accessories Included
• OSD menu system press OK, the TV will remain on and the function will be cancelled. You can enable this function again by • Stereo sound system changing the setting of the Auto TV OFF option from • Teletext the Settings>System>More menu. -
Page 41: Using Main Tv Menu
Source button on your remote control consecutively To cancel an already set timer, highlight that timer, to select the different sources. select Delete Selected Timer tab and press OK. A confirmation message will be displayed. Highlight Yes Changing Channels and Volume and press OK to proceed. -
Page 42: License Notification
SATELLITE INPUT (ANT SAT) socket located on the License Notification rear side of the TV. The terms HDMI and HDMI High-Definition Multimedia Rear side of the TV Interface, and the HDMI Logo are trademarks or registered trademarks of HDMI Licensing Administrator, Inc. -
Page 43: Disposal Information
Wireless LAN Transmitter Specifications Disposal Information [European Union] Frequency Ranges Max Output Power These symbols indicate that the electrical and 2400 - 2483,5 MHz (CH1-CH13) < 100 mW electronic equipment and the battery with this symbol 5150 - 5250 MHz (CH36 - CH48) <... -
Page 44: Remote Control
Standby: Switches On / Off the TV Remote Control Numeric buttons: Switches the channel, enters a number or a letter in the text box on the screen. Language: Switches among sound modes (an- alogue TV), displays and changes audio/subtitle language and turns subtitles on or off (digital TV, where available) Mute: Completely turns off the volume of the TV Volume +/-... -
Page 45: Connections
Connections See the illustrations on the left Connector Type Cables Device side. You can use YPbPr to VGA cable to enable YPbPr signal via VGA input. You cannot use VGA and YPbPr at the same time. To Connection enable PC/YPbPr audio, you will (back) need to use the back audio inputs with a YPbPr/PC audio cable for... -
Page 46: Switching On/Off
and not displayed. If you have any questions, Switching On/Off complaints or comments regarding this privacy To Switch the TV On policy or its enforcement, please contact by email at Connect the power cord to a power source such as a smarttvsecurity@vosshub.com. -
Page 47: Using Satellite Channel Table Feature
channels. Set the Install Type as Operator and then Using Satellite Channel Table Feature set the Tivusat Operator accordingly. Press OK to You can perform these operations using the Set- proceed. The TV will start to search for available tings>Installation>Satellite Settings>Satellite broadcasts. -
Page 48: Followme Tv
the related USB input option from this menu and press connected HDMI ports name(such as DVD Player, OK. Then select the file of your choice and press OK Recorder 1 etc.). to display or play it back. The TV remote is automatically able to perform the You can set your Media Browser preferences by using main functions after the connected HDMI source has the Settings menu. -
Page 49: Settings Menu Contents
Settings Menu Contents Picture Menu Contents You can change the picture mode to suit your preference or requirements. Picture mode can Mode be set to one of these options: Cinema, Game(optional), Sports, Dynamic and Natural. Contrast Adjusts the light and dark values on the screen. Brightness Adjusts the brightness values on the screen. - Page 50 Sound Menu Contents Volume Adjusts the volume level. Equalizer Selects the equalizer mode. Custom settings can be made only when in User mode. Balance Adjusts whether the sound comes from the left or right speaker. Sets headphone volume. Headphone Please ensure before using headphones that the headphone volume is set to a low level, to prevent damage to your hearing.
- Page 51 Installation Menu Contents Displays automatic tuning options. D. Aerial: Searches and stores aerial DVB stations. Automatic channel D. Cable: Searches and stores cable DVB stations. Analogue: Searches and stores scan (Retune) analogue stations. Satellite: Searches and stores satellite stations. Manual channel This feature can be used for direct broadcast entry. scan Searches for the linked channels in the broadcast system.
- Page 52 If this feature is supported by your TV, you can view your ESN(*) number and deactivate Netflix Netflix. (*) ESN number is an unique ID number for Netflix, created especially to identify your TV. Starts the setup process for this feature manually. If the setup is priorly completed Alexa Alexa Built-in Language, Alexa On Standby, Alexa Alarm Volume and Sign Out options will be available.
- Page 53 Virtual Remote Enable or disable the virtual remote feature. With this setting you can enable and disable CEC functionality completely. Press Left or Right button to enable or disable the feature. This function allows the connected HDMI-CEC compatible device to turn on the TV CEC Auto Power and switch to its input source automatically.
-
Page 54: General Tv Operation
Internet Lock: If this option is set to ON, the internet General TV Operation using applications will be disabled. Set to OFF to Using the Channel List release these applications again. The TV sorts all stored stations in the channel list. You Set PIN: Defines a new PIN number. -
Page 55: Teletext Services
Now/Next Schedule If a new upgrade is found, it starts to download the upgrade. After the download is completed, a warning In this layout option, only the current and next events will be displayed, press OK button to complete software of the listed channels will be displayed. -
Page 56: Pc Input Typical Display Modes
PC Input Typical Display Modes AV and HDMI Signal Compatibility The following table is an illustration of some of the Source Supported Signals Available typical video display modes. Your TV may not support all resolutions. SECAM Index Resolution Frequency Back AV NTSC4.43 640x480 60Hz... -
Page 57: Supported File Formats For Usb Mode
Supported File Formats for USB Mode Video File Formats Extension Video Codec Max. Resolution & Frame Rate & Bit Rate .mpg, .mpeg, .dat, .vob MPEG1/2, H.264, VC1 .ts, .trp, .m2ts .avi MPEG1/2, MPEG4, H.264, MJPEG .mp4, .m4a, .m4v, .mov, .qt, MPEG1/2, H.263, MPEG4, H.264 .3gp, .3g2, .3gpp .mkv... -
Page 58: Subtitle File Formats
Subtitle File Formats External Subtitles Extension Specification .ssa SubStation Alpha .ass Advanced SubStation Alpha .srt Subripper .sub Micro DVD / SubViewer .sub + .idx VOBSub .txt Micro DVD / TMPlayer / MPL2 .mpl MPL2 .smi Sami .jss JACOSUB .ttml TTML .txt / .sub DVDSUBTITLE .lrc... -
Page 59: Connectivity
Internet Speed Test Connectivity Highlight Internet Speed Test and press the OK Wired Connectivity button. TV will check the internet connection bandwidth To Connect to a Wired Network and display the result when complete. • You must have a modem/router connected to an Advanced Settings active broadband connection. -
Page 60: Networked Standby Mode
• The location where the transmission is most effective Connect your TV to your router following the steps differs depending on the usage environment. mentioned in the sections above. Afterwards, connect your mobile device to the router • The Wireless feature of the TV supports 802.11 a,b,g and then activate the sharing software on your mobile & n type modems. It is highly recommended that device. Then, select files that you want to share with you should use the IEEE 802.11n communication your TV. protocol in order to avoid any possible problems while watching videos. If the connection is established correctly, you will be able to access the shared files installed on your • You must change your modem’s SSID when there mobile device via the AVS(audio video sharing) -
Page 61: Connectivity Troubleshooting
Using with mobile devices each time when you connect to the internet. This is a precaution against unauthorized access. Since your There are different standards which enable sharing of TV has its own MAC address, your internet service screens including graphical, video and audio content provider cannot validate the MAC address of your TV. between your mobile device and TV. For this reason, your TV cannot connect to the internet. Plug the wireless USB dongle to TV first, if the TV Contact your internet service provider and request doesn’t have internal WLAN feature. -
Page 62: Apps
PC/HDD/Media Player or any other devices that are Name and Address, highlight OK and press the OK compatible should be used with a wired connection for button to add. Whilst you are on the site you wish to higher playback quality. add to the Speed Dial list, highlight the Vewd button and press the OK button. - Page 63 and press OK. Highlight AVS and change as Enabled. set the selected channel list source as a constant Your TV is ready to connect to your mobile device now. choice. In this case if the selected source is available Install the Smart Center application onto your mobile it will be used in the application.
-
Page 64: Hbbtv System
Voice Recognition be noted that the red button switching capability is provided by the application and some application may You can tap on the Microphone( ) widget and behave differently. manage your application, giving voice commands If you switch to another channel while an HbbTV such as “Volume Up/Down!”, “Programme Up/Down!”. - Page 65 • Use the Alexa Built-in option in the Settings>Sys- wizard when you press OK. In that case press Exit tem menu or highlight Setup Later and press OK in order to exit the setup. • Carry out first time installation on your TV. The setup wizard will be displayed after the installation process Once the setup is complete, you will be able to control is completed...
-
Page 66: Dvb Functionality Information
DVB functionality information This DVB receiver is only suitable for use in the country which it was designed to be used in. Although this DVB receiver conforms to the latest DVB specifications at the time of manufacture, we cannot guarantee compatibility with future DVB transmissions due to changes that may be implemented in broadcast signals and technologies. - Page 67 Information regarding EU countries (only) The symbol indicates that the product must not be disposed of with the normal household wastes. Correct disposal of this product prevents any potentially negative impact on the environment and human health that could arise from any inappropriate handling of the product itself.
- Page 68 50607773...
Need help?
Do you have a question about the TE24550B40Q2D and is the answer not in the manual?
Questions and answers