Table of Contents
Advertisement
Advertisement
Table of Contents

Related Manuals for Motic EasyScan One

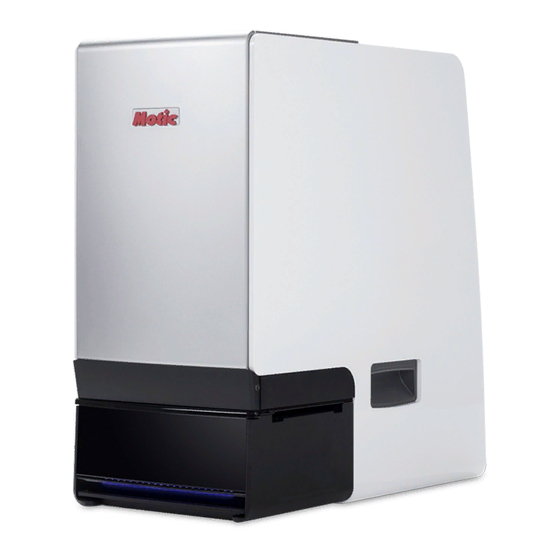
Summary of Contents for Motic EasyScan One
- Page 1 EasyScan One Instruction Manual Complete reading of this manual before opeartion is required. If the equipment is used in a manner not specified by the manufacturer, the protection provided by the Note equipment may be impaired. WWW.MOTIC.COM MOTIC HONG KONG LIMITED...
-
Page 2: Table Of Contents
TABLE OF CONTENTS Device Safety Instructions General Safety Tip Safety Sign Device Safety and EMC Warranty Description General Description Product Application Range System Overview 2.2.1 System Diagram 2.2.2 System Installation 2.2.3 System Connection Diagram 2.2.4 Port Description 2.2.4.1 Device Hosting Ports Description 2.2.4.2 Computer Ports Description 2.2.5... - Page 3 Operation Guidance Cautions Operation Instruction Complete Scanning Maintenance and Troubleshooting Care and Maintenance Troubleshooting 5.2.1 Software cannot control MoticEasyScan One Operation 5.2.2 Scanning Software is not able to Display Image 5.2.3 Calibration 5.2.3.1 Import Calibration File 5.2.3.2 Auto Calibration 5.2.3.3 Manual Calibration Appendix Specifications...
-
Page 4: Device Safety Instructions
Representing uncertainty of the general danger. Follow the descriptions on the back of signs or follow manufacturer’s instructions. For damaged, missing or unreadable labels, please contact Motic Group Corporation for replacement before continue operation. 1.3 Device Safety and EMC ●... -
Page 5: Warranty Description
Summary List Project Standard Safety Regulations IEC 61010-1:2001/EN 61010-1:2001、GB4793.1-2007 GB 18268.1-2010/IEC 61326-1-2005/IEC 61326-2-6:2005、 EN 55011 A Device Scrap Disposal WEEE 2002/96/EC 1.4 Warranty Description MoticEasyScan One and its components are only allowed to be operated within techniques and processes described in this operation manual. The manufacturer does not take any responsibility for damage caused by usage not complying to the instruction in the Manual. -
Page 6: General Description
Rapid high quality digital slide scanning can be achieved with Motic digital slide scanning software. It is applicable for scanning, digital storage, transferring and browsing of histopathology slide, cytology and biology slides etc. -
Page 7: System Installation
2.2.2 System Installation Before installation, please be familiar with following parts. USB 3.0 cable Power Supply Cable 2.2.3 System Connection Diagram (Fig. 2) -
Page 8: Port Description
2.2.4 Port Description 2.2.4.1 Device Hosting Ports Description USB port matches macro camera and main camera (USB cable connects to USB3.0 port of host computer) (Fig. 3) -
Page 9: Computer Ports Description
2.2.4.2 Computer Ports Description USB port of host computer should be USB3.0 port, which is signed with SS or marked as blue color. Computer Ports Diagram (Fig. 4) 2.2.5 System Connection Operation Please make sure the EVA foam, which is inside the device, is taken out before starting any operation and connection work. - Page 10 ● Firstly, manually disassemble the locking screw. (Fig. 6a) ● Then slide the front panel ①, ② out in horizontal direction from the device. (Fig. 6a) ● Take out the EVA foam carefully. (Fig. 6b) ● Snap the front panel back into the device and relock the locking screw. (Fig. 6b) (Fig.
-
Page 11: Slide Tray
a. Please make sure that all power is off before connecting. b. Follow the steps below for connection. ● Plug the USB3.0 cable to USB port of scanner, and connect the other end to computer USB3.0 port. ● Make sure system power is off, plug the power cord to the power socket of the scanner, and connect the other end to a safety rated Power outlet. -
Page 12: Slide Unloading Procedure
Notice: Make sure the backside of clip Fig. 7-① and Fig. 7-② are pressed on the top of the slide. Make sure the clip Fig. 7-③ pushes against the left side of the slide. (Fig. 8c) After inserting the whole slide into the slide slot, need to check if the slide is loaded onto the flat mounting pads. -
Page 13: Slide Tray Installation Procedure
(Fig. 9a) (Fig. 9b) 2.3.2 Slide Tray Installation Procedure: Load the slide tray into slide tray positioning slot slightly with the direction (make sure the arrow on the tray is outward) shown in the figure 10. (Fig. 10) -
Page 14: Software Installations And Instructions
3. SOFTWARE INSTALLATIONS AND INSTRUCTIONS 3.1 Software Installation The software should be installed by administrators. Double-click Setup.exe file in the installation program; Select installation language and click on the "Next" button;... - Page 15 Then click "Next" button; Select installation path and click "Next" button;...
- Page 16 Select installation path and click "Next" button; Click "Install" button to proceed installation and display installation process;...
- Page 17 g. Select “EasyScan 1” configuration, and then click “OK” button. When installation is completed, click "Finish" button to complete software installation.
-
Page 18: User Interface
3.2 User Interface Double-click the software icon on the desktop to run the software, and the following interface will display: This is simplified operation interface, software initial status “Scan” button is in grey. After the slide tray is in right position, “Scan” button will be automatically activated (change from grey to blue), then click “Scan”... - Page 19 Advanced Mode: click in to the advanced setting interface (need to input password, default password: Motic12345). The advanced mode interface consists of a title bar, menu bar, tool bar, observation window, status bar, and each Panel (such as video tuning, digital chips scanning and device control window). User interface applies floating/ fixed window design, the user can customize the window layout, all windows can be set as floating, fixed or hidden type.
-
Page 20: Slide Scanning
3.3 Slide Scanning 3.3.1 Slide Scanning — Operation Interface Operation interface can realize simplified operation and simplified setting. Operation interface is the main interface of the scanning software. Attention: MoticEasyScan One provides automation for identifying tissues outline in green as above picture shown. During scanning, scanner will only scan the inner part of the green outline and automatically skip over the outside empty part. -
Page 21: Slide Scanning - Advanced Setting Interface
After clicking "Scan" button, the scanning will be performed based on interface settings. When scanning is completed, a message will be displayed for next step operation. The digital slide image can be viewed by double clicking the macro map or via “Motic DSAssistant” . Followings are MoticEasyScaner software slide scanning characteristics ●... - Page 22 Create New Slide In the tool bar, click and a window will be popped up, type in corresponding slide name and description, select encode method and slide storage path, click “confirm” button. Establish Focus Model Focus model establishment includes auto model and manual model. If selecting “Auto Modeling”, please follow below procedure.
-
Page 23: For Mobile Device (*Optional)
Operation procedure ● Download Motic RDC APP from AppStore (Fig. 11a) ● iPad is connected to mainframe of scanner by using the same WIFI environment ● Open Motic RDC APP to connect and control scanner (Fig. 11b) (Fig. 11a) (Fig. 11b) -
Page 24: Operation Guidance
4. OPERATION GUIDANCE 4.1 Cautions Maintain clean slide tray, preventing contamination of glue, oil and others. Follow procedure Chapter 2.3 (Slide tray) for slide tray loading. Follow the software prompts to load and unload slide tray, prohibit any arbitrary action, otherwise it will cause damage to the device. -
Page 25: Maintenance And Troubleshooting
Choose “Point Grey Research Devices”, under normal conditions, it should list 1 imaging device, namely “Point Grey USB3 Version Camera”. ● Choose “Imaging Devices”, under normal conditions, it should list 2-imaging devices, namely “E3CMOS01200KPA” and “Motic USB3 Camera”. If not, please replug the USB3.0 cable, and restart the computer. -
Page 26: Calibration
5.2.3 Calibration It provides 3 method to calibrate. 5.2.3.1 Import Calibration File It is fit for reinstalling or updating the software. (Not to change the hardware) Make sure you had exported the correct calibration data before reinstalling or updating the software. Go to “System Calibration”... -
Page 27: Auto Calibration
5.2.3.2 Auto Calibration It supports one key to do automatic calibration, and provides simple and efficient operation. It is fit for only changing the objective, scanning poor quality images. Auto Calibration Settings Follow the wizard, select a blank spot & a tissue spot & entire tissue region in the map. As shown in the following figure, it will automatic complete system calibration, macro calibration and focus calibration. -
Page 28: Manual Calibration
5.2.3.3 Manual Calibration It is fit for changing hardware especially the camera or failing to auto calibrate. System Calibration ● Video Calibration Calibrate: remove the slide first, and click this button, the system will automatically process "Exposure", "Background Balance", "White Balance". ●... - Page 29 ● Camera Angle Offset Calibration Camera angle offset calibration is to calibrate the camera angle offsets, mainly in order to guarantee image stitching effect. Camera Angle: display calibration results of camera angle Calibrate: start to perform calibration operation. Please read the calibration conditions before calibration.
- Page 30 ● Z Compensation Calibration Z Compensation calibration helps to compensate the error of Z axis movement. Current compensation (um): Display the calibration result of the Z axis compensation under 40x objective. Calibrate: To start Z axis compensation calibration. b. Macro Camera Calibration Below figures are for video image calibration and slide image position calibration.
- Page 31 ● Click “Prepare Label Exposure” on the calibration wizard window, then system will automatically move to slide label section. ● Manually adjust the exposure bar and ensure the brightness of label is suitable. ● Complete Macro Image Settings. ● Select an area which can cover whole tissue by dragging a rectangle over it with the mouse. Then click “Scan Map”...
- Page 32 (Fig. B) (Fig. C)
- Page 33 Calibration: Please follow the steps of 10 and 11 (Fig. B) (Fig. D) ● Select an area which can cover whole tissue by dragging a rectangle over it with the mouse. Then click “Scan Map” button. ● After scanning map completed, click “Calibrate” button to complete calibration.
- Page 34 c. Focus Camera Calibration It is mainly to calibrate the video parameters of focus camera and the correspondence with z axis. Please do as below to perform Camera Auto Focus Calibration (refer to the detailed instructions): ● Make sure a slide with rich texture has been placed on the slide magazine (such as slide1), then load this slide.
-
Page 35: Appendix
6. APPENDIX 6.1 Specifications Slide Capacity 1-slide tray can load 1 slide Slide Tray Dimension 120 x 100 x 5.8mm Slide Dimension 76x25x1mm Plan APROCHROMAT 20x/0.75 Objective S APO 10x/0.3 Under 20X magnification, scanner resolution is 0.52μm/pixel tolerance Resolution Under 40X magnification, scanner resolution is 0.26μm/pixel Light Illumination 10W LED, Auto-control intensity (99 grade) Main Camera... -
Page 36: Digital Camera System Specifications
Lift equipment base plate on both sides respectively, during lifting and handling process, need to keep balance of device to prevent rollover. ● If you need to pack MoticEasyScan One for long distance transportation, please contact Motic or the Motic Distributor. (Fig.13) 6.7 Component Purchasing... -
Page 37: Miscellaneous
LED lamp life time is 25000 hrs, please contact after-sales service dept if there is any failures. 6.9 Lens Cleaning ● This needs to be operated by profession engineer. Please contact your nearest Motic Distributor, or contact our technical service department directly. 6.10 Cleaning of Components with Painting and Plastic components ●... - Page 38 Fax: 86-0592-562 7855 © 2007-2017 Motic China Group Co., Ltd. All rights reserved. Motic is a registered trademark and service mark of Motic China Group Co., Ltd. Microsoft Windows logo is a registered trademark of Microsoft Corporation. All other trademarks are the property of their respective owners.
Need help?
Do you have a question about the EasyScan One and is the answer not in the manual?
Questions and answers