Table of Contents
Advertisement
Quick Links
Advertisement
Table of Contents

Related Manuals for IMPETUS VE4500


Summary of Contents for IMPETUS VE4500
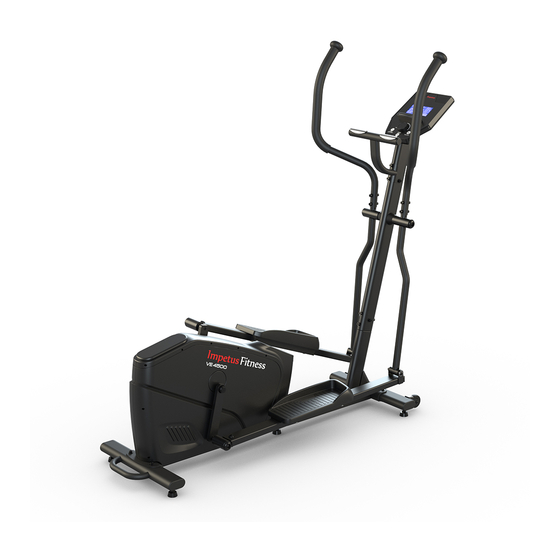
- Page 1 USER MANUAL...
-
Page 2: Table Of Contents
TABLE OF CONTENTS INRODUCTION / IMPORTANT INFORMATION PACKING LIST HARDWARE PACK PACKING LIST ASSEMBLY INSTRUCTIONS HOW TO MOVE THE TRAINER HOW TO ADJUST THE BALANCE OF THE TRAINER CONSOLE DESCRIPTION TELEMTRIC HEART RATE CHEST STRAP WARM UP / COOL DOWN CLEANING &... -
Page 5: Packing List
PACKING LIST FRONT FRAME(A4) REAR STABILIZER(A3) FRONT STABILIZER(A5) UPRIGHT POST(A2) REAR FRAME(A1) FIXED HANDLEBAR(A6) CONSOLE(A13) LOWER HANDLEBARS UPPER HANDLEBARS PEDALS (L/R = A7/A8) (L/R = A11/A12) (L/R = A9/A10) LEVELING FOOT (76) HARDWARE PACK PAKGING LIST WRENCH + SCREW DRIVER 1PC L-SHAPED WRENCH 1PC #24 M8*16 BOLT 14PCS #25 M8*60 BOLT 4PCS... -
Page 6: Assembly Instructions
ASSEMBLY INSTRUCTIONS STEP 1 Attach the FRONT STABILIZER (A4) to the FRONT FRAME (A5) with 2 SCREWS (25) and 2 WASHERS (38). STEP 2 1. Attach the REAR STABILIZER (A3) to the REAR FRAME (A1) with 2 SCREWS (25) and 2 WASHERS (38). 2. - Page 7 STEP 4 1. Remove the PRE-INSTELLED SCREWS (24) and WASHERS (38 & 41) on the UPRIGHT POST (A2). 2. Attach the UPRIGHT POST (A2) onto the FRONT FRAME (A4) with 5 SCREWS (24), 3 ARC WASHERS (41) and 2 WASHERS (38). STEP 5 1.
- Page 8 STEP 7 1. Remove the PRE-INSTALLED SCREW (30), COVER (17), WASHERS (40 & 38) on the RIGHT PEDAL TUBE (A8). 2. Attach the RIGHT PEDAL TUBE (A8) to the axle of THE REAR FRAME (A1) with the assembly order of a WASHER (38), a WASHER (40), a COVER (17) and a SCREW (30). 3.
- Page 9 STEP 8 1. Remove the PRE-INSTALLED SCREWS (24) and WASHERS (38 & 41) on the UPRIGHT POST (A2). 2. Insert the PULSE WIRE (63) upward through the UPRIGHT POST (A2). 3. Attach the FIXED HANDLEBAR (A6) to the UPRIGHT POST (A2) with 4 SCREWS (24), 2 ARC WASHERS (41) and 2 WASHERS (38).
- Page 10 STEP 9 1. Remove 4 SCREWS on the back of the CONSOLE (A13). 2. Connect WIRES (63 & 64) to the CONSOLE (A13). 3. Attach the CONSOLE (A13) to the UPRIGHT POST (A2). STEP 10 1. Plug the POWER ADAPTER (72) into the power jack on the equipment as the figure shown.
-
Page 11: How To Move The Trainer
HOW TO MOVE THE TRAINER HANDLE TRANSPORT WHEEL 1. Hold the handle and lift the trainer up, so the transport wheels touch the floor. 2. Move the trainer to your designated position while lifting the trainer. 3. Carefully let down the trainer. HOW TO ADJUST THE BALANCE OF THE TRAINER Make sure the trainer is placed on the flat floor, and rotate the leveling foot clockwise or counter-clock wise, so the leveling foot touches the floor. -
Page 12: Console Description
CONSOLE DESCRIPTION The things you should know before exercise A. Program select and setting value 1. Use the UP or DOWN keys to select program mode and then press ENTER to confirm your exercise mode. 2. At the Manual mode, the computer will use the UP or DOWN keys to set up your exercise TIME, DISTANCE, CALORIES, PULSE. - Page 13 6.CALORIES: Your computer will estimate the cumulative calories burned at any given time during your workout. 7.PULSE: Your computer displays your pulse rate in beats per minute during your workout. 8.AGE: Your computer is age-programmable from 10 to 99 years. If you do not set an age, this function will always default to age 35.
- Page 14 c. During setting the Clock, press this key can accept the setting hour and setting minute. 5. BODY FAT key: Press the key to input your HEIGHT, WEKGHT, GENDER and AGE then to measure your body fat ratio, 6. PULSE RECOVERY key: Press the key to activate heart rate recovery function. Program Introduction &...
- Page 15 7. Press the START/STOP key to begin exercise. User Setting Program: User 1, User 2, User 3, User 4 Program 14 to 17 is the user setting program. Users are free to create the values in the order of TIME, DISTANCE, CALORIES and the resistance level in 10 columns. The values and profiles will be stored in the memory after setup.
- Page 16 Users can exercise according to your desired Heart Rate program by setting your AGE, TIME, DISTANCE, CALORIES or TARGET PULSE. In these programs, the computer will adjust the resistance level according to the heart rate detected. For example, the resistance level may increase every 20 seconds while the heart rate detected is lower than the TARGET H.R.C.
- Page 17 8. Press the START/STOP key to begin exercise. NOTE: 1. WATT = TORQUE (KGM) * RPM * 1.03 2. In this program, the WATT value will keep constant value. It means that if you peddle quickly, the resistance level will decrease and if you peddle slowly, the resistance level will increase.
- Page 18 Error Message: E1 (ERROR 1): Normal state: During workout, when the monitor did not get the count signal from the gear motor more than 4 seconds and check under successive 3 times then the LCD will show E1. Power on state: The gear motor will return to zero automatically, when the signal of motor cannot be detected for more than 4 seconds then the gear motor's driver will be cut off immediately and show the E1 on the LCD display.
- Page 19 PROGRAM 13 PRECIPICE USER SETTING PROGRAM: PROGRAM 14 USER 1 PROGRAM 15 USER 2 PROGRAM 16 USER 3 PROGRAM 17 USER 4 HEART RATE PROGRAM PROFILES: PROGRAM 18 55% H.R.C. PROGRAM 19 65% H.R.C.
- Page 20 PROGRAM 20 75% H.R.C. PROGRAM 21 85% H.R.C. PROGRAM 22 TARGET H.R.C. WATT CONTROL PROGRAM PROGRAM 23 WATT CONTROL BODY FAT TEST PROGRAMS: PROGRAM 24 BODY FAT (STOP MODE) BODY FAT (START MODE) One of the Following Six Profiles Will Display Automatically after Measuring Your BODY FAT: Workout Time: 40 minutes Workout Time: 40 minutes Workout time: 20 minutes...
-
Page 22: Warm Up / Cool Down
WARM UP / COOL DOWN Suggested Stretches The following stretches provide a good warm-up and cool-down. Move slowly as you stretch. Ham String Stretch Sit with one leg extended. Bring the sole of the opposite foot toward you, resting it against the extended leg's inner thigh. -
Page 23: Cleaning & Maintenance
CLEANING & MAINTENANCE Inspect and tighten all parts of the exercise trainer regularly. Replace any worn parts immediately. To clean the exercise trainer, use damp cloth and a small amount of mild soap. IMPORTANT: To avoid damage to the console, keep liquids away from the console and keep the console out of direct sunlight.
Need help?
Do you have a question about the VE4500 and is the answer not in the manual?
Questions and answers