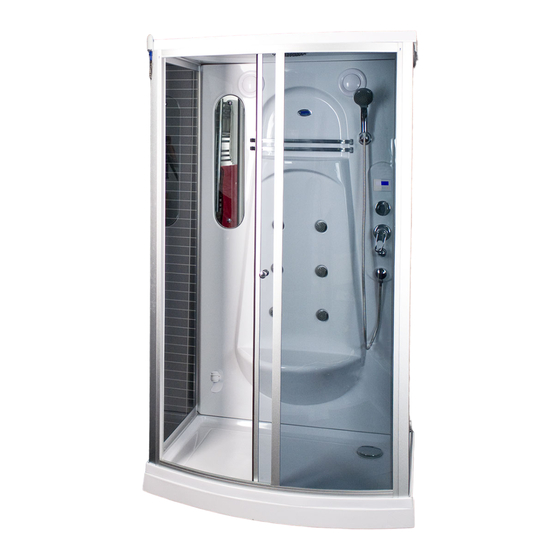
Summary of Contents for Arrow 6030
- Page 1 Arrow Skandinavien AB Tel: +46 (0)31 330 00 10 www.arrowshower.com (SV) Installationsmanual för duschkabiner och ångbastukabiner (EN) Installation manual for shower cabins and steam cabins 6030 6130 Ver: 9 March 2020 12:56 pm...
- Page 3 (SV) Lås upp brunnen. (EN) Unlock tray draining gutter.
- Page 4 (SV) På karets undersida, vrid avloppsröret så att det pekar mot duschutrymmets golvbrunn. (EN) On the underside, point the drainpipe towards the draining gutter on the bathroom floor.
- Page 5 (SV) Lås brunnen. (EN) Lock tray draining gutter.
- Page 6 (SV) På karets undersida, använd förlängnings röret vid behov. Kapa överflödig del av röret med såg. Använd silikon i skarven. (EN) If needed, mount the extension pipe on the underside of tray. Cut it with a saw. Use silicone.
- Page 7 (SV) Montera ihop de tre glasväggarna genom att vrida in dem i aluminiumprofilerna. (EN) Mount the the three glass wall by twisting them into the aluminium profiles.
- Page 8 (SV) Använd silikon vid skruvarna för att undvika att vatten tränger igenom. Skruv, brickor och mutter måste sättas i den ordning som skissen visar. (EN) Use silicone on the screws to avoid leakage. Screws, washers and nuts must be fixed in the same order as shown in the drawing. 2pcs screw&nut 2pcs gasket 1pcs O-ring...
- Page 9 (SV) Lägg silikon mot kabinens baksida. (EN) Put silicone on the backside of the cabin.
- Page 10 (SV) Placera bakväggen i rätt läge. (EN) Place back wall in its position.
- Page 11 (SV) Skruva fast bakväggen nedtill på baksidan. (EN) Fasten back wall at the bottom on backside. Tray&Backward 4 pcs screw&nut 8 pcs gasket 4 pcs O-ring – O-ring...
- Page 12 (SV) Skruva fast bakväggen på baksidans sidokanter. (EN) Fasten back wall on the backside edges. Backward&front: 14pcs screw 14pcs gasket...
- Page 13 (SV) Montera takduschanslutningen på taket. (EN) Mount the overhead shower connector on the roof.
- Page 15 (SV) Skruva fast taket i kabinens framsida. (EN) Attach the roof to the front wall. 2pcs screw&nut 2pcs gasket 1pcs O-ring...
- Page 16 (SV) Skruva fast taket på kabinens baksida. (EN) Fasten roof on the backside. Roof&Backward 4 pcs screw&nut 8 pcs gasket...
- Page 19 (SV) Endast på ångbastu. Baksidan: Anslut den vita slangen som går ut från ånggeneratorns undersida med avlopps röret på ångbastukabinens undersida. (EN) Only for steam cabin. Backside: Connect the white hose from beneath the steam generator with the pipe on underside of the steam cabin.
- Page 21 (SV) Anslut varm- och kallvatten på kabinens baksida. Anslutningsslangarna är 80 cm långa. (EN) Connect hot and cold water supply to the backside of the cabin. The connection hose length is 80 cm. ؽ” in. 80 cm...
- Page 22 6130 6030 (SV) Denna elanslutning bör utföras av en professionell elektriker. (EN) This electric installation should be made by a professional electrician. 195 cm 190 cm...
- Page 23 (SV) Orange antennkabel. (EN) Orange antenna cable.
- Page 24 (SV) Montera tätningslister upptill och nedtill. (PL) Mount the seals at the top and bottom.
- Page 26 (SV) Omkastare (val av duschtyp) (EN) Diverter (spray type selection) (SV) Takdusch (EN) Top shower (SV) Kroppsduschar (SV) Handdusch (EN) Bodysprays (EN) Hand shower (SV) Fotmassage (EN) Foot massage (SV) OFF (endast på ångbastukabiner): När du vill använda ångfunktionen, vrid reglaget till OFF så...
- Page 27 (SV) Engreppsblandare (EN) Flow controller (SV) Varmvatten (SV) Kallvatten (EN) Hot water (EN) Cold water (SV) OBSERVERA: För duschkabiner som inte har termostatblandare reglerar engreppsblandaren både vattenflöde och vattentemperatur. För ångbastukabiner reglerar engreppsblandaren enbart vattenflödet. Vattentemperaturen regleras då istället med termostaten. (EN) NOTE: For shower cabins without a thermostat, the flow controller adjusts both water flow and the water temeperature.
- Page 28 (EN) In the event of service and warranty, the cabin must be easily accessible for the repair man both at the top and the back. At service and warranty work that Arrow has been called to, and where we note failure due to incorrect installation, Arrow will...


Need help?
Do you have a question about the 6030 and is the answer not in the manual?
Questions and answers