Advertisement
Advertisement
Table of Contents

Related Manuals for VacPak-It Ultima 86UVMC32


Summary of Contents for VacPak-It Ultima 86UVMC32
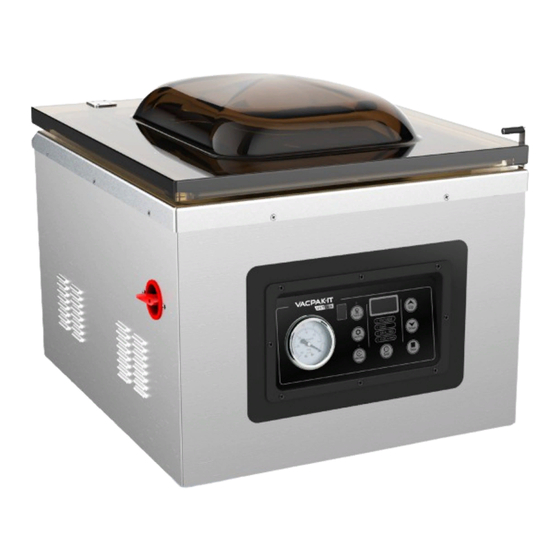
- Page 1 CHAMBER V ACUUM PACKAGING MACHINES #186UVMC16 Single 16" Seal Bar 120V • 1150W #186UVMC32 Double 16" Seal Bar 120V • 1180W Includes: 3 Filler Plates, 100 Bags: 25 (10"x13"), 25 (8"x12"), 25 (12"x16"), 25 (6"x10") Bags 11/2020 and Maintenance Kit (Seal Bar, Seal Tape, Sealing Gasket, (2) Fuses)
-
Page 2: Table Of Contents
Food Storage and Safety Information . . . . . . . . . . . . 3 Control Panel . . . . . . . . . . . . . . . . . . . . . . . . . . . . . . . 4-5 Programming Instructions . -
Page 3: Food Storage And Safety Information
Vacuum packaging with any model in the VACPAK-IT line will yield unbelievable results. These machines remove up to 95% of the air from the package. This will help keep food fresher up to 5 times longer than under normal storage methods. You can store dry foods like pasta, cereal and flour, fresh meats like pork, chicken and beef, vegetables like carrots, potatoes and squash, or even frozen liquids like soups and drink mixes. -
Page 4: Control Panel
Control panel "Set" Button - After plugging the unit in, press the "Set" button when the vacuum cover is open to switch the settings between vacuuming time, sealing time, and cooling time: • When the "Vacuum" light is illuminated, adjust vacuum time through the "Up / Down"... - Page 5 Control panel 4 . "Up / Down" Button - By pressing the "Up / Down" button, you can adjust the vacuum time, sealing time, cooling time, marinate time, and the preset program. Press quickly or hold to move up or down. 5 .
-
Page 6: Programming Instructions
programming instructions Power the Unit On - Plug in the unit. The LED displays and indicator lights will be on for 2 seconds, and then the 3-digit LED display will display "on" (if the vacuum lid is closed, the LED display will display "CLO"). Finally, the unit will enter the work preparation mode. - Page 7 programming instructions "Sealing" light will flash, the seal wire will work, and the LED display will begin to count backwards by 0.5 seconds. After "Sealing", it enters "Cooling" mode. The "Cooling" light will flash and the LED display will begin to count backwards by 0.5 second.
-
Page 8: Setup Instructions
set up Adding Oil Remove the back panel by unscrewing all the corner screws. Remove the oil fill bolt located on the vacuum pump using a thumbscrew cap. Fill the pump with oil until it reaches the white line marked on the bottle. Replace the oil fill bolt on the vacuum pump, and then replace the back panel of the unit. -
Page 9: Operating Instructions
0.1 seconds. Begin the process again at Step 2. If the vacuum and seal are of good quality, the VACPAK-IT process is finished. Enjoy the deliciousness of your freshly vacuum-packed food! - Page 10 operating instructions How to Marinate Press the "Marinate" button into "Marinate" mode, and then select the marinate time through the "Up / Down" buttons. You can also use the preset program by pressing the "Prog 0-9" button, then pressing the "Up / Down" buttons to select the corresponding marinate preset program.
-
Page 11: Maintenance Guide
Changing Oil It is recommended to change the vacuum pump oil in your VACPAK-IT machine after the first 20 hours of use. Further oil changes should occur after every 50 hours of use. Required Supplies: • Machine Oil •... -
Page 12: Troubleshooting
ISSUE REMEDY • Ensure the machine is properly plugged into a grounded outlet. • Check the power cord for tears, frays, or other damage. Unit won't turn on Do not use machine if the power cord is damaged. • Make sure the power switch is turned on. The LED screen will be illuminated when on. -
Page 13: Model Specifications
model specifications 186UVMC16 186UVMC32 Model Chamber Dimensions 163/ 4 "W x 18"D x 315/16"H 163/ 4 "W x 18"D x 315/16"H Material Stainless Steel Body & Transparent Lid Stainless Steel Body & Transparent Lid Seal Bar Single 16" Bar Double 16" Bar Voltage 120V 120V... -
Page 14: Warranty
EQUIPMENT LIMITED W ARRANTY VacPak-It Ultima warrants its equipment to be free from defects in material and workmanship for a period of 18 months. This is the sole and exclusive warranty made by VacPak-It Ultima covering your VacPak-It Ultima brand equipment. A claim under this warranty must be made within 18 months from the date of purchase of the equipment.
Need help?
Do you have a question about the Ultima 86UVMC32 and is the answer not in the manual?
Questions and answers