Advertisement
Quick Links
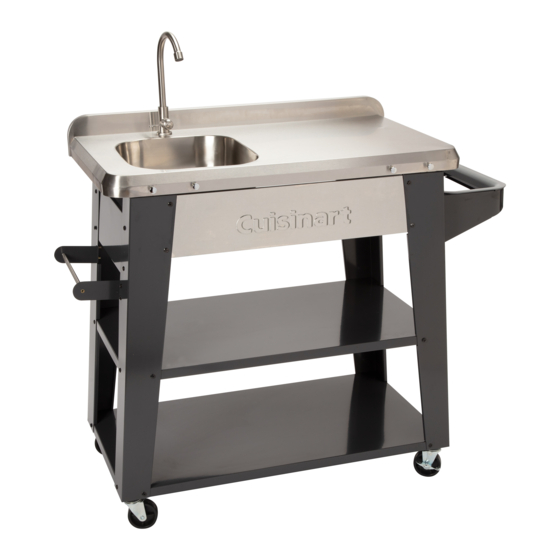
DELUXE OUTDOOR
PREP TABLE
Model NO: CGWM-090
Customer Service Hotline
1-866-994-6390
DO NOT RETURN YOUR TABLE TO THE STORE
Before visiting your local retailer, call our customer
service department at 1-866-994-6390 from 9:00 am
to 5:00 pm Eastern time, Monday through Friday.
Advertisement

Related Manuals for Cuisinart CGWM-090


Summary of Contents for Cuisinart CGWM-090
- Page 1 DELUXE OUTDOOR PREP TABLE Model NO: CGWM-090 Customer Service Hotline 1-866-994-6390 DO NOT RETURN YOUR TABLE TO THE STORE Before visiting your local retailer, call our customer service department at 1-866-994-6390 from 9:00 am to 5:00 pm Eastern time, Monday through Friday.
- Page 2 SAFETY INFORMATION WARNINGS AND USAGE - - - - - - - - - - - - - - - - - - - - - - - - - - - - - - - - - - - - - - - - - - - - - - - - - - - - - - - - - - - - - - - - - - - - - - - - - - - - - - - - - - - IMPORTANT: ALL INSTRUCTIONS AND SAFEGUARDS IN THIS SECTION MUST BE FOLLOWED TO PREVENT DAMAGE AND/OR INJURY.
- Page 3 WHAT’S IN THE BOX COMPONENTS - - - - - - - - - - - - - - - - - - - - - - - - - - - - - - - - - - - - - - - - - - - - - - - - - - - - - - - - - - - - - - - - - - - - - - - - - - - - - - - - - - - PART DESCRIPTION PART...
- Page 4 EXPLODED VIEW...
- Page 5 ASSEMBLY PREPARATION Please be careful when handling components. Always wear work gloves during assembly and set up. Read and follow all safety statements, warnings, assembly instructions and use and care instructions before attempting to assemble and use. Before beginning assembly of product, make sure all parts are present. Compare parts with package contents list and hardware contents list.
- Page 6 ASSEMBLY INSTRUCTIONS STEP 2 - - - - - - - - - - - - - - - - - - - - - - - - - - - - - - - - - - - - - - - - - - - - - - - - - - - - - - - - - - - - - - - - - - - - - - - - - - - - - - - - - - - Use screw assemblies to attach the middle portion of left back leg (5) (LB) and the right back leg (17) (RB) to the upper shelf (16) as shown below.
- Page 7 ASSEMBLY INSTRUCTIONS STEP 4 - - - - - - - - - - - - - - - - - - - - - - - - - - - - - - - - - - - - - - - - - - - - - - - - - - - - - - - - - - - - - - - - - - - - - - - - - - - - - - - - - - - Use screw assemblies to attach the left front leg (6) (LF) and the right front leg (18) (RF) to the lower shelf (19) and the upper shelf (16).
- Page 8 ASSEMBLY INSTRUCTIONS STEP 6 - - - - - - - - - - - - - - - - - - - - - - - - - - - - - - - - - - - - - - - - - - - - - - - - - - - - - - - - - - - - - - - - - - - - - - - - - - - - - - - - - - - Use screw assemblies to attach name plate (15) to the left front leg (6) (LF) and the right front leg (18) (RF).
- Page 9 ASSEMBLY INSTRUCTIONS STEP 8 - - - - - - - - - - - - - - - - - - - - - - - - - - - - - - - - - - - - - - - - - - - - - - - - - - - - - - - - - - - - - - - - - - - - - - - - - - - - - - - - - - - Use screw assemblies to attach the side panel (3) to the right leg assembly using just the top two screws.
- Page 10 ASSEMBLY INSTRUCTIONS STEP 10 - - - - - - - - - - - - - - - - - - - - - - - - - - - - - - - - - - - - - - - - - - - - - - - - - - - - - - - - - - - - - - - - - - - - - - - - - - - - - - - - - - - Use screw assemblies to attach both of the towel bar ends (8) to the left leg assembly.
- Page 11 ASSEMBLY INSTRUCTIONS STEP 12 - - - - - - - - - - - - - - - - - - - - - - - - - - - - - - - - - - - - - - - - - - - - - - - - - - - - - - - - - - - - - - - - - - - - - - - - - - - - - - - - - - - Install the faucet assembly (2) into the counter top assembly (1) by inserting the faucet and small rubber washer in from the top and then securing from the bottom with the large rubber washer and nut.
- Page 12 ASSEMBLY INSTRUCTIONS STEP 13 - - - - - - - - - - - - - - - - - - - - - - - - - - - - - - - - - - - - - - - - - - - - - - - - - - - - - - - - - - - - - - - - - - - - - - - - - - - - - - - - - - - Use screw assemblies to attach the counter top assembly (1) to the prep station base.
- Page 13 ASSEMBLY INSTRUCTIONS STEP 14 - - - - - - - - - - - - - - - - - - - - - - - - - - - - - - - - - - - - - - - - - - - - - - - - - - - - - - - - - - - - - - - - - - - - - - - - - - - - - - - - - - - Install the utensil hangers by screwing them into the front edge of the counter top assembly (1).
- Page 14 CONNECTION INSTRUCTIONS STEP 16 - - - - - - - - - - - - - - - - - - - - - - - - - - - - - - - - - - - - - - - - - - - - - - - - - - - - - - - - - - - - - - - - - - - - - - - - - - - - - - - - - - - Increase the length of the expanding drain hose by pulling the lower open end of the tube while holding firm the top end that is pressed onto the threaded adaptor.
- Page 15 GARBAGE BAG INSTRUCTIONS STEP 18 - - - - - - - - - - - - - - - - - - - - - - - - - - - - - - - - - - - - - - - - - - - - - - - - - - - - - - - - - - - - - - - - - - - - - - - - - - - - - - - - - - - Install a garbage bag by inserting the bag through the garbage bag ring (11) and then wrapping the open end of the bag around the ring.
- Page 16 For replacement parts, call our customer service department at 1-866-994-6390 from 9:00am to 5:00pm EST, Monday through Friday for assistance. To register your Cuisinart product, please visit https://cuisinart.registria.com. For FAQ’s and replacement parts, please contact us at grilling@thefulhamgroup.com. For our consumer care department, please contact us at grilling@thefulhamgroup.com or call 1-866-994-6390.
Need help?
Do you have a question about the CGWM-090 and is the answer not in the manual?
Questions and answers