Table of Contents
Advertisement
Advertisement
Table of Contents

Subscribe to Our Youtube Channel
Related Manuals for Falcon GSM

Summary of Contents for Falcon GSM
- Page 2 V1.0 08 Jul 2021...
-
Page 3: Table Of Contents
..................3.1.5 Serial Port ................3.1.6 Relay Outputs 3.2 Falcon GSM Installation ............3.3 GSM Connection and Signal Strength ......3.4 Changing the Default SIM Card ........... 3.5 Selecting the Alarm Panel Serial Port Format ... 3.6 Indicators and Controls... - Page 4 4. PROGRAMMING ..............4.1 Onboard Push-Button ..............4.2 PC-based Programmer ............... APPENDIX A Serial Interface ............APPENDIX B Programming Cable & Software ....
-
Page 5: Introduction
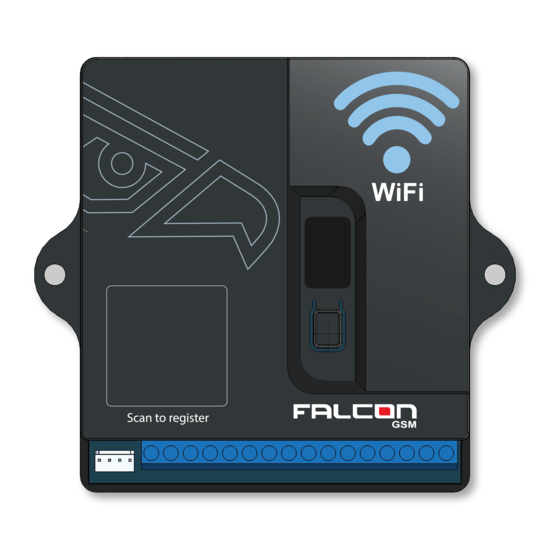
1. INTRODUCTION The Falcon GSM is a highly-featured GSM-based unit which is used for the secure transmission of alarm signals to a control room. The Falcon GSM will communicate via GSM messages to the control room and includes the universal Contact ID interface to alarm panels as well as a serial interface to leading panels. -
Page 6: Features & Functions
Full programming and software updating via a computer serial Ÿ port Programming over-the-air via GPRS Ÿ 2.4 Indicators and Controls Status and error indication via a seven segment display Ÿ Serial port selection via the onboard push-button Ÿ Falcon GSM Installation and Operation Manual... -
Page 7: Installation
3. INSTALLATION 3.1 Falcon GSM Wiring Connections to the Falcon GSM are shown below: - + T R CAC 12V GND 1 TIP RING SERIAL Falcon GSM Installation and Operation Manual... -
Page 8: Power Supply
DO NOT connect this line to the mains. The CAC input will detect AC voltages between 10 and 24V. If the CAC line is not connected, the Falcon GSM should not be programmed to send AC Fail or AC Restore signals. -
Page 9: Contact Id Inputs
3.1.4 Contact ID Inputs The Falcon GSM can 'intercept' signals sent by the alarm panel on its telephone line (Contact ID) interface. If the Contact ID interface is to be used, the alarm panel's TIP and RING lines should be connected to the TIP and RING lines on the Falcon GSM. -
Page 10: Relay Outputs
Two dry-contact relay outputs are available on the Falcon GSM. These outputs can be commanded to turn on and off via the GSM network. The outputs are rated at 24V AC or DC, up to a maximum current of 5A. -
Page 11: Changing The Default Sim Card
(see section 3.5 – Indicators and Controls) When the Falcon GSM has connected to the GSM network, it will display the sim card of the network it is connected to and the signal strength of the connection. -
Page 12: Selecting The Alarm Panel Serial Port Format
Wait until the Falcon GSM has re-connected to the GSM Ÿ network on the new SIM card and displays the signal strength. If the Falcon GSM displays an error message (E1 or E4), the Ÿ selected SIM card is not working and the other one should be selected The minimum signal strength required is 5. - Page 13 Orisec Ÿ Refer to Appendix A To change the serial port format: Remove the power from the Falcon GSM Ÿ Hold down the push-button and re-apply the power Ÿ Release the button then push the button to cycle through the Ÿ...
- Page 14 DISPLAY SERIAL FORMAT Rhino Texecom Premier Paradox Pima Hunter Pro DSC Neo Series Sherlotronics DSC Power Series IDS805 FSK Key-bus Falcon GSM Installation and Operation Manual...
-
Page 15: Indicators And Controls
DISPLAY SERIAL FORMAT Risco LightSYS 2 Orisec 3.6 Indicators and Controls The Falcon GSM has a seven segment display which indicates the current operating status. Falcon GSM Status CHARACTER FLASHED STATUS DESCRIPTION communicator re-starting the GSM Restarting modem The communicator is... - Page 16 All alarms sent, disconnecting from the necting server from server Falcon GSM Errors If the Falcon GSM detects an error it will flash the error code on the seven segment display. CHARACTER FLASHED STATUS DESCRIPTION The communicator has not detected a...
- Page 17 Server The communicator cannot GPRS settings are correct. connect to the server to route The GSM network may the GPRS message to the be experiencing technical control room problems. Contact the manufacturer. Falcon GSM Installation and Operation Manual...
-
Page 18: Programming
Falcon GSM. The Falcon GSM programmer requires a PC running Windows XP or above, with an available USB Port. The FSK USB programming cable is required to program the Falcon GSM (see Appendix B). -
Page 19: Appendix A Serial Interface
APPENDIX A SERIAL INTERFACE The Falcon GSM uses a standard interface cable (with interchangeable ends) along with an adapter to connect to various alarm panels except for the DSC PowerSeries and the IDS805 panels which use a key-bus module and the Orisec panel which has its own serial cable whose ends are NOT interchangeable. - Page 20 Falcon GSM Serial Interface Cable TEXECOM SERIAL INTERFACE Set the serial port format to Texecom on the Falcon GSM (Refer to Section 3.4). Connect the Falcon GSM to Com1 on the alarm panel using the serial interface cable with the TEXECOM-IDS adapter board.
- Page 21 Falcon GSM’s serial port. PIMA SERIAL INTERFACE Set the serial port format to Pima on the Falcon GSM (Refer to Section 3.4). Plug the adapter marked PIMA into the serial port on the Pima alarm panel. Plug the other end into the Falcon GSM’s serial port.
- Page 22 The Pima serial interface will send the standard FSK Contact ID alarm codes. DSC NEO SERIAL INTERFACE Set the serial port format to DSC PowerSeries Neo on the Falcon GSM (Refer to Section 3.4). The Falcon GSM can send alarms received from the PC LINK_2 header of the DSC PowerSeries Neo panel.
- Page 23 The Falcon GSM can send alarms received from the keypad-bus of the IDS805 alarm panel. Set the serial port format to IDS on the Falcon GSM if using an IDS-supplied key-bus module or to IDS805 FSK Key-Bus if using an FSK-supplied DSC Power Series/IDS805 FSK Key-Bus Module (Refer to Section 3.4).
- Page 24 App Set-up Guide provided, for alarm signals to be sent and/or for app connectivity. ORISEC SERIAL CABLE The Falcon GSM can send alarms received from the COM 1 serial port of the Orisec alarm panel with a firmware version of 4.52 or later.
-
Page 25: Appendix B Programming Cable & Software
APPENDIX B PROGRAMMING CABLE AND SOFTWARE The Falcon GSM is programmed using the FSK USB Programming Cable and FSK DVD kit which contains the programming software (FSK Item Code 40027). Installing the drivers for the FSK USB to UART Programmer Install the drivers before plugging the USB Programmer into the computer’s USB port. - Page 26 In the FSK DVD, navigate to the following directory: \FUSA FSK USB Serial Adapter Drivers For 64 bit operating systems, double click on: CP210xVCPInstaller_x64.exe Otherwise, double click on: CP210xVCPInstaller_x86.exe Follow the instructions on DRIVER software to install. Falcon GSM Installation and Operation Manual...
- Page 27 Upon opening the software for the first time it will require an initial setup. The following window will pop up: Select the folder where the templates will be saved for Falcon GSM devices. Falcon GSM Installation and Operation Manual...
- Page 28 Select the COM port that will be used to communicate with the device. From there the following window will appear: Connect the Falcon GSM to the correct COM port and click on the read button. Falcon GSM Installation and Operation Manual...
- Page 29 Upon completion, the window will look like this. All the settings that are greyed out cannot be changed. Falcon GSM Installation and Operation Manual...
- Page 30 All the input and output settings can be changed by clicking on the Input/Output Settings Tab. Falcon GSM Installation and Operation Manual...
- Page 31 This warranty replaces any previous warranties and is the only warranty made by seller on this product. No increase or alteration, written or verbal, of the obligations of this limited warranty is authorised. Note: Specifications are subject to change without notice. Patents issued and pending worldwide. Falcon GSM Installation and Operation Manual...
- Page 32 support@fsk.co.za +27 11 477 7705 (technical support) Amecor House, 14 Richard Road, Industria North, 1709...
Need help?
Do you have a question about the GSM and is the answer not in the manual?
Questions and answers
Good morning, on a Falcon GSM we have 5 devices linked but keeps give error code 170. It arms but doesn't disarm.