Advertisement
Available languages
Available languages
Quick Links
Advertisement

Related Manuals for Majestic TAB 527 3G


Summary of Contents for Majestic TAB 527 3G
- Page 1 TAB 527 3G Tablet PC Android 4.4.2 Manuale Utente...
- Page 3 Indice Specifiche... Contenuto della confezione... Descrizione delle parti... Per iniziare... Come utilizzare la scheda di memoria... Come collegare al PC... Connessione a Internet... Camera…………… Risoluzione dei problemi... Avvertenze…...
- Page 4 Specifiche Schermo Multi-touch capacitivo da 7" HD TN (1024x600) Processore A7 Quad Core SC7731G da 1.3GHz RAM: 512MB DDRIII Grafica GPU Mali 400 MP2 Memoria interna 4 GB* Espansione memoria Micro SD fino a 32 GB (NON FORNITA) Wifi incorporato 802.11 b/g/n Modulo SIM 3G Frequenze GSM (GPRS/EDGE) 850/900/1800/2100MHz Frequenze 3G (WCDMA) 900/2100MHz...
- Page 5 Contenuto della confezione Tablet – 1pz Adattatore di alimentazione - 1pz Cavo USB - 1pz Cavo USB OTG - 1pz Manuale di istruzioni - 1pz Tagliando di garanzia - 1pz...
- Page 6 Descrizione delle parti...
- Page 8 Nome Funzione Volume + Premere per aumentare il volume Volume - Premere per diminuire il volume Tenere premuto per accendere/spegnere il tablet; Power premere brevemente per attivare lo standby Reset Ripristinare il sistema in caso di blocco e riavviare Collegare l’auricolare a questa presa standard da Presa cuffie 3,5 mm Ingresso micro USB /...
- Page 9 Guida introduttiva Ricarica della batteria Il tablet dispone di una batteria ricaricabile al Li-po incorporata. 1. Per ricaricare la batteria collegare l'adattatore alla presa micro USB sul lato superiore del tablet. 2. L'icona della batteria mostra la condizione della batteria e lo stato di carica.
- Page 10 3. Il tablet può essere utilizzato anche se la batteria è in carica. 4. Non sostituire la batteria senza autorizzazione e rivolgersi unicamente ad un centro assistenza autorizzato. 5. Ricaricare per almeno mezz'ora se è rimasto inattivo per lungo tempo e non si avvia.
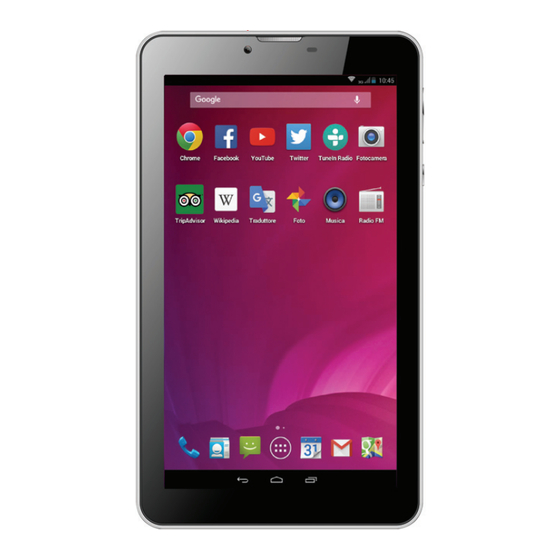
- Page 11 Schermata Home La schermata principale sarà simile all'immagine qui sotto. Per passare tra le diverse schermate, semplicemente far scorrere il dito a destra o a sinistra sul display. La barra di stato e i tasti di navigazione sono sempre visibili, non importa quale schermata è...
- Page 12 La schermata principale contiene collegamenti alle applicazioni più usate. Toccare l'icona sullo schermo per effettuare una ricerca nel Web usando Google. L’ icona avvierà il menu applicazioni. La barra di stato visualizza informazioni di sistema, come l’ora corrente, la connettività wifi e lo stato della batteria.
- Page 13 Il pulsante riporta indietro alla pagina/menu precedente. Il pulsante ritorna immediatamente alla schermata principale. Il pulsante visualizza lo storico delle applicazioni aperte di recente. Menu impostazioni Il menu impostazioni consente di regolare la configurazione di sistema. Per modificare le impostazioni: 1.
- Page 14 Lingua e immissione, dizionario personale, impostazioni tastiera a schermo, ricerca vocale, Backup e ripristino - Backup e ripristino dei dati, reset di fabbrica, ecc Data e ora - impostare la data, fuso orario, tempo, formato orologio, ecc Programma accensione/spegnimento – impostazioni per l’accensione e lo spegnimento automatico Accessibilità...
- Page 16 Come utilizzare la scheda di memoria 1. Inserire la scheda di memoria micro SD nell’apposito slot (vedere “Descrizione delle parti”). Spingere delicatamente la scheda nello slot fino a quando scatta in posizione. 2. Sullo schermo apparirà una schermata: "Preparazione SD card" Rimuovere la scheda di memoria 1.
- Page 17 Touch Screen Il touch screen risponde al tocco delle dita. Nota: non collocare nessun oggetto sullo schermo perché si potrebbe danneggiare o schiacciare. Singolo tocco: scegliere l'icona o l’opzione desiderata. Premere a lungo: premere e tenere premuto un'icona per far apparire un menù contestuale alla funzione eseguita (quando presente).
- Page 18 Nota: Accendere il Tablet prima di collegarlo al PC tramite il cavo USB. 1. Utilizzare il cavo USB per collegare il tablet con il computer. Il sistema avviserà di essersi connesso come memoria USB (menù a tendina superiore). 2. Il computer rileverà un disco esterno di nome “mid”; questa è la memoria interna del tablet.
- Page 20 Fotocamera Toccare l'icona per attivare la fotocamera: 1.Toccare l'icona per scattare una foto. 2. Toccare l' icona per iniziare la registrazione di un video. 3. Toccare l'icona in basso a destra per vedere l'immagine precedente scattata. Toccare il pulsante return per uscire dalla funzione videocamera. 4.
- Page 21 Risoluzione dei problemi Terminare un applicazione Quando un applicazione assume un comportamento anomalo è possibile terminarla per ottimizzare le risorse di sistema. Si prega di chiudere tutte le applicazioni inattive per liberare memoria in modo tale che la velocità del sistema torni alla normalità.
- Page 22 - Tutti i marchi e diritti d'autore sono proprietà dei rispettivi possessori. - La New Majestic Spa non è responsabile dei problemi che i software di terze parti potrebbero causare all'apparecchio. - La New Majestic Spa non è responsabile dei problemi di eventuali incompatibilità...
- Page 23 Istruzioni di sicurezza AVVERTENZA – Al fine di ridurre rischi di incendio, corto circuito e danni personali : Non usare l’apparecchio vicino all’acqua, per esempio vicino alla vasca da bagno, al lavabo, al lavello, su basi umide, in piscina, ecc.. Posizionarlo lontano da fonti di calore come I termosifoni, stufe, o altri apparecchi ...
- Page 24 Direttive 2011/65/UE, 2002/96/CE e 2003/108/CE, relative alla riduzione dell'uso di sostanze pericolose nelle apparecchiature elettriche ed elettroniche, nonché allo smaltimento dei rifiuti". Il simbolo del cassonetto barrato riportato sull’apparecchiatura o sulla sua confezione indica che il prodotto alla fine della propria vita utile deve essere raccolto separatamente dagli altri rifiuti.
- Page 25 Nel caso si dovessero riscontrare anomalie o difetti del prodotto, la New Majestic S.p.A. offre una Garanzia convenzionale soggetta alle condizioni qui riportate (precisando che la Garanzia convenzionale lascia impregiudicati i diritti del consumatore di cui al D.Lgs.
- Page 26 Per interventi in Garanzia si prega di rivolgersi presso uno dei Centri Assistenza Autorizzati della New Majestic S.p.A., la cui lista completa è consultabile sul sito www.newmajestic.com, oppure presso il punto vendita dove è stato acquistato il prodotto, consegnando il tagliando di Garanzia debitamente compilato ed allegando lo scontrino fiscale relativo l’acquisto.
- Page 27 TIPO: TABLET MARCA: MAJESTIC MODELLO: TAB 527 3G è costruito in conformità alle seguenti normative: EN 60950-1 : 2006+A11 :2009+A1 :2010+A12 :2011+A2 :2013 EN 50360 : 2001+A1 :2012 EN 50566 :2013/AC :2014; EN 62479 :2010 EN 62209-1 :2006 ;...
- Page 29 TAB 527 3G Tablet PC Android 4.4.2 User Manual...
-
Page 30: Table Of Contents
Tablet of Contents Specifications…………………………………………………………………. What’s inside the box………………………………………………………… Tablet Parts…………………………………………………………………… Getting started………………………………………………………………... How to use TF card ………………………………………………………… How to connect to PC ……………………………………………………… Connection to Internet……………………………………………………….. Camera………………………………………………………………………. Trouble Shooting……………………………………………………………. Warnings…………………………………………………………….……... -
Page 31: Specifications
Specifications Display: 7 inch TN (1024x600) Capacitive multi-touch screen CPU: A7 Quad Core SC7731G da 1.3GHz RAM: 512MB DDR III GPU Mali 400 MP2 Internal Storage: 4GB* Expansion Memory: Micro SD card up to 32GB (not supplied) Built-In Wireless: 802.11b/g/n SIM 3G module GSM frequencies (GPRS/EDGE) 850/900/1800/2100MHz 3G frequencies (WCDMA) 900/2100MHz... -
Page 32: What's Inside The Box
What’s Inside The box Tablet – 1pc Power Adapter -1pc USB Cable-1pc OTG Cable-1pc Instruction manual - 1pc Warranty card 1pc... -
Page 33: Tablet Parts
Tablet Part... - Page 35 Name function Volume + Press to increase the volume Volume - Press to decrease the volume Keep pressed to turn on/off the tablet; shortly press Power to activate standby Reset Reset the system in case of device stuck and restart Earphone jack Connect earphone to this standard 3.5mm jack PC connection / Peripheral connection through...
-
Page 36: Getting Started
Getting Started Battery Charging The tablet has a built-in rechargeable Li-polymer battery. 1. To charge connect the AC power adapter to the micro USB jack on the top side of the tablet. 2. The battery icon shows the battery status and charging status... - Page 37 3. The tablet can be used even if the battery is being charged. 4. no replacement of battery without authorization, or the explosion hazard might happen. 5. Recharge it for at least half hour if it has been idle for long time and fails to start itself.
- Page 38 The Home screen will look similar to the picture below. To switch between screens, simply slide your finger left or right across the display. The status bar and navigation buttons are always visible, no matter which Home screen you can currently viewing. The Desktop contains shortcuts to your most-used applications and widgets Touch the screen icon to quickly search the World Wide Web using Google.
- Page 39 icon will launch the Application menu. The status bar displays system information, such as current time, wireless connectivity and battery. Slide your finger from the top edge towards inside to display notification menu. button moves back one step to the previous menu/page.
- Page 40 button returns immediately to the main screen. button display a menu of recently opened applications. Settings Menu The settings menu allows you to adjust Tablet system configuration. To change settings: 1. Touch the "Settings" menu icon on the Application menu. The Settings menu will open.
- Page 41 About telephone - Information about your Android device Telephone function 1. in off mode insert SIM card in the slot. 2. after inserting SIM card turn on the tablet and wait to display the cell reception icon. 3. once the connection with the operator open the application and dial the number.
-
Page 43: How To Use Tf Card
How to Use TF card 1. Insert the TF card into the TF card slot. Gently push TF card into slot until it clicks into place. 2. A prompt will be seen on the screen saying “ Preparing SD card “ Removing TF card 1. -
Page 44: Connection To Internet
Touch Screen The touch screen responds to finger touch. Note: don’t place any object on the touch screen for it may damage or crush the screen. Single Click: single click one icon to choose the icon or option you want. Long Press: press and hold one icon to make appear a menu related to the executed function (if available). - Page 45 Note: when the tablet detects the same wireless network in the future, the device will connect to the network automatically with same password record. Web Browsing Connect to the internet and launch the browser.
-
Page 47: Camera
Camera Touch the icon to enter camera mode and the interface is shown as follows: 1. Touch the icon to take photo 2. touch the icon to start camera recording. 3. touch the icon on the bottom right to see the previous picture. Click return button to exit camera interface. -
Page 48: Trouble Shooting
Trouble Shooting Close Application When an application is not responding you can close it and will make system response faster. Please shut down all idle applications to release memory and get the system speed back to normal. To close the application, click the icon on the shortcut bar to enter the system configuration interface. - Page 49 off. Restore Default Setting If you want to reset the factory setting and erase all materials, please press Settings → Backup & reset → Factory data reset. ** Warning: Factory data reset setting will delete your data and configuration of system and applications from downloading. **Please use this function carefully.
- Page 50 All brands and copyright are property of the related owners. New Majestic Spa is not responsible for the problems of incompatibility found during the use of software developed by third party. New Majestic Spa declines all responsibilities on the breach of copyright from the user.
Need help?
Do you have a question about the TAB 527 3G and is the answer not in the manual?
Questions and answers