Table of Contents
Advertisement
Available languages
Available languages
Quick Links
Advertisement
Table of Contents

Related Manuals for Steren GAM-010


Summary of Contents for Steren GAM-010
- Page 2 IMPORTANT Before using your new USB Missile launcher, please read the following recommendations. • Do not expose your USB missile launcher to extreme temperatures. • Always use a soft and dry cloth in order to clean • Do not attempt to open this device as this could cause malfunctions •...
-
Page 3: Minimum System Requirements
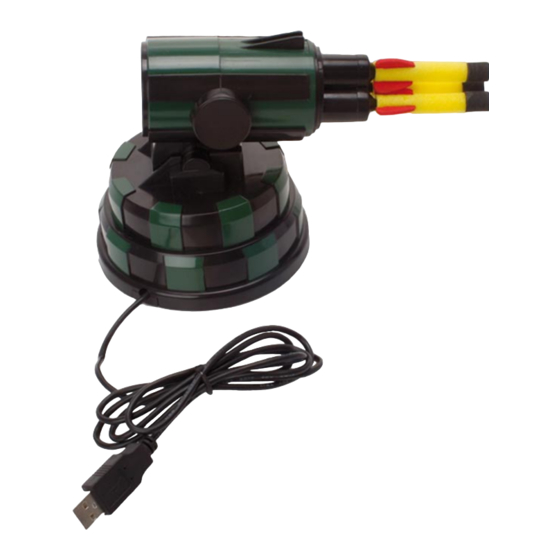
MINIMUM SYSTEM REQUIREMENTS • Intel Pentium II o AMD Athlon processor running 2.4 GHz • 128MB RAM • 100MB of hard disk space • CD-ROM. CONTROLS 1.- Missile. 2.- Launcher. 3.- Rotating base. 4.- USB cable. ENGLISH-03... -
Page 4: Installation Program
INSTALLATION PROGRAM. 1.- Place the installation CD (included) in the CD-ROM 2.- The following screen appears, click NEXT to continue the installation. ENGLISH-04... - Page 5 3.- Choose the destination folder where the files are copied the program. 4.- Continue with the installation selecting the NEXT button to finalize the installation. ENGLISH-05...
-
Page 6: Program Controls
PROGRAM CONTROLS 1 .- Minimizes the program. 2 .- Close the program. 3 .- Move the launcher upwards. 4 .- Turn the bottom left. 5 .- Turn the bottom right. 6 .- Move the launcher down. 7 .- Button shooting. 8 .- Reset the starting position. -
Page 7: Operation
OPERATION Once installed the software: 1 .- Put missiles in the launcher. 2 .- Connect the USB cable from the launcher to an available USB port in the computer. 3 .- Place the target (included) in a wall. 4 .- Run “MissileLauncher” program and through the controls of the launcher, move the base in direction to the target. -
Page 8: Warranty
Part number: GAM-010 Brand: Steren WARRANTY This Steren product is warranted under normal usage against defects in workmanship and materials to the original purchaser for one year from the date of purchase. CONDITIONS 1.- This warranty card with all the required information, invoice or purchase ticket, product box or package, and product, must be presented when warranty service is required. - Page 9 RETAILER INFORMATION Name of the retailer Address Product Brand Part number Serial number Date of delivery In case your product fails or have questions, please contact your nearest dealer. If you are in Mexico, please give a call to our Call Center. Call Center 01 800 500 9000...
- Page 11 IMPORTANTE Antes de utilizar su nuevo Kit C Antes de utilizar su nuevo Disparador de dardos controlado por PC, por favor lea las siguientes recomendaciones. • No exponga el equipo a temperaturas extremas. • No deje caer el equipo, podría ocasionar fallas. •...
- Page 12 REQUISITOS MINIMOS DEL SISTEMA • Procesador Intel Pentium II o AMD Athlon 2.4 GHz • 128MB en memoria RAM • 100MB de espacio de disco duro • Lector de CD. CONTROLES DEL DISPARADOR DE DARDOS 1.- Misiles. 2.- Disparador. 3.- Base giratoria. 4.- Cable USB de conexión.
- Page 13 INSTALACION DEL SOFTWARE. 1.- Coloque el CD de instalación (incluido) en el lector de CD de la computadora. 2.- Aparecerá la siguiente pantalla, haga clic en NEXT para continuar con la instalación. ESPAÑOL-04...
- Page 14 3.- Elija la carpeta destino donde se copiarán los archivos del programa. 4.- Continue con la instalación seleccionando el botón NEXT hasta finalizar con la instalación. ESPAÑOL-05...
- Page 15 CONTROLES DEL PROGRAMA 1.- Minimiza el programa. 2.- Cierra el programa. 3.- Mueve el disparador hacia arriba. 4.- Gira la base hacia la izquierda. 5.- Gira la base hacia la derecha. 6.- Mueve el disparador hacia abajo. 7.- Botón de disparo. 8.- Reestablece la posición inicial.
-
Page 16: Especificaciones
OPERACION Una vez instalado el software siga los siguientes pasos: 1.- Coloque los misiles en el disparador. 2.- Conecte el cable USB del disparador a un puerto USB disponible de la computadora. 3.- Fije la diana (incluida) en una pared. 4.- Abra la aplicación llamada “MissileLauncher”... -
Page 17: Póliza De Garantía
1.- Para hacer efectiva la garantía, presente ésta póliza y el producto, en donde fue adquirido o en Electrónica Steren S.A. de C.V. 2.- Electrónica Steren S.A de C.V. se compromete a reparar el producto en caso de estar defectuoso sin ningún cargo al consumidor. Los gastos de transportación serán cubiertos por el proveedor. - Page 18 Biólogo MaximIno Martínez No. 3408 Int. 3 y 4, San Salvador Xochimanca, México, D.F. 02870, RFC: SPE941215H43 ELECTRONICA STEREN DEL CENTRO, S.A. DE C.V. Rep. del Salvador 20 A y B, Centro, 06000, México. D.F. RFC: ESC9610259N4 ELECTRONICA STEREN DE GUADALAJARA, S.A.
Need help?
Do you have a question about the GAM-010 and is the answer not in the manual?
Questions and answers