Advertisement
EU-ME2, EU-ME2 Premier Plus
Quick Reference Guide - Setup
CAUTION:
This quick reference guide is only a summary of the EU-ME2, EU-ME2 Premier Plus Instructions for Use. For detailed operating instructions, be sure to follow
the EU-ME2, EU-ME2 Premier Plus Instruction Manual included with your EU-ME2 or EU-ME2 Premier Plus purchase.
1
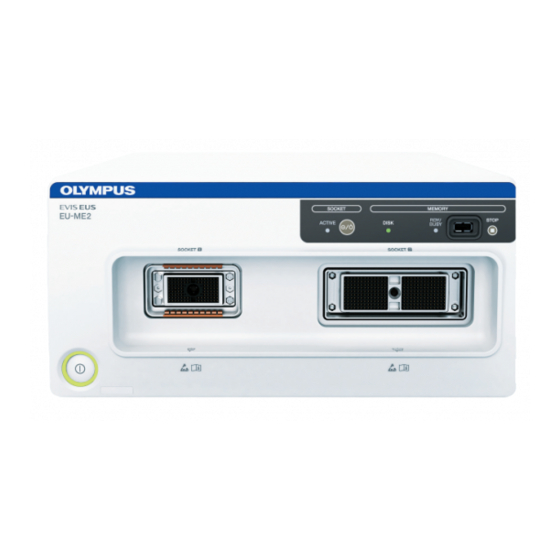
Insert mechanical scanning scopes in the left socket (SOCKET1) or electronic scanning scopes in the right socket
(SOCKET2). Turn the lever of the ultrasound connector clockwise to tighten.
2
Press the
POWER
switch and confirm that the power indicator (green light) is lit.
* Confirm that either the
POWER
* It takes approximately one minute to start up the EU-ME2.
* To change scopes, turn off the
ACTIVE Switch
POWER Switch
1
VIDEO SOURCE
Press the
* EVIS operation can be controlled by the LCD touch panel on the keyboard.
* This feature is only available when the 2 keyboards are integrated.
Connecting Ultrasound Endoscopes
or
ACTIVE
switch is turned off when the scope is being connected.
ACTIVE
switch, which eliminates the hassle of turning off the EU-ME2.
With mechanical scanning scopes
With mechanical scanning scopes
Lever
Video Source
key on the keyboard to switch between US and EVIS.
Ultrasound Connector
Ultrasound Connector
SOCKET1
SOCKET1
Lever
VIDEO SOURCE key
Image on Monitor
Switch
With electronic scanning scopes
With electronic scanning scopes
Ultrasound Connector
Ultrasound Connector
SOCKET2
Lever
Lever
LCD Touch Panel
SOCKET2
Advertisement
Table of Contents

Related Manuals for Olympus EU-ME2


Summary of Contents for Olympus EU-ME2
- Page 1 CAUTION: This quick reference guide is only a summary of the EU-ME2, EU-ME2 Premier Plus Instructions for Use. For detailed operating instructions, be sure to follow the EU-ME2, EU-ME2 Premier Plus Instruction Manual included with your EU-ME2 or EU-ME2 Premier Plus purchase.
- Page 2 * ID input is mandatory to save data after examinations. * When the EU-ME2 is integrated with the CV-190 or CV-180, ID input is not available on the EU-ME2 and patient data must be entered via the CV-190 or CV-180 system.
- Page 3 CAUTION: This quick reference guide is only a summary of the EU-ME2, EU-ME2 Premier Plus Instructions for Use. For detailed operating instructions, be sure to follow the EU-ME2, EU-ME2 Premier Plus Instruction Manual included with your EU-ME2 or EU-ME2 Premier Plus purchase.
- Page 4 CAUTION: This quick reference guide is only a summary of the EU-ME2, EU-ME2 Premier Plus Instructions for Use. For detailed operating instructions, be sure to follow the EU-ME2, EU-ME2 Premier Plus Instruction Manual included with your EU-ME2 or EU-ME2 Premier Plus purchase.
Need help?
Do you have a question about the EU-ME2 and is the answer not in the manual?
Questions and answers