Table of Contents

Related Manuals for Brandywine ENTA-2


Summary of Contents for Brandywine ENTA-2
- Page 1 User Guide Enhanced Network Time Appliance Model ENTA-2 P/N 023000004 Revision D August 2011 Brandywine Communications 1153 Warner Ave. Tustin, CA 92780 (714) 755 1050 (714) 755 0175 http://www.brandywinecomm.com MANUAL P/N 900000108 REV D...
- Page 2 Revision History REVISION DATE COMMENTS JUN 2009 Initial Release JUL 2009 Updated Screen Shots/ Text JUL 2009 QA updates AUG 2009 Updated IRIG-B input and 10MHz output connector numbers in table 1 AUG 2009 Added UL requirements, Updated Telnet information and FPGA install AUG 2011 Changed Title Page/ Updated FPGA Upload MANUAL P/N 900000108 REV D...
- Page 3 Safety Warnings WARNING: This unit contains lethal AC voltages. Disconnect the unit from the AC supply before removing the cover. WARNING: The lightning flash with an arrowhead inside of an equilateral triangle is intended to alert the user to the presence of un-insulated “dangerous voltage” within the product’s enclosure.
- Page 4 Reduced Air Flow – Installation of the equipment in a rack should be such that the amount of air flow required for safe operation of the equipment is not compromised. Mechanical Loading – Mounting of the equipment in the rack should be such that a hazardous condition is not achieved due to uneven mechanical loading.
-
Page 5: Table Of Contents
Table of Contents Specifications .......................... 7 GPS Receiver ........................7 1.1.1 Receiver Type ......................7 Internal Oscillator ......................7 1.2.1 Oscillator Type ......................7 Inputs ..........................7 1.3.1 Antenna ........................7 1.3.2 1 PPS ........................7 1.3.3 IRIG-B ........................7 Outputs .......................... - Page 6 5.2.1 Opening TCP 2500 Socket Interface ...............41 5.2.2 TCP 2500 Socket Interface Command List .............41 TELNET and Console Port Configurations ..............42 5.3.1 Opening TELNET Session ..................42 Uploading Firmware .......................44 Uploading FPGA ........................46 FPGA Update ........................46 FPGA Upload ........................49 Maintenance and Troubleshooting ..................51 Drawings ..........................52 ...
-
Page 7: Specifications
1 Specifications GPS Receiver 1.1.1 Receiver Type Architecture 12 parallel channels • Dynamics Velocity 1000 knots everywhere > 1000 knots at altitudes < 60000 ft. Acceleration Jerk 5 m/s • Acquisition Time Hot (with the current almanac, position, time, and <... -
Page 8: Outputs
Outputs 1.4.1 Reference Frequency Output Frequency 10 MHz Connector Output level TTL INTO 50Ω 1.4.2 Time Code - IRIG B + IRIG E Code format IEEE 1344 Ext. IRIG B modulated DC Level Shift IRIG E DC Level Shift Modulation ratio 3:1 nominal Amplitude 3 Vpp into 600 ohm (modulated) -
Page 9: Mechanical
Connector IEC 320 with integrated switch and fuse Fuse 1A 5x20mm slo-blo • FCC port 15 EN55022 EN55024 Mechanical Size (unit) 17” x 1.72” x 9” excluding the connectors and handles. Front panel width 19”. Weight 5 lbs. nominal MANUAL P/N 900000108 REV D... -
Page 10: Rear Panel Connections
1.10 Rear Panel Connections CONNECTOR REFERENCE CONNECTOR CONNECTOR SIGNAL TYPE J1 TIMER 1 - 12 REMOVABLE NOT USED TERMINAL BLOCK ANTENNA, J3 CENTER GPS SIGNAL INPUT CENTER +5 V LNA SUPPLY SHIELD GROUND CONSOLE PORT, J4 DB-9 FEMALE TRANSMIT DATA RECEIVE DATA GROUND FUNCTION SWITCH... -
Page 11: General Description
2 General Description IRIG IRIG-B Reader ANTENNA 10/100 1 PPS Micro MAC/ processor 10/100 OCXO 10MHz 1PPS IRIG-B IRIG-B DC IRIG Generator IRIG-E IRIG-E DC Figure 1 ENTA Simplified Block Diagram MANUAL P/N 900000108 REV D... -
Page 12: Unpacking And Installation
NOT penetrate buildings. Use the provided antenna cable to connect the GPS antenna to the ENTA. If a longer cable is required, a low loss cable must be used so that the total signal attenuation at 1575 MHz is < 20 dB. Contact Brandywine Communications for more details on suitable cables. - Page 13 (when desired or needed) is provided by an externally mounted protection device designed to shunt the high voltage transient to a well established earth ground. Lightning arresting devices designed for use in GPS antenna systems are available at Brandywine Communications (P/N 001000914).
-
Page 14: Network Connection
RF Loss The most important cause of signal loss is the RF signal attenuation experienced in the cable. The amount of attenuation is related to the type (quality) of coaxial cable and cable length. The antenna provides about 30 dB of gain to the received GPS signal. The purpose of this gain is to offset the loss that is experienced in the cable between the GPS antenna and ENTA. -
Page 15: Getting Started
Getting Started Powering Up the ENTA Once all connections to the ENTA have been made, apply power to the unit by setting the On/Off switch to the on position. The On/Off switch is located on the rear panel power entry module. The POWER LED on the front panel should be illuminated green within 2 seconds. -
Page 16: Ipsetup.exe
4.2.1 IPSetup.exe To set up the network address using the IP Setup program, follow the steps given below. Please note that IPSetup uses a local broadcast on UDP port 20034. Download the IP Setup program from the NetBurner website located at http://www.netburner.com/support/public_downloads.html Double click on the IPSetup.exe icon and Figure 2 will be displayed. -
Page 17: Web Browser
4.2.2 Web Browser To set up the network address using the web browser, follow the steps given below. Connect one end of an Ethernet cable to the ENTA Network Port. Connect the other end of the Ethernet cable to your network. Open a web browser, type the IP Address of the ENTA unit in the Address bar, and press <Enter>. -
Page 18: Latest Version Of Java Software
Latest Version of Java Software To properly control and monitor the ENTA via a web browser based interface, Java software must be installed on your computer. To obtain the Java software, follow the steps given below. Go to http://www.sun.com/ Click on the Downloads link. Click on the Java Download link. -
Page 19: Configuration
Configuration The ENTA configuration may be completed in one of three ways. • Via the web browser (recommended) • Via a TELNET session • Via the console port Web Browser Configuration 5.1.1 System The System tab consists of two sections, the System Status and Reference Status. This tab allows the user to view the state, status, and reference of the ENTA system. -
Page 20: Setup
5.1.1.1 System Status The System Status section consists of seven fields, the Version, Time, State, Locked, TFOM, Alarm/Fault and Alarm/Fault LED. The Version refers to the version number of the ENTA. The Time refers to the current UTC time. The State refers to the state of the system. If the system has locked to the reference and the time is valid, Locked is ‘TRUE’. - Page 21 Figure 5 Setup Screen MANUAL P/N 900000108 REV D...
- Page 22 5.1.2.1 System The System section consists of two fields, the Version and Unit Location. The Version refers to the version number of the ENTA software. The Unit Location refers to the location of the unit on your network. A maximum of 127 characters may be entered in the Unit Location field. Entering apostrophes (‘) in the Unit Location field is not recommended.
- Page 23 Moscow (Russia) Baku (Azerbaijan) New Delhi (India) Dhakar (Jordan) Bangkok (Thailand) Hong Kong Tokyo (Japan) Sydney (Australia) Magadan (Russia) Wellington (New Zealand) 5.1.2.3.1 Daylight Savings Time The Daylight Savings Time consists of three fields and a check box, the Daylight Savings Time Offset (DSTO), Daylight Savings Time Start, and Daylight Savings Time End.
-
Page 24: Password
Password screen, click the Reset button. IMPORTANT INFORMATION: The default user name and password for the system are both BRANDYWINE. The user must always enter a user name and password when submitting changes to the system. Figure 6 Password Screen 5.1.3.1... -
Page 25: Reference
5.1.4 Reference The Reference tab consists of two sections, the Reference and Reference Settings. This tab allows the user to select the reference, view the reference status, and modify the reference settings for the system. To save all modifications made to the Reference screen, click the Submit button. Figure 7 Reference Screen MANUAL P/N 900000108 REV D... - Page 26 5.1.4.1 Reference The Reference consists of two fields, the Select Reference and Reference Stable. The Select Reference allows the user to select one of four references to acquire time from. The four references used by the system are Free Run (No External Reference), GPS, IRIG-B, and 1PPS . Table describes each supported time reference.
- Page 27 5.1.4.2 Reference Settings The Reference Settings consist of two fields, the 1PPS/Free Run and GPS. A Manually Set Time link is available for the 1PPS/ Free Run reference setting. A Setup GPS link is available for the GPS reference setting as well as the Open Satellite Status. The following sections describe the links. 5.1.4.2.1 Manually Set Time is displayed when the user clicks on the Manually Set Time link.
- Page 28 5.1.4.2.2 Setup GPS is displayed when the user clicks on the Setup GPS link. The GPS Settings screen consists of Figure 9 two sections, the Settings and Version. This screen allows the user to select a position mode, set a position, cold start, and view the version number of the GPS receiver.
- Page 29 5.1.4.2.2.1 Settings The Settings consist of three fields, the Position Mode, Position, and Cold Start. A Set Position link is available for the Position setting. A Cold Start link is available for the Cold Start setting. The following two sections describe the two links. 5.1.4.2.2.1.1 Position Mode The GPS receiver operates in one of three position modes.
- Page 30 Figure 10 Set GPS Position Window 5.1.4.2.2.1.3 Cold Start is displayed when the user clicks on the Cold Start link and enters a valid username and Figure 11 password. Cold start clears the almanac of the GPS receiver, forces the GPS receiver to search for satellites, and rebuilds its almanac.
- Page 31 5.1.4.2.3 Open Satellite Status The system provides a comprehensive view of the GPS receiver. A typical GPS receiver screen is shown in Error! Reference source not found.. Figure 12 GPS Receiver Screen The upper section of the screen displays different tracked satellites and their signal strengths. The typical GPS Signal Strength for a satellite that is overhead and has an unobstructed view is between 40 and 50.
-
Page 32: Advanced
5.1.5 Advanced The Advanced tab consists of five sub-tabs, the 1PPS Output, Alarms, NTP Server, Plot, and SNMP. This tab allows the user to clear a fault, set the 1 PPS output delay, manage alarms, set the leap indicator, view cached and real-time time differences, and configure SNMP. Figure 13 Advanced Screen 5.1.5.1 1PPS Output... - Page 33 5.1.5.2 Alarms is displayed when the Alarms sub-tab is selected. To save all modifications made to the Figure 14 Alarms screen, click the Submit button. Figure 14 Alarms Screen The checkboxes will allow each output signal to create an alarm when a fault is detected on its output circuitry.
- Page 34 5.1.5.3 NTP Server is displayed when the NTP Server sub-tab is selected. The NTP Server consists of two Figure 15 sections, the Leap Indicator Mode and Manual Mode. To save all modifications made to the NTP Server screen, click the Submit button. Figure 15 NTP Server Screen 5.1.5.3.1 Leap Indicator Mode...
- Page 35 5.1.5.3.2 Manual Mode Settings The Manual Mode Settings consist of one combo box, the Settings. The Settings allows the user to manually set the leap indicator setting used. describes the supported leap indicator settings Table 6 used. DESCRIPTION No warning Last minute has 61 seconds Last minute has 59 seconds Alarm condition (clock not synchronized)
- Page 36 5.1.5.4 Plot is displayed when the Plot sub-tab is selected. The Plot consists of two fields, the Vertical Figure 16 Scale (± ns) and Horizontal Scale (hours). This sub-tab allows the user to modify the vertical and horizontal scale for the cached time difference plot and view the cached time difference and real-time time difference plots The cached time difference displays recorded data for up to 168 hours.
- Page 37 The Simple Network Management Protocol (SNMP) is a protocol used to expose variables to a Network Management System (NMS). The variables are arranged in a Management Information Base (MIB). The Brandywine Communications ENTA SNMP version 1 includes MIB-II and the capabilities listed below.
- Page 38 5.1.5.5.1 Community The Community consists of two fields, the Read Community and Write Community. The Community allows the user to enter the read community and write community names. Once the community names are entered, they are stored in non-volatile memory and will be recalled when the ENTA is powered up. describes the read/write commands used by SNMP.
- Page 39 5.1.5.5.5 ENTA Control Using SNMP The following variables may be set and read from SNMP. describes the variables supported by Table 9 SNMP. VARIABLE ACCESS DESCRIPTION ENTAszSystemSerialNumber 18954.3.1.1.0 Read-only System Serial Number. ENTAiSystemStatus 18954.3.1.4.0 Read-only Current State Disciplining, System Lock, Fault, TFOM ENTAiSystemState 18954.3.1.5.0...
-
Page 40: Help
5.1.6 Help The Help tab provides the user with help while using difficult areas in the system. Help links are located throughout the entire system so the user has access to the Help screen whenever the user encounters a problem. Once the user clicks on the Help link the user will be automatically redirected to the Help screen. -
Page 41: Tcp 2500 Socket Interface
TCP 2500 Socket Interface 5.2.1 Opening TCP 2500 Socket Interface To open the TCP 2500 socket interface, follow the given steps below. 1. Go to the Start menu. 2. Select Run. will be displayed. Type TELNET XXX.XXX.XXX.XXX 2500 and press the OK Figure 19 button. -
Page 42: Telnet And Console Port Configurations
TELNET and Console Port Configurations The TELNET and console port may be used to configure the ENTA. Both TELNET and console port configurations use exactly the same commands. 5.3.1 Opening TELNET Session To open a TELNET session, follow the given steps below. 1. - Page 43 5.3.1.1 HELP Command Shows a list of the supported Telnet commands. 5.3.1.2 LOGOUT Command Exits the Telnet command session 5.3.1.3 SYSTEMSTATUS Command The response format for this command is follows: -> System State: Locked (See Table 10) -> System Alarms… 1PPS Output: No Alarm (See Table 11) 10 MHz Output: No Alarm...
-
Page 44: Uploading Firmware
Uploading Firmware To upload new firmware for the ENTA, the user will need a software application such as AutoUpdate, the IP address of the ENTA, and the file name of the new released file. Follow the steps listed below to upload new firmware for the ENTA. - Page 45 Figure 25 Open Screen 4. Now, click on the Reboot when complete check box. 5. To close the application, click the Dismiss button. 6. To upload the new firmware, click the Update button and will be displayed for a few Figure 26 seconds.
-
Page 46: Uploading Fpga
7 Uploading FPGA To upload the FPGA for the ENTA, the user will need a software application called FPGA Update provided by Brandywine. This needs to be uploaded on the user’s computer. 7.1 FPGA Update When installing the FPGAUpdate Application this is the initial Welcome screen. Click the “Next” button. - Page 47 The FPGA Update application will then request the folder to install the application to. Keep the existing folder or browse for a new folder on the user’s compluter. Click “Next”. Confirm by clicking “Next” to start the installation. MANUAL P/N 900000108 REV D...
- Page 48 FPGAUpdate will be installed. FPGAUpdate is installed. Click “Close” to exit. MANUAL P/N 900000108 REV D...
-
Page 49: 7.2 Fpga Upload
7.2 FPGA Upload Start FPGA Update Provide the IP address of the unit and the file name of the FPGA to be uploaded. Make sure that the Compress FPGA Code File box is not checked. Click the “Upload FPGA” button. The above will be shown while the file is being uploaded. - Page 50 The Unit Version and the Previous FPGA Version will be shown in the above box. The new FPGA version will take effect once the unit has restarted. Click the “Yes” button to restart the unit now or the “No” button to restart later. MANUAL P/N 900000108 REV D...
-
Page 51: Maintenance And Troubleshooting
Maintenance and Troubleshooting There is no required preventive maintenance for the ENTA. To troubleshoot the problems, refer to Table 12 SYMPTOM POTENTIAL CAUSE CORRECTIVE ACTION Power LED 1. There is no power. 1. Verify that the AC power is available. does not 2. -
Page 52: Drawings
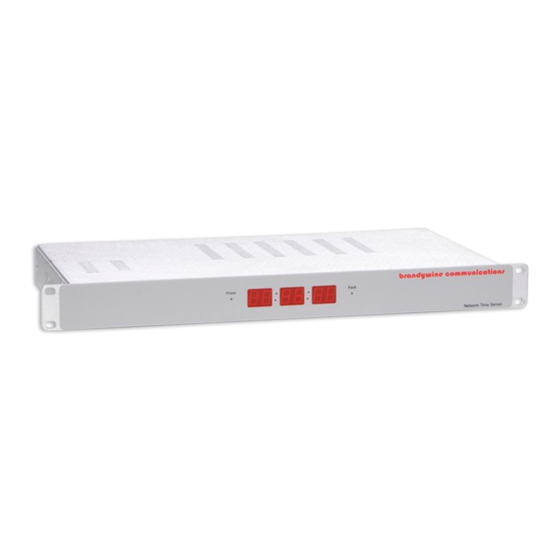
Drawings FIGURE DESCRIPTION ENTA Front Panel ENTA Rear Panel Table 21 ENTA Drawings MANUAL P/N 900000108 REV D... - Page 53 Figure 1 ENTA Front Panel Figure 2 ENTA Rear Panel MANUAL P/N 900000108 REV D...
Need help?
Do you have a question about the ENTA-2 and is the answer not in the manual?
Questions and answers