Table of Contents
Advertisement
Advertisement
Table of Contents

Subscribe to Our Youtube Channel
Related Manuals for FIOCCHETTI ECT-F TOUCH

Summary of Contents for FIOCCHETTI ECT-F TOUCH
- Page 1 USER AND MAINTENANCE Manual ECT-F TOUCH...
- Page 3 WIRING AND ELECTRICAL HOOK UP ______________________________________________________________ 9 SETUP OPERATIONS ___________________________________________________________________________ 9 CONTROL PANEL ECT-F TOUCH ___________________________________________________________________ 13 DESCRIPTION CONTROL BOARD ECT-F TOUCH _____________________________________________________ 13 FUNCTIONING ECT-F TOUCH CONTROL __________________________________________________________ 15 ELECTRICAL SAFETY FUSES_______________________________________________________________________ 35 DMLP TOUCH DIGITAL MONITOR _________________________________________________________________ 35...
- Page 4 TOUCH SCREEN DRAWBACKS ____________________________________________________________________ 44 DIAGNOSTIC __________________________________________________________________________________ 45...
- Page 5 GENERAL INFORMATION CERTIFICATION All appliances are manufactured in compliance with the CE directives applicable at the moment of their placing on the market. All appliances are certified according to the directives 2006/42/CE, 2006/95/CE, 2004/108/CE and further amendments and they are manufactured taking into account the safety standards of electrical appliances used in laboratories (CEI EN 61010-1).
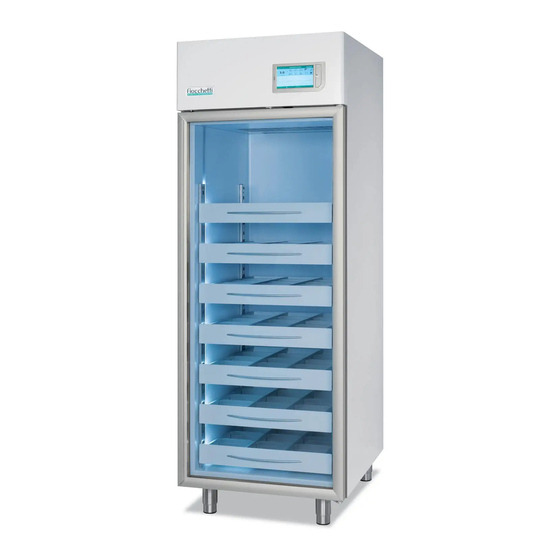
- Page 6 The maximum grids or drawers load for any Fiocchetti model is 30 kg, and the weight should be uniformly distributed.
- Page 7 SAFETY GENERAL SAFETY RULES Read this manual carefully and follow the prescriptions contained herein. The user assumes full responsibility in case of operations carried out without observing the instructions in the manual. Primary general safety regulations: do not touch the equipment with wet hands and/or feet do not insert screwdrivers or other pointed objects into the guards or moving parts of the appliance do not pull the power cord to disconnect the appliance from the electrical mains...
- Page 8 Stability: the appliance is designed and built in order to guarantee its stability even in case shelves/drawers are fully extracted, without any risk of tipping, falling or sudden movement. Surfaces, edges, corners: accessible parts of the appliance have no sharp corners, sharp edges or rough surfaces that could cause injury.
- Page 9 POSITIONING Incorrect positioning can cause damage to the appliance and create dangerous conditions for users. Therefore, the installer must observe the following general regulations: make sure to maintain a minimum of 10 cm distance from the walls the room must be well ventilated keep the equipment far from heat sources avoid direct sunlight exposure and AC flow remove packing material...
- Page 10 4.4.2 Indication for optimal use do not block the motor compartment air vents Arrange the material on the suitable provided shelves or drawers. Do not place the products directly on the base of the chamber, against the walls, doors or fixed guards of the unit make sure door is closed properly keep the defrost water drain outlet clear...
- Page 11 In order to change the position of the drawers, extract the same, and once it is fully extracted, unlock it from the slides through the unlocking devices (plastic lever black colour) positioned on the side. The drawer is unlocked by pushing the right lever up and the left lever down at the same time.
- Page 12 After that it is possible to remove the telescopic slides by lifting the front part of the slide up (to extract it from the rack in the front part) and pulling the slide frontward, to extract the rear part. Repeat the same operations, but inverting the sequence to reposition the slides and the drawers.
- Page 13 CONTROL PANEL ECT-F TOUCH DESCRIPTION CONTROL BOARD ECT-F TOUCH Equipment with one chamber Equipment status INFO 2 Panel INFO 1 Panel Date/Hour Equipment name Graph STATUS Panel Figure 6 Equipment with two chambers INFO Panel chamber Graph 1 chamber Graph 2 chamber INFO Panel...
- Page 14 Equipment with one chamber + ballasted probe Panel INFO 1 Panel INFO 2 Product temperature Product alarm Min/Max limits Figure 8 Screensaver mode: it is possible to set the screensaver page which will be automatically activated if the screen is not in use for a certain period of time (see “Description setup system menu”...
- Page 15 FUNCTIONING ECT-F TOUCH CONTROL Introduction The fridge is equipped with a latest generation Electronic Controller with a TFT display of 7” Touch screen. This screen visualizes the temperature and the functioning status of the equipment with an accuracy of 0,1°C. This instrument guarantees maximum safety in case of alarms and failures, signaling promptly critical conditions and recording each event in order to...
- Page 16 DESCRIPTION PANEL INFO 1 5.2.2 Touch the temperature value to visualize all the useful information of the equipment both for the user and for the Service. Touch the green arrows to browse pages or touch the “Home” symbol to go back to homepage.
- Page 17 SET TEMPERATURE CHANGE 5.2.3 If the Control user password is enabled (Par Errore. L'origine riferimento non è stata trovata.), user shall enter the password in order to switch off the system. Touch in the homepage the Setpoint value in order to access to the dedicated page. Enter the new value and press “OK”.
- Page 18 Touch in the Homepage the Lower and Upper Limit value in order to modify limits in the dedicated page. Enter the new value and press “OK”. In the dedicated page the user can also modify the delay for the signalization of the alarm and of door opening. CONSUMPTION PANEL 5.2.5 Figure 16...
- Page 19 ELECTRIC DIGITAL KEY LOCK (optional) 5.2.6 As safety device against unauthorized door opening, the equipment can be fitted with an electric-digital key locking, consisting in mini electronic hook placed in the upper corner of the door (and lower in 2 doors refs.). The door is opened by means of pressure on the key icon in the homepage.
- Page 20 Double temperature (2T) models do follow the same manual unlocking. In Figure 20, indications to find the slot for unlocking, in accordance with the handlong position. For model 600 2T, manual unlocking have to be performed from front side with the supplied key. Figure 20 For model 1500 (Figure 21), manual door opening has to be performed by accessing from top of the refrigerator to the two...
- Page 21 5.2.7 ECT-F TOUCH USER PANEL Figure 24 ICONS DESCRIPTION I allow to turn the equipment off (Password protected if passwords are enabled) I allows to visualize the latest n.32 registered alarms. It allows to visualize the latest n.32 door openings. It allows the access to Night &...
- Page 22 5.2.8 SWITCHING OFF If the Control user password is enabled (Par 5.2.12.1), user shall enter the password in order to switch off the system. Figure 25 In order to switch the equipment off, it is necessary to press the USER PANEL icon and then press the SYSTEM OFF one.
- Page 23 5.2.11 NIGHT & DAY FUNCTION AND ELECTRONIC LOCK MANAGEMENT (IF PRESENT In case of “USER PASSWORD SETUP” active (Par. 5.2.12), in order to access this panel it is necessary to enter PSW: 0000 (Superuser) This panel allows to manage two functions: Night and day function This special function allows saving energy during the night, holidays or when the equipment is not used frequently and doors remains closed by increasing the temperature of a default...
- Page 24 5.2.12 SYSTEM SETUP MENU In this menu the user has the possibility to customize some specific functions of the equipment. Figure 30 To modify the internal light brightness (from 0 to 100%) To modify the brightness of the display (MAX during the equipment functioning and MIN during the N&D and screen saver) To activate Screen Saver each (h) hours (from 1 to12h or Never)
- Page 25 5.2.12.1 User password setup Enabling the “USER PASSWORD SETUP” from the SYSTEM SETUP icon, Par. 5.2.12, (enter PSW: 0000 to activate), it is possible to protect the equipment from no qualified personnel who may change important parameters for the correct functioning of the equipment.
- Page 26 By selecting this icon, the displayed value of the probe slowly (within a minute) and artificially decreases down to a value below the lower limit set. Once it happens, acoustic signaling takes place three times and dry contact switches. To conclude test, the value of the probe turns back close to the device operating value;...
- Page 27 We advise to use the SD card for the first download of data in order also to install the software CAPTURE 5.0 in the computer. Software CAPTURE 5.0 allows to read, create and print daily/weekly graphs of the backup data saved in the USB (see Par. 5.2.15) 5.2.14 TEMPERATURE DATA BACKUP FROM SD CARD We suggest to save every two months in the computer the SD card registered data in order to prevent data loss in case SD CARD is lost or damaged.
- Page 28 Open Capture 5.2 and select the time period you would like to download (Start-End) – set the average resolution (select 5 min. to create monthly graph) and click on Open. Figure 34 Double click only on the “Backup” folder. Figure 35 Now, click on “Load”...
- Page 29 5.2.16 ALARMS AND FAILURES SIGNAL Running alarm or failure When a failure or alarm is detected, in the display will appear the following icon an acoustic alarm will be heard. Touch the icon in order to silence the acoustic alarm and visualize the description of the alarm.
- Page 30 5.2.17 EXTERNAL CONTACTS CONNECTION (additional option) 5.2.17.1 Local LAN connection In case an ethernet port (RJ-45) is available in the back of the device, place the local LAN Ethernet cable in the port. Each appliance static IP address is preset at 192.168.2.127, and it Figure 39 needs to be aligned to the installation place local net.
- Page 31 As net parameters are adjusted, you can recall the IP adderess of the device via internet browser from a domain PC (i.e. Mozilla firefox), so to monitor some device functions. Check Figure 43 as an example of what is visible, with running alarm. Figure 43 Service menu contains parameters and configurations that allows the device to work properly.
- Page 32 RS485 This output allow a serial connection to the device. By connecting it to a BMS (Building Management System), it is possible to extract data regarding device controller functioning and status. Please, do contact the manufacturer for the table regarding MODBUS communication protocol applying.
- Page 33 Figure 47 5.2.19 DEFROSTING Equipment fitted with ECT-F TOUCH controller is provided with an advanced managing of the defrosting cycles. The defrosting is operated only if necessary, thus drastically reducing the number of cycles for a cost-effective operation. For this reason, a manual defrosting has never to be operated.
- Page 34 5.2.20 MULTEMEDIAL CONTENTS: TUTORIAL The Multimedia section enables the user to watch technical static contents (PDF) and dynamic contents (video). Figure 48 Figure 49 When the user decides exits the tutorial section, the system will be activated again and this will take 1-2 minutes. Despite this, the equipment will continue working normally...
- Page 35 Introduction The equipment can be supplied with DMLP Touch Digital Monitor. This instrument is completely independent from the ECT-F touch controller. It records independently temperatures – by means of a PT100 probe – and signals temperature alarms or power failures (using a back-up battery supplied as standard automatically recharged).
- Page 36 CONDENSER CLEANING Clean MONTHLY (depends from the dust present in the ambient) the heat exchanger fins using an air jet, a vacuum cleaner or a dry brush. DO NOT USE ANY METAL BRUSH. BEFORE CLEANING THE CONDENSER SWITCH OFF THE APPLIANCE, DISCONNECT THE POWER CORD.
- Page 37 8.3.2 Models 130-170-200-250-300-600 2t-400-500 (1T/2T) Remove the frontal bottom cover using a screwdriver for all the equipment with the refrigeration unit in the bottom part (n.3 screws). Using a vacuum cleaner, an air jet or a dry brush clean the heat exhanger fins of the condenser.
- Page 38 - that will evaporate the defrosting water automatically. BATTERIES REPLACEMENT (if present) In the models with the ECT-F touch controller it is possible to install no. 8 Nihm rechargeable batteries type AA of 1.2 Volt useful for the signalization of alarms and the record temperatures in case of power failure.
- Page 39 EXTRAORDINARY MAINTENANCE AND REPAIRS Extraordinary maintenance and repairs have to be performed exclusively by specialized technicians authorized by the manufacturer. The manufacturer declines all liability in case of intervention performed by the user or unauthorized personnel, or if non-original spare parts are fitted to the appliance. All malfunctioning due to the fitting of non-original spare parts will not be accepted from our technicians and will cause the immediate expiry of the GUARANTEE.
- Page 40 - Production and test sheets - Electrical circuit diagrams DATA PLATES 12.1 DATA PLATES WITH EQUIPMENT CHARACTERISTICS Only for Medical Devices Name and address of manufacturer Description (C.F.Fiocchetti) Manufacturing year Model (C.F.Fiocchetti) Power tension (V-Ph-Hz) Power absorbance (A/Kw) Refrigerant type...
- Page 41 Max storage level Dry contact and RS485 slot (optional) CONSUMABLES Spare/accessory Code Type/Characteristics Instrument picture Nihm rechargeable -Ect-f touch BAT005 batteries type AA of 1.2 -DMLP Touch Digital Volt 2.7 Ah Monitor DISPLAY TFT 7” Lithium Battery BAT007 3V type CR 2032...
- Page 42 DRAWBACKS AND REMEDIES The following table provides guidance in identifying the causes and solve the most frequent anomalies, which do not allow technical service. Electrical repairs may be also performed by your electrician. Before contacting Technical Service, make sure you tried all the recommended checks for user.
- Page 43 Appliance not levelled Check if the appliance is The refrigeration unit is too noisy. levelled and correct it Foreign bodies touch the Check that foreign bodies, equipment. such as cardboards, polystyrene etc. do not touch the equipment creating vibrations.
- Page 44 TOUCH SCREEN DRAWBACKS For the following drawbacks, please, contact technical service in order to perform tests and find out causes. DRAWBACK POSSIBLE CAUSE SOLUTION Electrical parts disconnected Electromagnetic fields Screen red-black- Contact service Display under mechanical pressure white color ...
- Page 45 DIAGNOSTIC Visual alarms list VISUAL INDICATION MEANING Visual and acoustic indication of a current alarm or fault Tap the large triangle to get alarm information. Together with the large triangle, a small ones appears too, except for open door alarm ALARM IN PROGRESS, but muted.
- Page 46 The following table provides guidance in identifying the causes and solve the most frequent anomalies, which do not allow technical service. Electrical repairs may be also performed by your electrician. VISUAL AND SOLUTION POSSIBLE CAUSE ACOUSTIC ALARM Check the set limits with ...
- Page 47 Check delay time for the The door has been left open for alarms. If necessary, change longer than the alarm delay set OPEN DOOR ALARM them, Par 5.2.4 (45 -60 seconds) OPEN DOOR ALARM COMPARTMENT A Close the door ...
- Page 48 Too many products have been Tap on icon in order to filled in the chamber. view alarm list and to mute it (par.5.2.16) Too humid products Turn the refrigerator off from Freezer cabinets: Ambient the display, -STAND BY- temperature <...
- Page 49 Turn the refrigerator off from Faulty electrical parts The device is in a condition of the display, -STAND BY- Par.5.2.8. After a while turn it forced stop due to a failure that on and the visual and potentially could be dangerous for acoustic alarm is off.
- Page 50 Do check the electrical Temporary black out <10 mins connections by a qualified NO MAINS electrician SUGESTION FOR END USER: Reporting service for a smooth equipment operation and data safety 1. Clean the Clean the condenser (Par 8.3) condenser regularly ...
- Page 51 In case of S2 or S3 robe Disconnected or faulty probe failure, device operation does S2 Evaporator probe failure not take place regularly. Turn the refrigerator off from S3 Condenser probe failure the display, -STAND BY- Par.5.2.8.
- Page 52 Turn the refrigerator off from Faulty Relay U2 or electrical parts the diplay, -STAND BY- Unbalanced probes Par.5.2.8. Disconnect and reconnect to mains. After a while turn it on and the visual PROTECTION and acoustic alarm is off. AGAINST Tap the off alarm/fault icon so OVERHEATING...
- Page 53 U2 and 2 AUX: Reporting of abnormal absorption or false Turn the refrigerator off from FAILURE LOAD U2 alarm relay (Defrost heater) the diplay, -STAND BY- U3: Reporting of abnormal Par.5.2.8. After a while turn it FAILURE LOAD U3 absorption or false alarm relay on and the visual and (Evaporator fan)
- Page 54 Turn the refrigerator off from Connection cable between two the diplay, -STAND BY- electronic boards faulty Par.5.2.8. After a while turn it on and the visual and TWIN acoustic alarm is off. COMMUNICATION Tap the off alarm/fault icon so FAILURE to permanently delete the (Only TWIN models)
- Page 56 MNL066_ENG Rev.B...
Need help?
Do you have a question about the ECT-F TOUCH and is the answer not in the manual?
Questions and answers