Table of Contents
Advertisement
Quick Links
Advertisement
Table of Contents

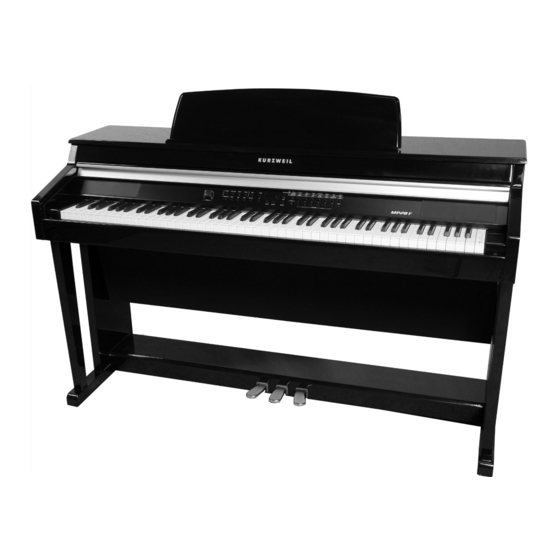
Related Manuals for HDC Kurzweil MP20


Summary of Contents for HDC Kurzweil MP20
- Page 1 ®...
- Page 2 IMPORTANT SAFETY INSTRUCTIONS 1. Read these instructions. 2. Keep these instructions. 3. Heed all warnings. 4. Follow all instructions. 5. Do not use this apparatus near water. 6. Clean only with dry cloth. 7. Do not block any of the ventilation openings. Install in accordance with the manufacturer s instructions.
- Page 3 CAUTION The lightning flash with the arrowhead symbol, within an equilateral triangle is intended to alert the user to the presence of uninsulated RISK OF ELECTRIC SHOCK "dangerous voltage" within the product's enclosure that may be of sufficient magnitude to constitute a risk of electric shock to persons. DO NOT OPEN CAUTION: TO REDUCE THE RISK OF ELECTRIC SHOCK, The exclamation point within an equilateral triangle is intended...
-
Page 4: Table Of Contents
TABLE OF CONTENTS Table of Contents Chapter 1 Introduction Primary Features ....................7 Chapter 2 Getting Started Setting Up the MP20 .................... 8 Volume...................... 8 Connecting the Power Supply................. 9 Assembling the Stand ................10 -11 Quick Start......................12 Chapter 3 MP 20 Overview Front Panel ...................... - Page 5 TABLE OF CONTENTS Chapter 6 Layering Layer Mode......................24 Layer Mode Navigation Buttons..............24 Selecting a Layered Voice ................Layer Mode Parameters ................25 Layer Volume ..................26 Layer Transposition................. 26 Saving Layered Voices ................. 27 Save Button .................... 27 Favorites Buttons ..................
- Page 6 TABLE OF CONTENTS Table of Contents Chapter 9 Rhythm Mode Rhythm Mode ..................... 35 Entering Rhythm Mode ................. 35 Selecting a Rhythm Pattern ................35 Changing the Default Rhythm Pattern............. 36 Playing a Rhythm Pattern ................35 Changing the Tempo................36 Rhythm Mode Parameters ................
-
Page 7: Chapter 1 Introduction
Chapter 1 INTRODUCTION Congratulations on your purchase of the Kurzweil MP20. You are certain to enjoy many hours exploring the variety of features as well as the beautiful preset voices. The MP20 is designed with the same sound technology from the world acclaimed PC3 Series key board. -
Page 8: Chapter 2 Getting Started
Chapter 2 Getting Started Setting Up the MP20 Your new MP20 carton should have the following: • MP20 instrument • DC Power Adapter and AC cord • Piano Bench • MP20 Stand in Separate Box • Warranty Card • MP20 User’s Manual (this manual) If you are missing any of the above, please contact your Kurzweil dealer. -
Page 9: Connecting The Power Supply
Chapter 2 Getting Started Connecting the Power Supply A DC power adapter supplies the MP20’s power. Before connecting the MP20’s power adapter, make sure that the power switch (located on the bottom left corner of the instrument) is in the off position. Connect the power adapter to the DC jack on the rear panel of the MP20. -
Page 10: Assembling The Stand
Chapter 2 Getting Started Assembly Instructions for MP20 STEP 1 STEP 2: : Figure 1. A) Place left leg #2 on a carpet- Figure 2. A) Place right leg #3 & ed floor. B) Place speaker box assembly #5 and align align with holes on top and bottom of speaker with holes and (4) screws #7, on top and bottom of box with (4) # 7 screws. - Page 11 Chapter 2 Getting Started Assembly Instructions -- MP20 (continued) STEP 3: Figure 3. Be sure to have 2 people when lifting Main Piano Assembly. A) Place main piano unit facing forward on top of stand and tighten with 4 Turning bolts #8.
-
Page 12: Quick Start
Chapter 2 Getting Started After the MP20 is set up and the power adapter connected, press the power switch. This is located on the left bottom side of the piano. While the unit is performing its power-up routine, the LED display and some of the button LEDs flash. -
Page 13: Front Panel
Chapter 3 MP20 OVERVIEW Front Panel Power Switch As shown in the illustration below, the power switch is located at the bottom left side of the MP20. Turn the power on and off by pressing the rocker-style switch. Headphone Jacks The MP20 has two 1/4”... -
Page 14: Front Panel Display, Buttons And Controls
Chapter 3 MP20 OVERVIEW Front Panel Display, Buttons and Controls Here is a quick overview of the MP20’s front panel. A description of its individual features follows. Display and Navigation Buttons Display Scrolling alphanumeric LED display. Select ▲ and ▼ Buttons Use these buttons to move through the list of available parameters for the current mode. -
Page 15: Voice, Rhythm, And Piano Buttons
Chapter 3 MP20 OVERVIEW Voice, Rhythm, and Piano Buttons Voice Button Press this button to enter Voice mode. Rhythm Button Press this button to enter Rhythm mode. Piano Button No matter what mode is active, select this button to immediately return to the Grand Piano voice (the first voice of the Piano category). -
Page 16: Recording And Play/Stop Buttons
Chapter 3 MP20 OVERVIEW Recording and Play/Stop Buttons Record Button Press this button to begin recording. Play/Stop Button Select this button to play or stop recording, user songs, Rhythm Patterns, and Demos. Track 1 and Track 2 Buttons Use these buttons to select the track to record. Variation and Tempo Buttons Variation Button Press the [Variation] button to add the preset effects. -
Page 17: Rear Panel
Chapter 3 MP20 OVERVIEW Rear Panel Audio In Use these RCA stereo jacks to connect the MP20’s internal speakers to other devices such as a digital audio player or CD player. Always turn off the MP20’s power before plugging or unplugging cables into the Audio In jacks. -
Page 18: Front Panel Buttons
Chapter 3 MP20 OVERVIEW Front Panel Buttons Single Buttons There are 32 buttons on the MP20 Front Panel. Most buttons have LEDs that light up when the button is pressed and remain lit to show the button is active. Four buttons do not have LEDs, they are: ▲... -
Page 19: Quick Parameter Buttons
Chapter 3 MP20 OVERVIEW Hard Reset To clear all user data and return the MP20 to its default settings, you need to perform a Hard Reset. Turn off the MP20 power. Press and hold the C8 key (highest key on the keyboard). Turn on the power switch (bottom left side of unit) while continuing to hold down the top key. -
Page 20: Demo Mode
Chapter 4 demo mode The MP20 has 51 pre-recorded grand piano songs performed in a variety of classical styles that demonstrate the Grand Piano Voice. You can also preview any other sound in the Voice Demo mode. Selecting Demo Songs 1. -
Page 21: Demo Song List
Chapter 4 demo mode DEMO SONG LIST DEMO SONG LIST Song Name Composer Rhapsody J. Brahms Prelude I J. S. Bach Invention No. 4 J. S. Bach Invention No. 8 J. S. Bach Prelude II J. S. Bach Aria Goldberg J. -
Page 22: Voice Mode
Chapter 5 VOICE MODE When you turn on the MP20, Voice Mode is active and the Grand Piano voice is already selected and ready to play. Grand Piano is the default voice and the first voice in the Piano category. In Voice Mode, voices are selected first by choosing one of two Voice Banks, then a category. -
Page 23: Selecting Voices
Chapter 5 VOICE MODE Selecting Voices If the MP20 is not already in Voice Mode, press the [Voice] button, to return to your sounds. Press the button for the category you want. Its LED lights and the default voice for that category is selected. -
Page 24: Chapter 6 Layering
Chapter 6 LAYERING In addition to the many presets already available in the MP20, you can create layered voices and add even more depth and breadth to its rich sounds. Layering combines two of the MP20 voices enabling you to play both voices together. -
Page 25: Selecting A Layered Voice
Chapter 6 LAYERING Layered Voice Select the voice you want as your primary voice, by choosing the sound in the Category section. Scroll with the [Prev -] or [+Next] buttons to find your sound. Press the [Layer] button to enter Layer Mode. When the [Layer] button is pressed, the current voice becomes the primary layer voice. -
Page 26: Layer Volume
Chapter 6 LAYERING Layer Voice - Volume Balance The parameter sets the balance volume between the 2 layered sounds. Press the [Layer] button, so you are now in Layer mode. Press the Arrow Up [Select ] button (to the left of the screen). This parameter sets the volume between the layered voices. The display scrolls VOL:0 ( 0 is the default settering). -
Page 27: Saving Layered Voices
Chapter 6 LAYERING Saving Layered Voices with Favorite Buttons Once you have created your layered sound, select a [Favorite] button 1-6 to store the layered voice. Press and hold any [Favorite] button 1-6 at least 1.5 seconds. The layered voice is now stored in that location. -
Page 28: Split Mode
Chapter 7 SPLIT MODE Split Mode Split Creating a Split allows you to divide the MP20 keyboard into an upper and lower region. For example, you can create a split and play Piano with the right hand and Bass with the left hand. Split Mode Navigation Buttons Depending on the selected parameter and the current mode, some buttons operate differently. -
Page 29: Selecting A Voice
Chapter 7 SPLIT MODE Selecting Split Mode Voices Select the voice you want to use as your primary voice. Press the [Split] button to enter Split Mode. The [Split] button is located on the left side of the front panel. When the [Split] button is pressed, the current voice becomes the primary (right hand) split voice. -
Page 30: Split Voice
Chapter 7 SPLIT MODE Split Voice Change for Secondary or Left Hand Press the [Split] button, and the parameter is selected for the primary and the scondary voice. (The default factory split is PRG:183, E Bass.) To choose a different voice as the secondary voice, press the category voice you desire, then press the [Prev -] or [+Next] buttons to scroll to your selected sound. -
Page 31: Split Volume
Chapter 7 SPLIT MODE Balance Split Volume This parameter sets the volume between the two split sounds. In Split mode, press the Arrow Up [Select ] button until you arrive at the screen display “VOL:0”. This is the Split Balance Volume. Press the [Prev -] button from -1 to -9 to decrease the volume of the secondary voice (left hand). -
Page 32: Function Mode
Chapter 8 FUNCTION MODE The Function Mode includes parameters that allow you to change the behavior of the entire instrument. The following are available parameters in function mode: Transpose, Effect Level, Touch Sensitivity, Tune, MIDI Channel, Metronome, Rec Rhythm, Local Control, Hard Reset, OS/Object. Press the [Function] button to enter Function mode. -
Page 33: Touch
Chapter 8 FUNCTION MODE Touch Use this parameter to adjust the keyboard touch sensitivity to your playing technique. In “Function” mode, press the “Select” up or down arrows until the LED Screen displays, TOUCH:LINEAR (factory default). To change the setting effect, press the [+Next] button to the next desired touch. Press the [Prev -] button down to reverse the steps. -
Page 34: Metronome
Chapter 8 FUNCTION MODE Metronome This parameter has three settings: On, Rec or Off. The default setting is “Off”, (no metronome). If you choose “On”, the metronome sounds while playing or recording. To hear the metronome only while recording, choose Rec. In “Function”... -
Page 35: Rhythm Mode
Chapter 9 Rhythm MODE There are 100 rhythm patterns stored in the MP20. The rhythm patterns include a wide variety of musical styles. The labels directly above the category buttons list the different rhythm categories. A complete list of the available rhythm patterns begins on page 43. -
Page 36: Changing The Default Rhythm Pattern
Chapter 9 RHYTHM MODE Changing the Default Rhythm Pattern Pressing a category button selects the default rhythm pattern for that category. You can change the default rhythm pattern. To do so, select the pattern you want for the default rhythm. Press and hold the category button until the display scrolls SAVED then shows the ID number. -
Page 37: Rhythm Mode Parameters
Chapter 9 Rhythm MODE Rhythm Mode Parameters ▲ ▼ The available parameters in Rhythm Mode are: Rhythm ID and Volume. Press the [Select] button to select a Rhythm Mode parameter. Rhythm ID ▲ ▼ The default parameter is Rhythm ID. Pressing the [Select Jump] button pair ([Select] buttons simultaneously) defaults to this parameter. -
Page 38: Chapter 10 Recording
Chapter 10 RECORDING Recording a Song The MP20 has a two-track recorder. You can record two voice tracks and a rhythm pattern accompaniment. Favorites can be used to give you even more versatility while recording. For example, you can have a Favorite split voice such as Piano and Bass recorded in Track 1 and a layered favorite in Track 2. -
Page 39: Recording Track 2
Chapter 10 RECORDING Recording Track 2 Press the [Track 2] button, then the [Record] button. The display scrolls RECORD READY message. Press the [Play/Stop] button to begin recording Track 2. (Track 1 is playing while recording Track 2.) Press the [Play/Stop] button again when you are finished. The [Save] button’s LED is flashing and the display shows SAVE RHYTHM AS Ux (AS:(U1 –... -
Page 40: Chapter 11 Midi
Chapter 11 MIDI MIDI is the acronym for Musical Instrument Digital Interface. It is the industry standard protocol that allows the exchange of musical data between electronic musical instruments, devices (such as sequencer), and computers. MIDI enables MIDI equipped devices designed by different manufacturers the ability to communicate MIDI data to each other. -
Page 41: Usb Midi Connection
Chapter 11 MIDI USB MIDI Connection In addition to the conventional MIDI In and MIDI Out ports, the MP20 also has a USB (Universal Serial Bus) port on the rear panel. You can connect the MP20 directly to a computer with a USB cable. This connection transmits and receives MIDI data between the MP20 and the computer. -
Page 42: Appendices
MP20 IMPLEMENTATION CHART MIDI Implementation Chart Appendices MIDI Implementation Chart Model: MP20 Manufacturer: Date: 412/2012 Young Chang Music Version 1.0 Function Transmitted Recognized Remarks Default Basic Channel Memorized Changed 1 - 16 1 - 16 Default Mode 3 Mode 3 Use Multi mode for Messages Mode... -
Page 43: Rhythm Patterns
Rhythm Patterns Rhythm Patterns Rhythm Pattern Button Rhythm Pattern Button Latin6 Latin Ballad1 Rock & Pop Cha Cha Latin Ballad2 Rock & Pop Salsa Latin Ballad3 Rock & Pop Rumba Latin Ballad4 Rock & Pop Samba Latin Ballad5 Rock & Pop Samba 2 Latin Ballad6... -
Page 44: Voice List
Voice List Voice Button Voice Button Grand Piano Piano Mellow Organ Organ Pro Piano Piano Perc Organ Organ Grand Piano 2 Piano Gregg's B Organ Piano & Strings Piano Perc Organ 2 Organ Piano & Pad Piano Melvin's Gospel Organ Piano &... - Page 45 Voice Button Voice Button Brass Fanfare Brass String Pad R&B Funk Brass Spider Web Horn Layer Brass Wispy One Brass Chorale Brass Airy Pad Solo Tenor Sax Wind Innervate Pad Jazz Flute Wind Lush Pad Fife & Drums Wind Class Pad Solo Flute Wind Bladerunner...
-
Page 46: Mp20 Features
MP20 FEATURES Keyboard 88-Note, Graded Hammer-Action Keyboard with adjustable touch sensitive keys Preset Programs 200 Expressive sounds. 10 Drum Kits Splits/Layers Split /Layer, easy access with adjustable relative volume Dual ambience and effect processors (reverberation and chorus). Rich and Effects complex effects from the PC3 Series. - Page 47 INDEX Index Assembling the Stand 11 Layer Mode 24 Audio In and Out 17 Layer Mode Parameters 25 LEDs Bank 15, 22, 35 LED Display 14 List Demo Song 21 Bank LEDs 15, 22, 35 Rhythm Patterns 43 Voice 44 Local Control (Function Mode parameter) 34 Category buttons 12, 15, 18, 23, 24, 28, 35, 36 CC Pedal (Volume/Expression Pedal) 17...
- Page 48 Rear Panel 17 Value Jump button 18, 19, 26, 30, 37 Rec Rhythm (Function Mode parameter) 34, 38 Variation button 16, 19 Record button 16, 20, 21, 38, 39 Voice button 12, 15, 20, 22, 23 Recording Voice List 44 Erasing/Recording over Tracks 39 Voice Mode 22 Punch-Ins 39...
- Page 50 www.kurzweil.com ® 910542-001...
Need help?
Do you have a question about the Kurzweil MP20 and is the answer not in the manual?
Questions and answers