Table of Contents
Advertisement
Quick Links
Advertisement
Table of Contents

Related Manuals for Vigor 530


Summary of Contents for Vigor 530
- Page 1 Vigor 530 USB2.0 Adapter User’s Manual Version: 2.0 — March 2004...
- Page 2 Copyright Statement No part of this publication may be reproduced, stored in a retrieval system, or transmitted in any form or by any means, whether electronic, mechanical, photocopying, recording or otherwise without the prior writing of the publisher. ™ ® Windows 98SE/2000/ME/XP are trademarks of Microsoft Corp.
-
Page 3: Regulatory Information
Regulatory Information Federal Communication Commission Interference Statement This equipment has been tested and found to comply with the limits for a Class B digital device, pursuant to Part 15 of the FCC Rules. These limits are designed to provide reasonable protection against harmful interference in a residential installation. This equipment generates, uses and can radiate radio frequency energy and, if not installed and used in accordance with the instructions, may cause harmful interference to radio communications. -
Page 4: Table Of Contents
3.4 Basic Setting for Infrastructure Mode _______________________________21 3.5 Basic Setting for Peer-to-Peer Mode _________________________________22 3.6 Remove your Vigor 530 USB 2.0 Adapter_____________________________23 3.7 Uninstall the Vigor 530 USB2.0 adapter Setting / Driver ________________24 4. Using Vigor530 USB2.0 adapter Setting ________________________________25 4.1 Status Tab_______________________________________________________25 4.2 Configuration Tab________________________________________________27... -
Page 5: Welcome
Thank you for purchasing Vigor 530 USB 2.0 Adapter, and welcome to Wireless LAN—the easy way to wireless networking. This user’s manual introduces to you the Vigor 530 USB 2.0 Adapter and describes the most common configurations, which will help to build a connection to your network easily. -
Page 6: Kit Contents
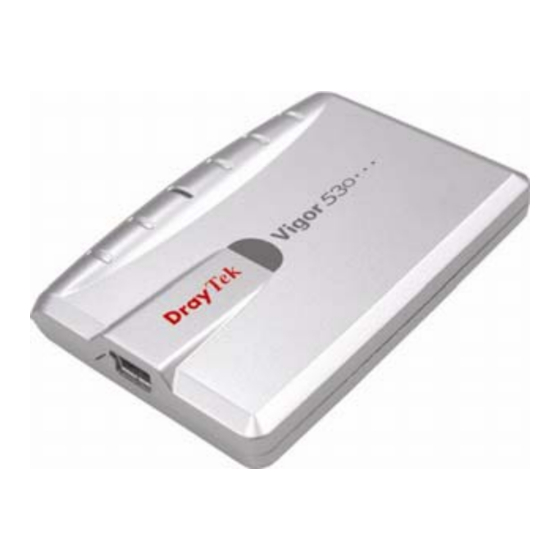
1.1 Kit Contents Vigor 530 USB 2.0 Adapter kit should include the following items: One Vigor 530 USB 2.0 Adapter with USB cable, one CD and one Quick Start Guide. a. One Vigor 530 USB 2.0 Adapter b. One USB cable c. -
Page 7: Main Features Of Vigor 530 Usb 2.0 Adapter
1.2 Main Features of Vigor 530 USB 2.0 Adapter A. Status LED Off: Power Off. Blinking: adapter powered on but no wireless connection is made yet. Steady Green: Wireless connection is linked. B. USB Connector Vigor 530 USB 2.0 Adapter features: High-speed wireless connection, up to 54 Mbps. -
Page 8: Wireless Networking Scenarios
1.3 Wireless Networking Scenarios As our Vigor 530 USB 2.0 Adapter is interoperable and compatible with other IEEE 802.11g compliant products from other manufacturers, it offers you the most freedom to establish your ideal wireless network. After installing Vigor 530 USB 2.0 Adapter, you can connect your computer to: a. - Page 9 A. Peer-to-Peer Networking (Ad Hoc): An Ad Hoc Network could be easily set up with some PCs and this Vigor 530 USB2.0 Adapter or our other WLAN devices. Therefore, it is very suitable to build a network for temporary use, such as for demonstration in exhibition, for new sales point/branch use and alike.
-
Page 10: Advantages For Using Wireless Network
Vigor 530 USB 2.0 Adapter can wirelessly transmit and receive data, minimizing the need for wired connections, at a speed of up to eleven megabit per second. With the Vigor 530 USB 2.0 Adapter, you can locate your PC wherever you want without wires and cables. -
Page 11: Quick Start To Wireless Networking
Windows 2000/XP: Select “Install the software automatically” when the window with this option appears, and then click “Next” to continue installation. NOTE! In Windows XP, it is recommended that you use the Vigor 530 USB2.0 adapter Setting. Please check User’s Manual Chapter 3.1.2 to disable the... -
Page 12: Connecting To An Existing Network
2.2 Connecting to an Existing Network 1. Double click on the shortcut icon or go to windows Start > Programs > Vigor530 > Vigor530 USB2.0 adapter Setting to open the Setting window. You can also see a small link-status icon in Windows System Tray. - Page 13 4. Go to “ Status ” Tab to view network link status. 5. For details of each tab in Vigor 530 USB2.0 adapter Setting, please read Chapter 4.
-
Page 14: Step-By-Step Installation Guide
3. Step-by-Step Installation Guide This section will lead you through the installation of Vigor 530 USB 2.0 Adapter and Vigor 530 USB2.0 adapter Setting software in detail. People who are familiar with the installation and settings of wireless device may refer to quick start guide to establish a network. -
Page 15: Install Vigor 530 Usb2.0 Adapter
3.1 Install Vigor 530 USB2.0 adapter NOTE! Please install the software before inserting the Vigor 530 USB 2.0 Adapter. 1. Insert the installation CD. Insert the installation CD into your CD-ROM drive. The setup program automatically starts. 2. Click “Next”. - Page 16 4. Read the destination folder and click “Next”. The default destination folder is displayed. You may change the default folder by clicking “Browse” to select the destination folder. Click “ Next” to go to the next screen. 5. Click “Next” .
- Page 17 7. Connect Vigor 530 USB2.0 Adapter to your PC/notebook PC. To adjust the direction or position of Vigor 530 USB2.0 Adapter, please use the USB extension cable. D e skto p Laptop NOTE! Please use USB extension cable to connect your Vigor 530 USB 2.0 Adapter with PC/Notebook during normal operation.
-
Page 18: Additional Setup Processes
“Next” to continue installation. 4. Windows XP: Select “Install the software automatically” when the window with this option appears, and then click “Next” to continue installation. Note that before using the Vigor 530 USB2.0 adapter Setting, please disable the Windows XP Zero-Configuration first. -
Page 19: Disable Windows Xp Zero-Configuration
3.1.2 Disable Windows XP Zero-Configuration In Windows XP, it is recommended that you use Vigor 530 USB2.0 adapter Setting. Right after the installation, before opening the Setting window, please follow the steps below to disable the Windows XP Zero Configuration: Go to “Control Panel”... -
Page 20: Verifying The Driver/Utility
Right-click “My Computer” icon on the desktop and choose “Properties”. Step 2. Select “Device Manager” tab and open “Network adapters”. You should see your Vigor 530 USB 2.0 Adapter in the list. Highlight it and click “Properties” button. Step 3. -
Page 21: Vigor 530 Usb2.0 Adapter Setting
3.3 Vigor 530 USB2.0 adapter Setting Vigor 530 USB 2.0 Adapter has its own management software, named Vigor 530 USB2.0 adapter Setting, and users can control all functions provided with it. The link-status icon appears in the Windows System Tray. The Setting includes six tabs: Status, Configuration, SiteSurvey, WEP, Domain and About. -
Page 22: Basic Setting For Infrastructure Mode
Point (AP), which has the same Network Name. Note that the Network Name will be case sensitivity. NOTE! You can key in “any” for name work name so that Vigor 530 USB2.0 adapter can search for the available network automatically. -
Page 23: Basic Setting For Peer-To-Peer Mode
If you have several computers and only want to place them in a local area network, or you want to communicate directly without using an Access Point or any connection to a wired network, then you can select the “Peer-to-Peer” mode on your Vigor 530 USB 2.0 adapter Setting. -
Page 24: Remove Your Vigor 530 Usb 2.0 Adapter
2. The Safely Remove Hardware window will pop up. You can select the device you want to remove. Then, click the Stop button. NOTE! When removing Vigor 530 USB 2.0 Adapter, you will lose your connection to the network. Make sure you have closed all files and network applications (such as e-mail) prior to removing the Vigor 530 USB 2.0... -
Page 25: Uninstall The Vigor 530 Usb2.0 Adapter Setting / Driver
3.7 Uninstall the Vigor 530 USB2.0 adapter Setting / Driver 1. Make sure the Setting page is closed . 2. Go to windows Start > Programs_> Vigor 530 > UnInstall Vigor 530 USB2.0 adapter 3. Follow the uninstall wizard to complete the uninstallation. -
Page 26: Using Vigor530 Usb2.0 Adapter Setting
4. Using Vigor530 USB2.0 adapter Setting 4.1 Status Tab The Status tab displays information on the current status of your connection to the wireless LAN. The fields in this page provide the following information: State: shows the association state of your computer with the wireless LAN. Possible values for this field are: •... - Page 27 • Hardware Radio Switch OFF: The radio has been disabled by moving the hardware radio switch to the off position. Note that not all adapters have a hardware switch. SSID: shows the name of the connected wireless network. Current Tx Rate: shows the current transmit rate of the current association. Current Channel: shows the channel on which the connection is made.
-
Page 28: Configuration Tab
4.2 Configuration Tab The Configuration tab shows information of Network Name, Network Type and Profile. Profile allows you to save five sets of default settings. After entering the values of the settings (such as Network Name and Network Type), set a name in the Profile field. -
Page 29: Site Survey Tab
4.3 Site Survey Tab “SiteSurvey” page allows you to check the information of each network or Access Point in vicinity, such as BSSID, SSID, Signal, Channel, WEP and Support Rates. You can double click on the BSSID to connect the chosen network. If you cannot find your designated network name, press “Rescan”... -
Page 30: Wep Tab
4.4 WEP Tab You may enhance the security of your network by enabling the “Encryption” function. In this tab, you can define the encryption key that your Vigor 530 USB2.0 Adapter should use. NOTE! When Encryption function enabled, all devices in the same network should set the same WEP key. - Page 31 a. Select “64 bit” and “Alphanumeric”. Choose one key from “Use WEP Key” drop-down menu. Enter 5-digit WEP key. b. Select “64 bit” and “Hexadecimal”. Choose one key from “Use WEP Key” drop-down menu. Enter 10-digit WEP key.
- Page 32 c. Select “128 bit” and “Alphanumeric” Choose one key from “Use WEP Key” drop-down menu. Enter 13-digit WEP key. d. Select “128 bit” and “Hexadecimal” Choose one key from Use WEP Key drop-down menu. Enter 26-digit WEP key.
- Page 33 e. You may choose “Create Keys with Passphrase”.
-
Page 34: Domain Tab
4.5 Domain Tab A domain refers to a territory in which radio frequency transmissions must conform to the standards set by a single regulatory agency. For example, in the United States, the allowed frequencies and channels for wireless data communications are set by the FCC. - Page 35 If you choose Flexible in this field, your adapter can communicate with any Access Point it finds. In this case, you must also choose the county in the Countries/Domains field which corresponds to your location. Your adapter then searches for an Access Point which provides information on the channels, frequencies, and power levels permitted in your location.
-
Page 36: About Tab
4.6 About Tab This tab provides you the version information of Network Driver, Configuration Utility and NIC Firmware. -
Page 37: Network Application
E. To Use the Shared Printer(s) of Your Network Member(s) In fact, the network applications of Vigor 530 USB 2.0 Adapter are the same as they are in a wired network environment. You may refer to the following 3 examples of Surveying the Network Neighborhood, File Sharing and Using the Shared Folder. -
Page 38: File Sharing
5.2 File Sharing Vigor 530 USB 2.0 Adapter allows the sharing of files between computers that are logged onto the same wireless network. If you want to share your folder “My Documents” with other computers of the wireless network, please highlight the folder “My Documents”... -
Page 39: Using The Shared Folder
5.3 Using the Shared Folder If you would like to access a shared folder stored in other stations of same network, please follow the process below: Double-click the “My Network Places” icon, and then double-click the computer where the shared folder is located. Double-click the folder you want to connect to. -
Page 40: Product Specifications
6. Product Specifications Item Key specifications Frequency range U-NII: 2.412 ~ 2.484Ghz Europe: 2.412 ~ 2.484Ghz Japan: 2.471 ~ 2.497Ghz Modulation technique 802.11b: DSSS (CCK, BPSK, QPSK) 802.11g: OFDM Host interface USB 2.0 Channels support US/Canada: 11 (1 ~ 11) Major European country: 13 (1 ~ 13) France: 4 (10 ~ 13) Japan: 14 (1~13 or 14...
Need help?
Do you have a question about the 530 and is the answer not in the manual?
Questions and answers